
Free Material
Find hereMore than 150 Articles about Microsoft Technologies on Modern Workplace
Official Site
Microsoft Most Valuable Professional M365 Apps & Services
Microsoft Most Valuable Professional Business Applications
Consultant & Sr Cloud Solution Architect Modern Wokrplace
Find hereMore than 150 Articles about Microsoft Technologies on Modern Workplace
11 November 2023
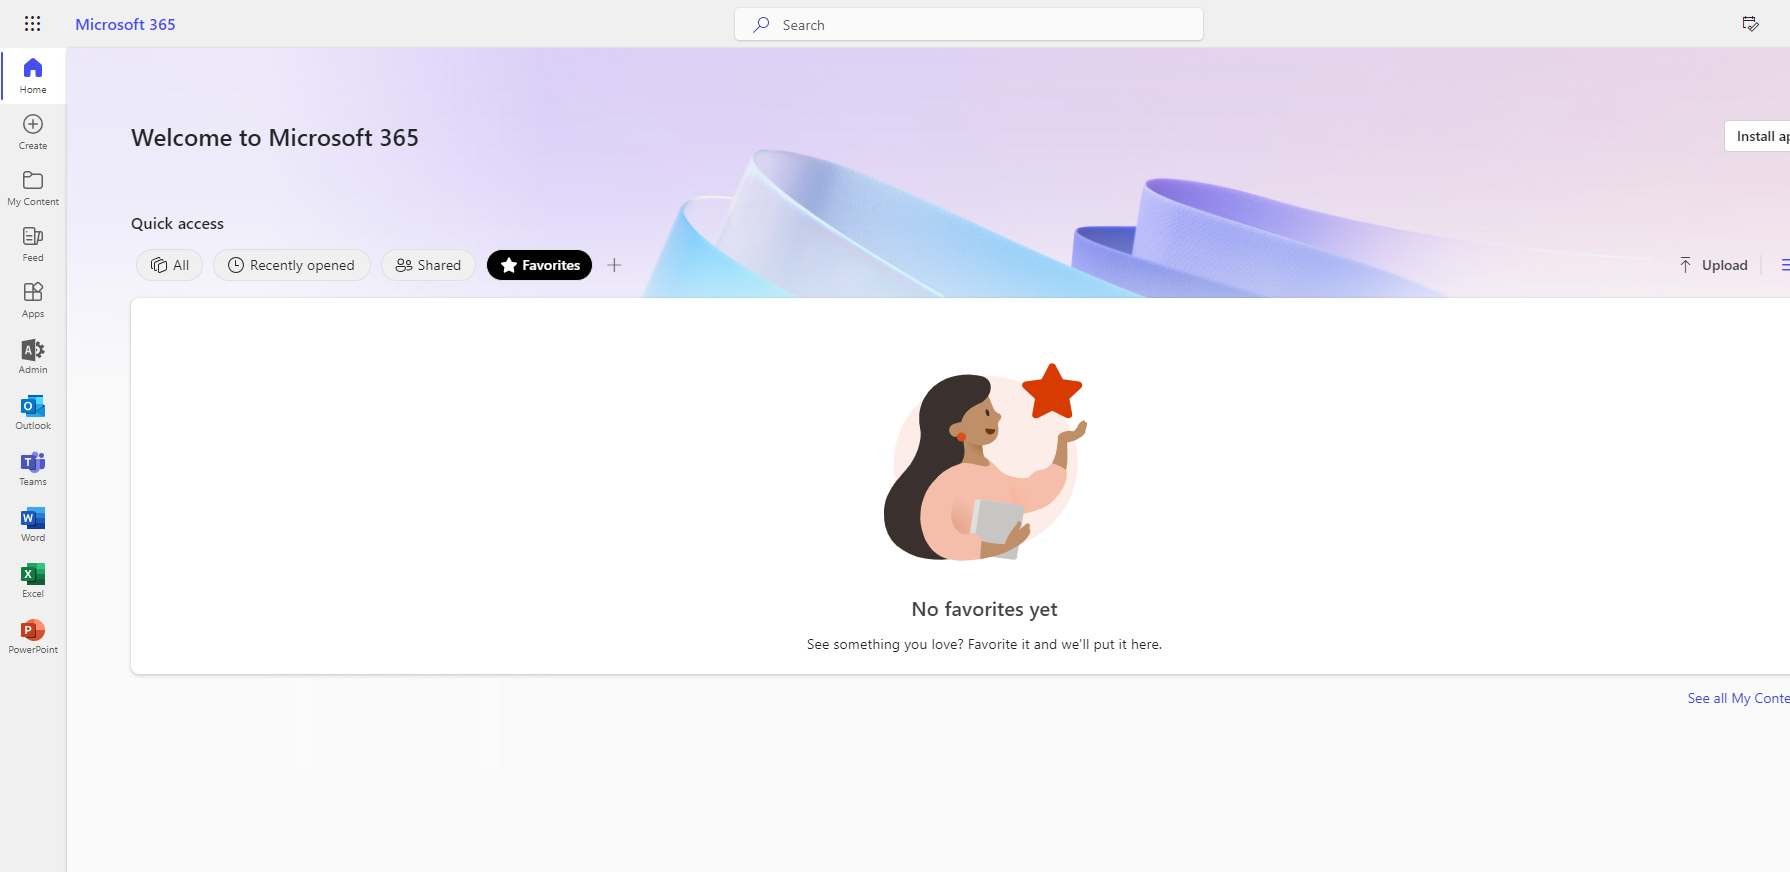
In today's article we will see how we can create our first Power app First of all I must tell you that in this article we will see the first steps in creating a blanc power app and then we will see some very basic settings in the main screen of the app To create a power app first of all we need to have an M365 subscription and then we need to have been assigned by the admin of the power app With the active subscription we enter the home page
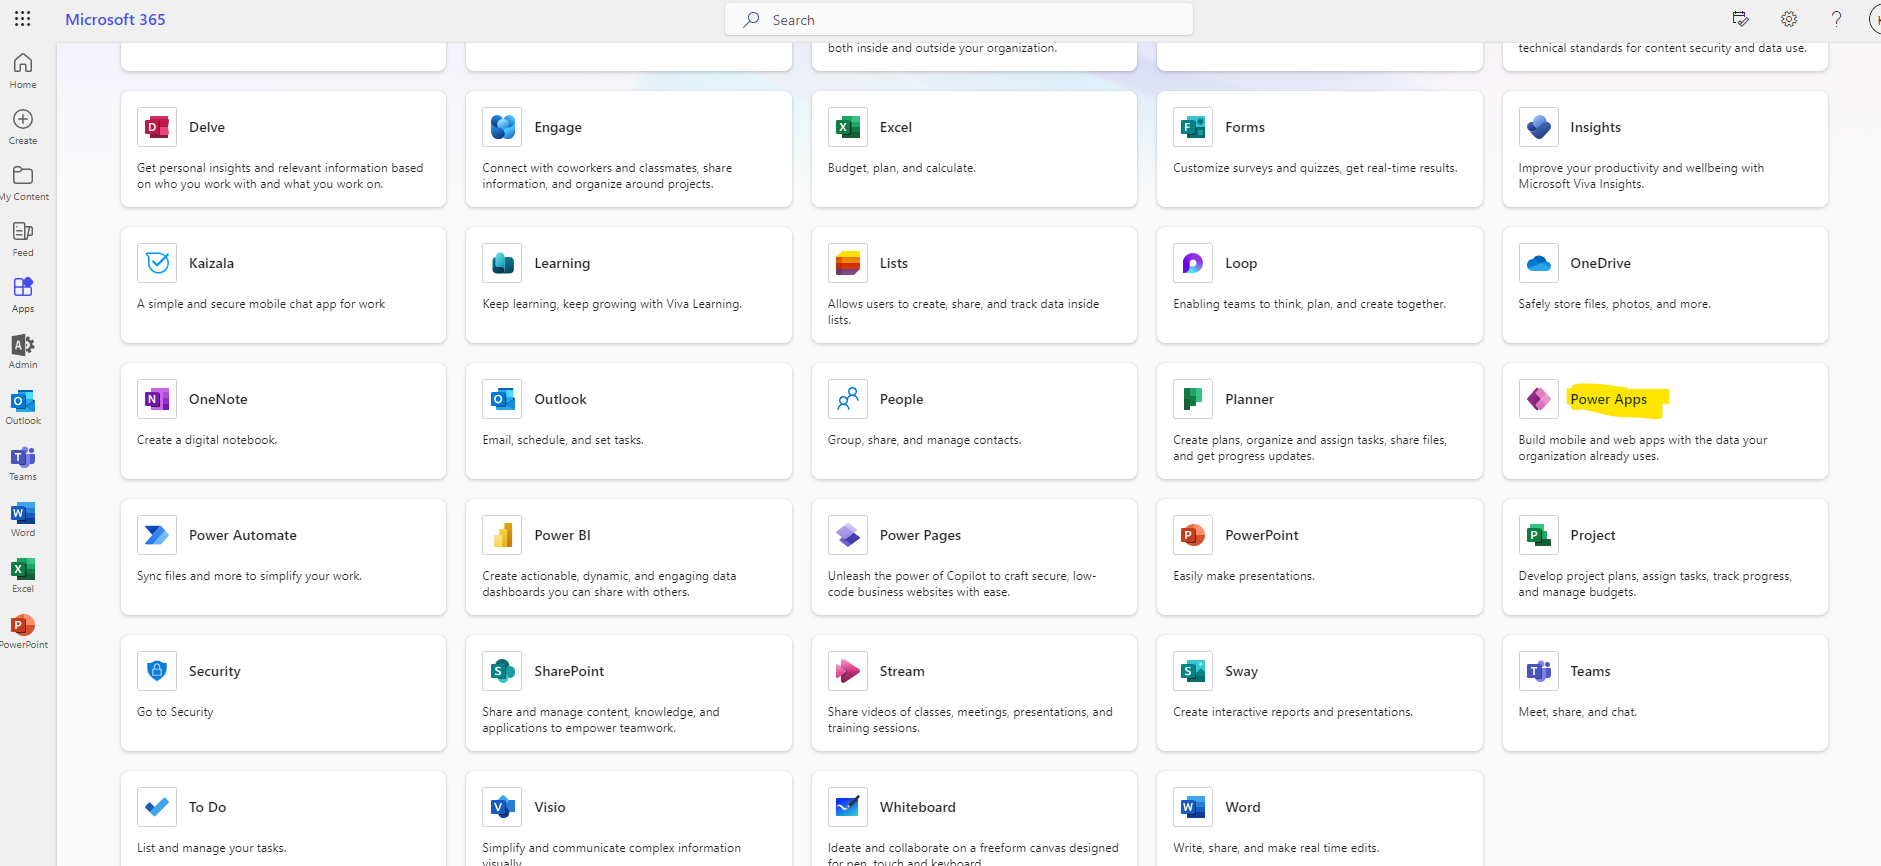
Then we check all apps and then in the applications grid we check power apps
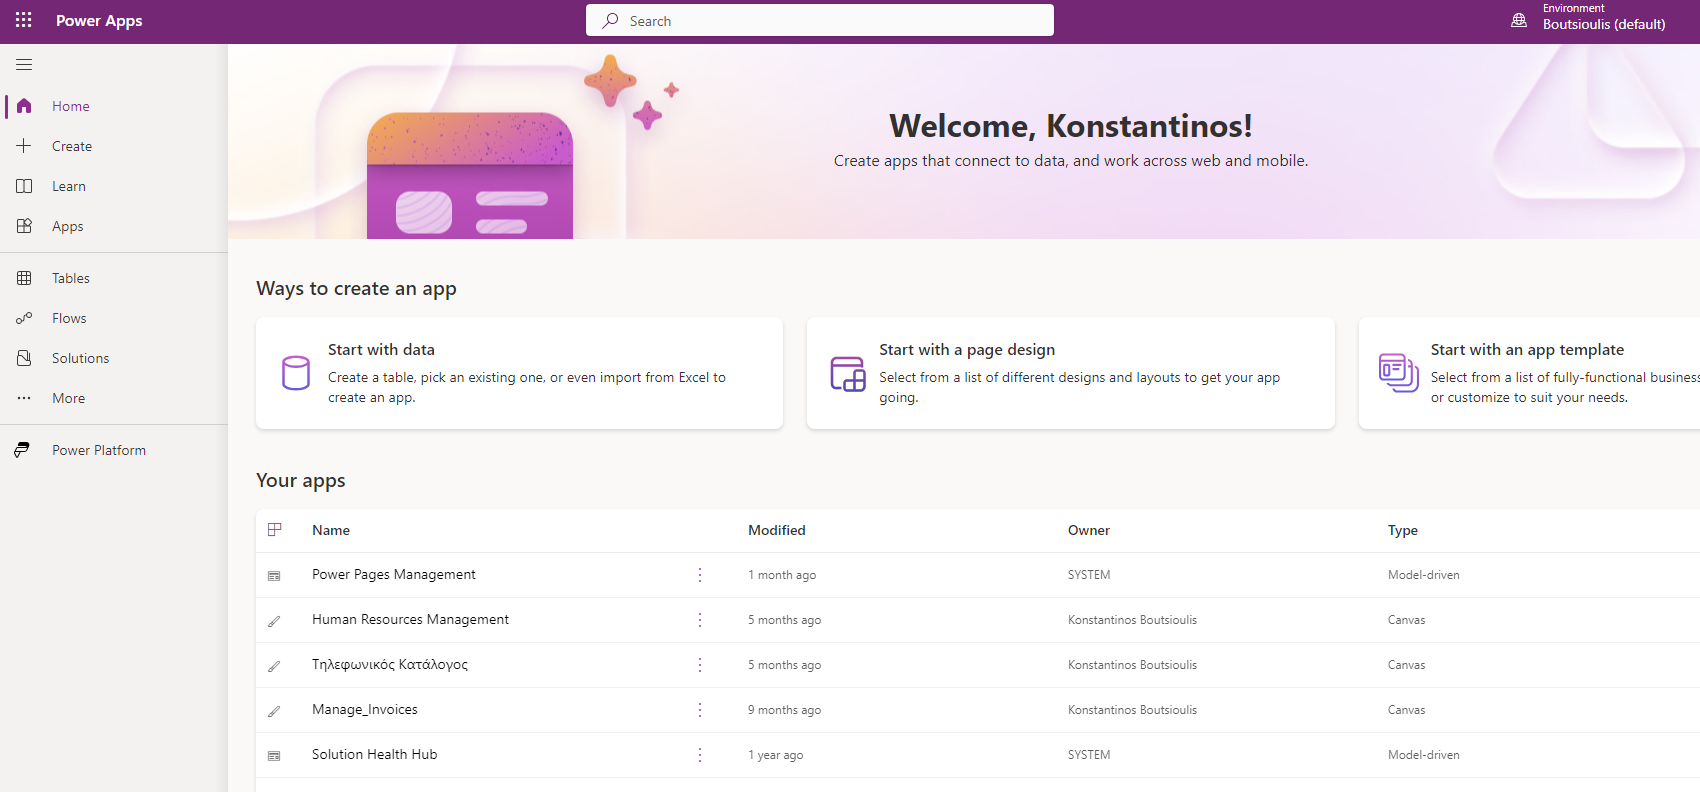
In the next step we will be on the main Power apps page where from a quick glance we have all the apps we have created but there are also a number of options such as creating a new app , learn which essentially takes us to the official Microsoft documentation for Power apps and a number of other options such as Tablets , flows and solutions which we will deal with in future articles
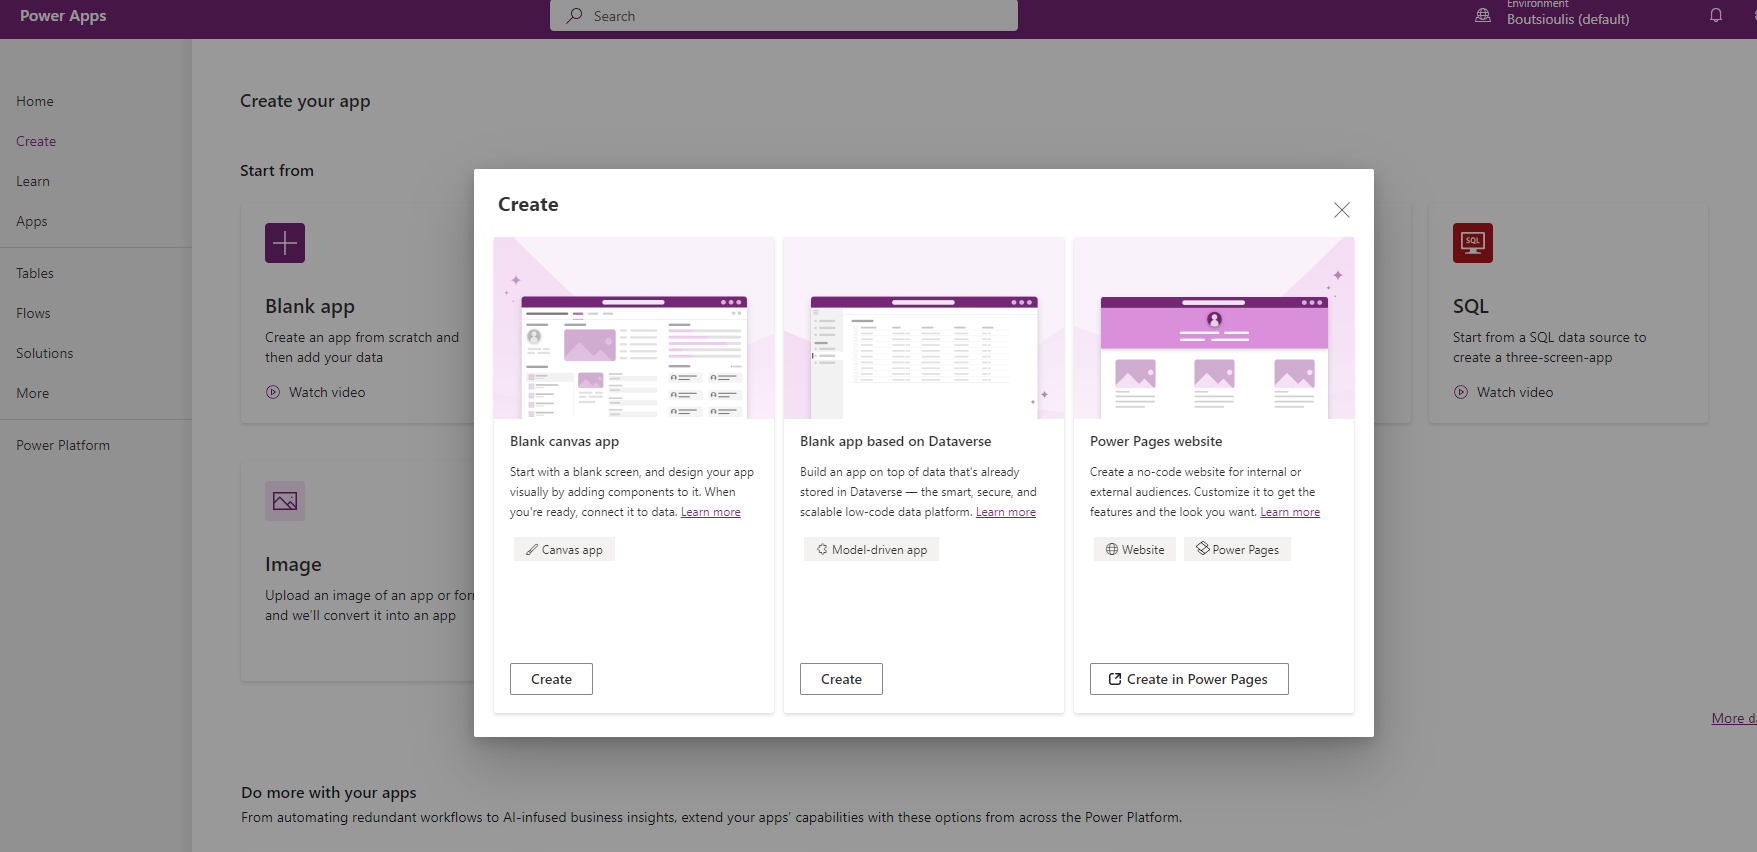
We select create and a number of options appear, such as dataverse which is for applications that interface with data tablew or other applications that contain data , sharepoint Which is for applications that interface with sharepoint , excel where we are talking about applications that interface with excel , and of course SQL which is for applications that integrate with SQL in different versions of it . There are also the Image and Figma options that essentially we have a more active media participation in building an application .
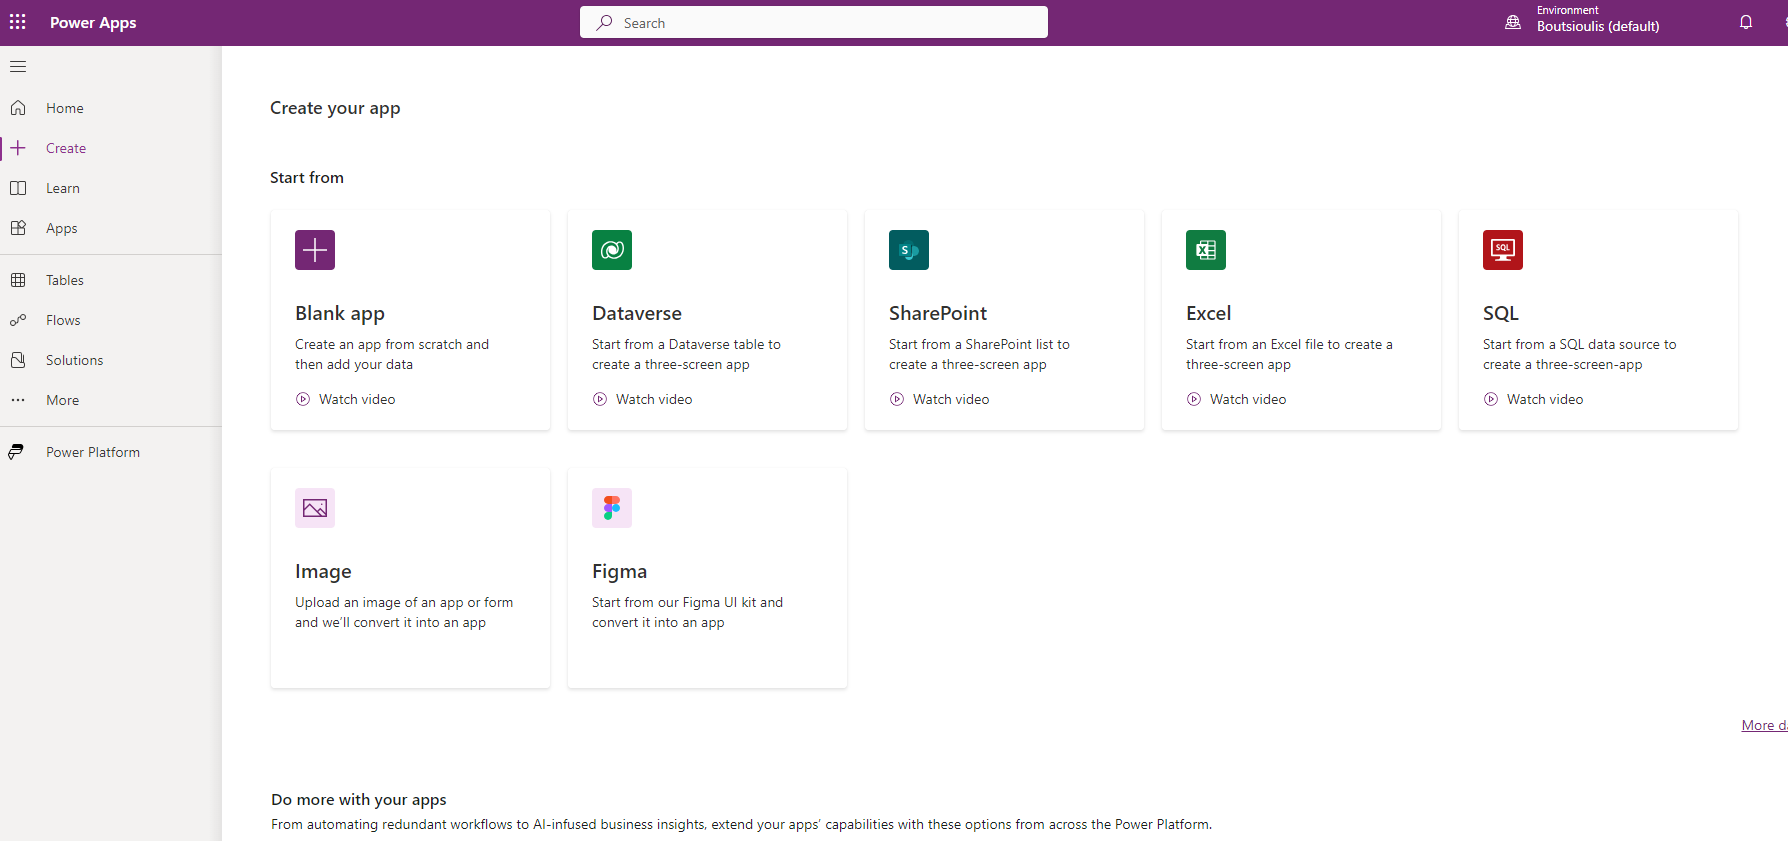
We will choose blank app And so we will have another window with options to create a Black canvas app or a Model Driven app or even a power pages website . We for now will choose a blank canvas app for our initial approach with Power apps
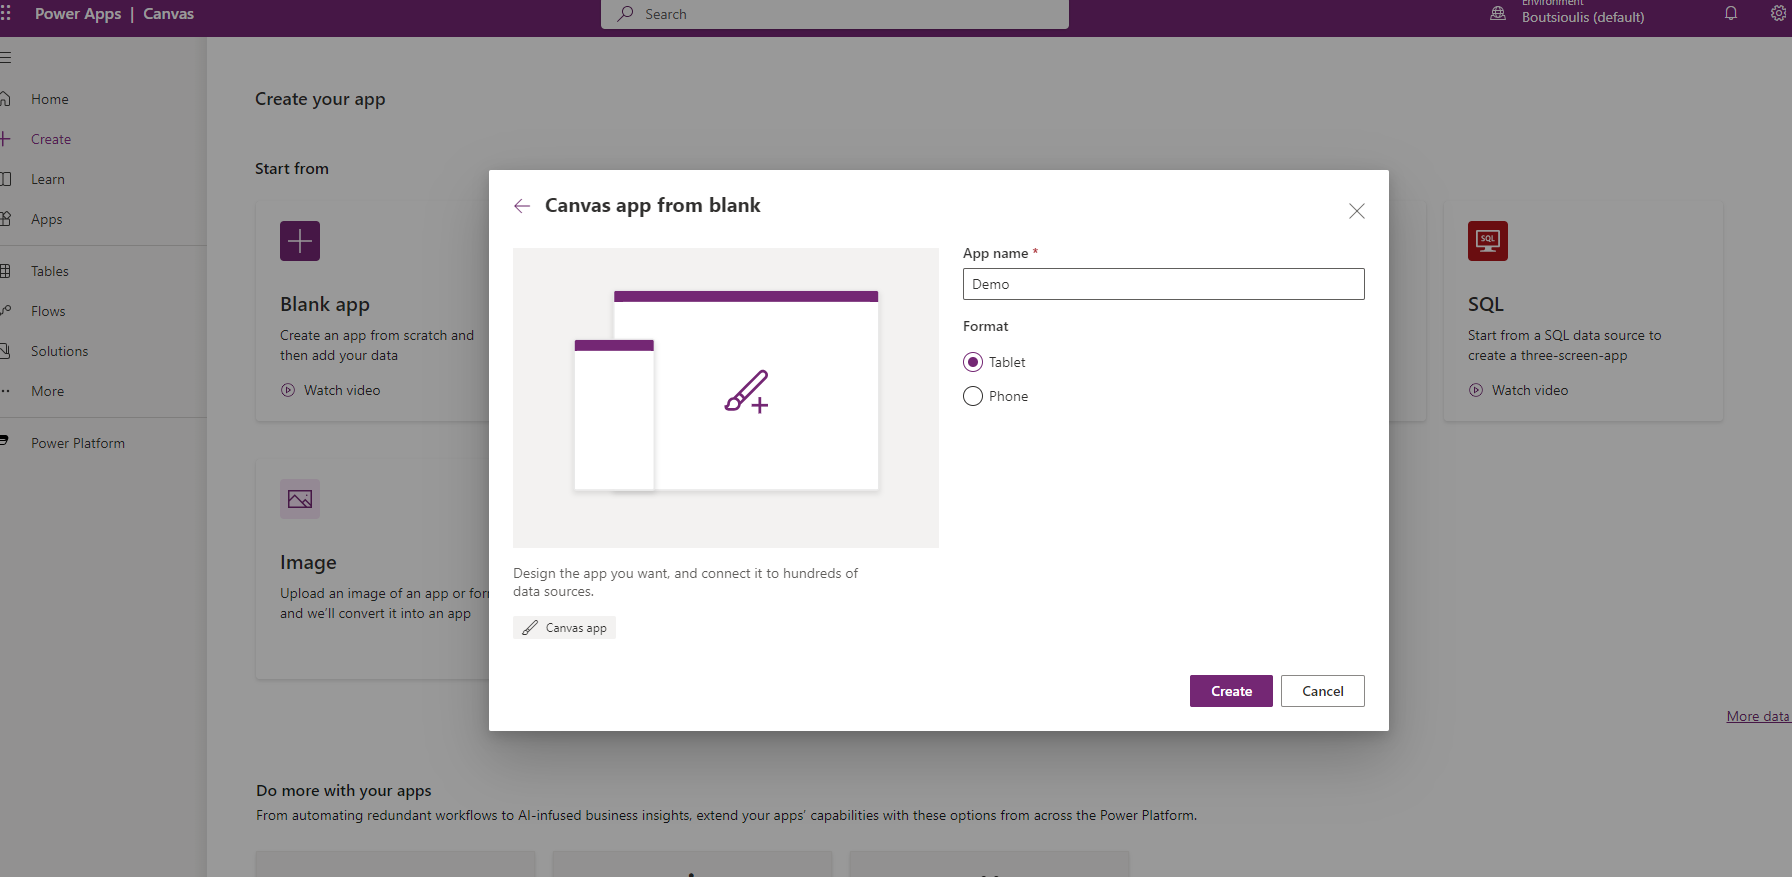
In the next step we need to give a name to the app and choose the format of the app whether it will be mobile or Tablet related and select create
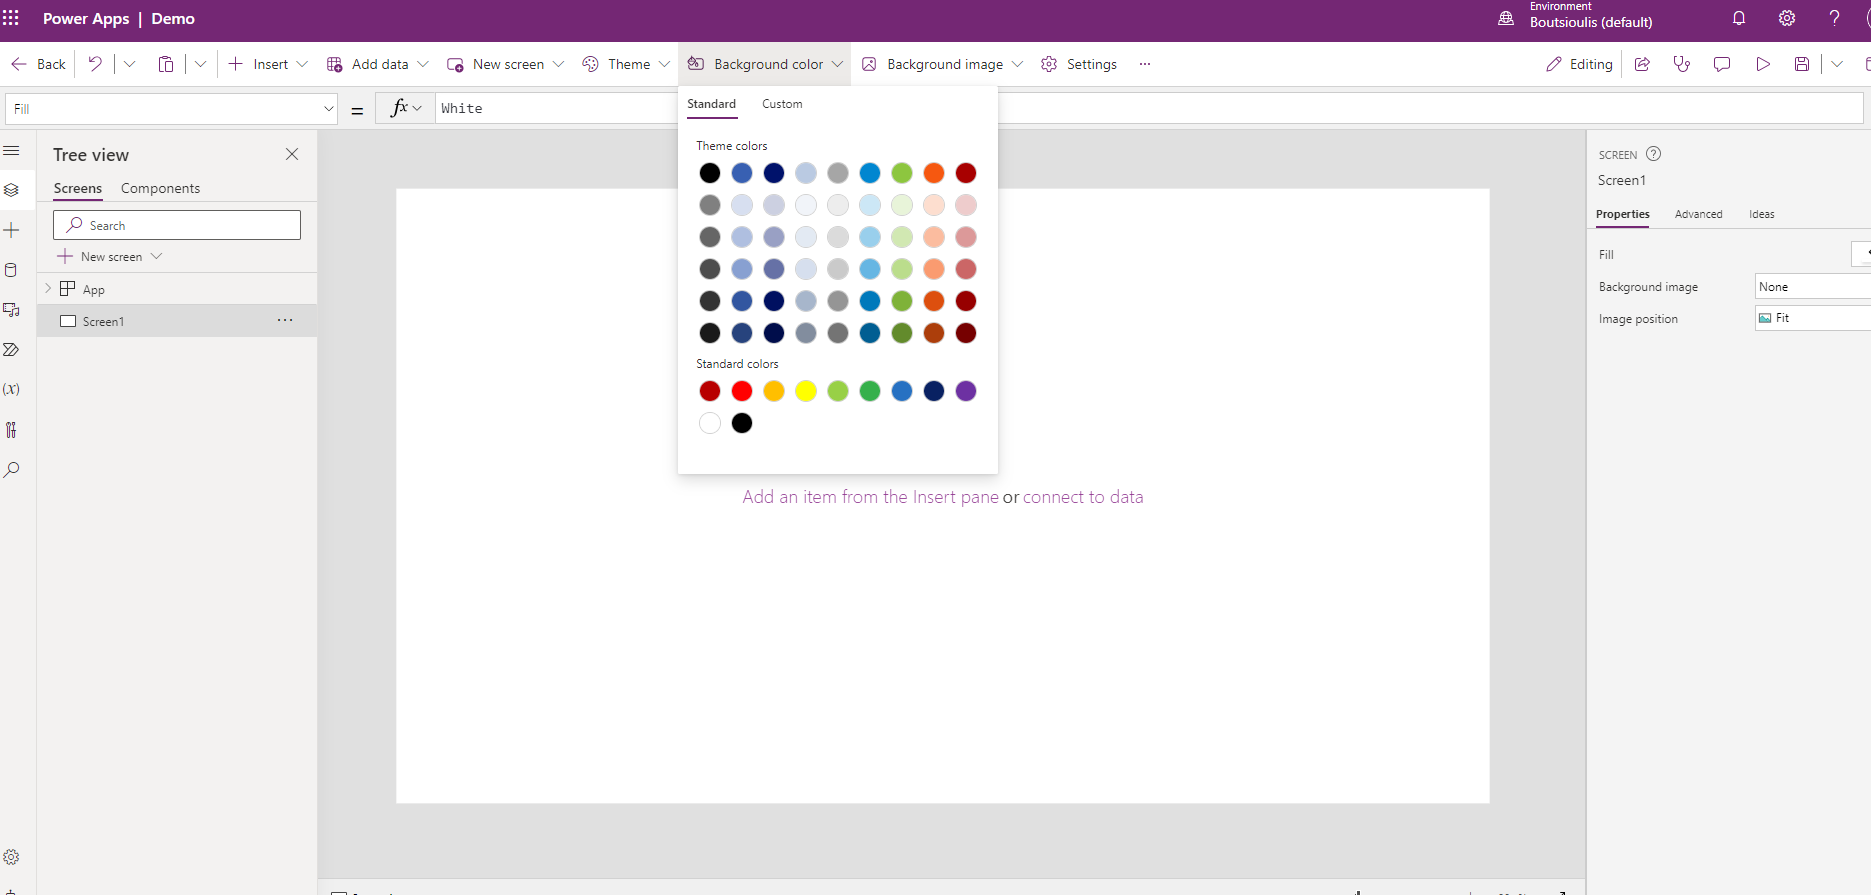
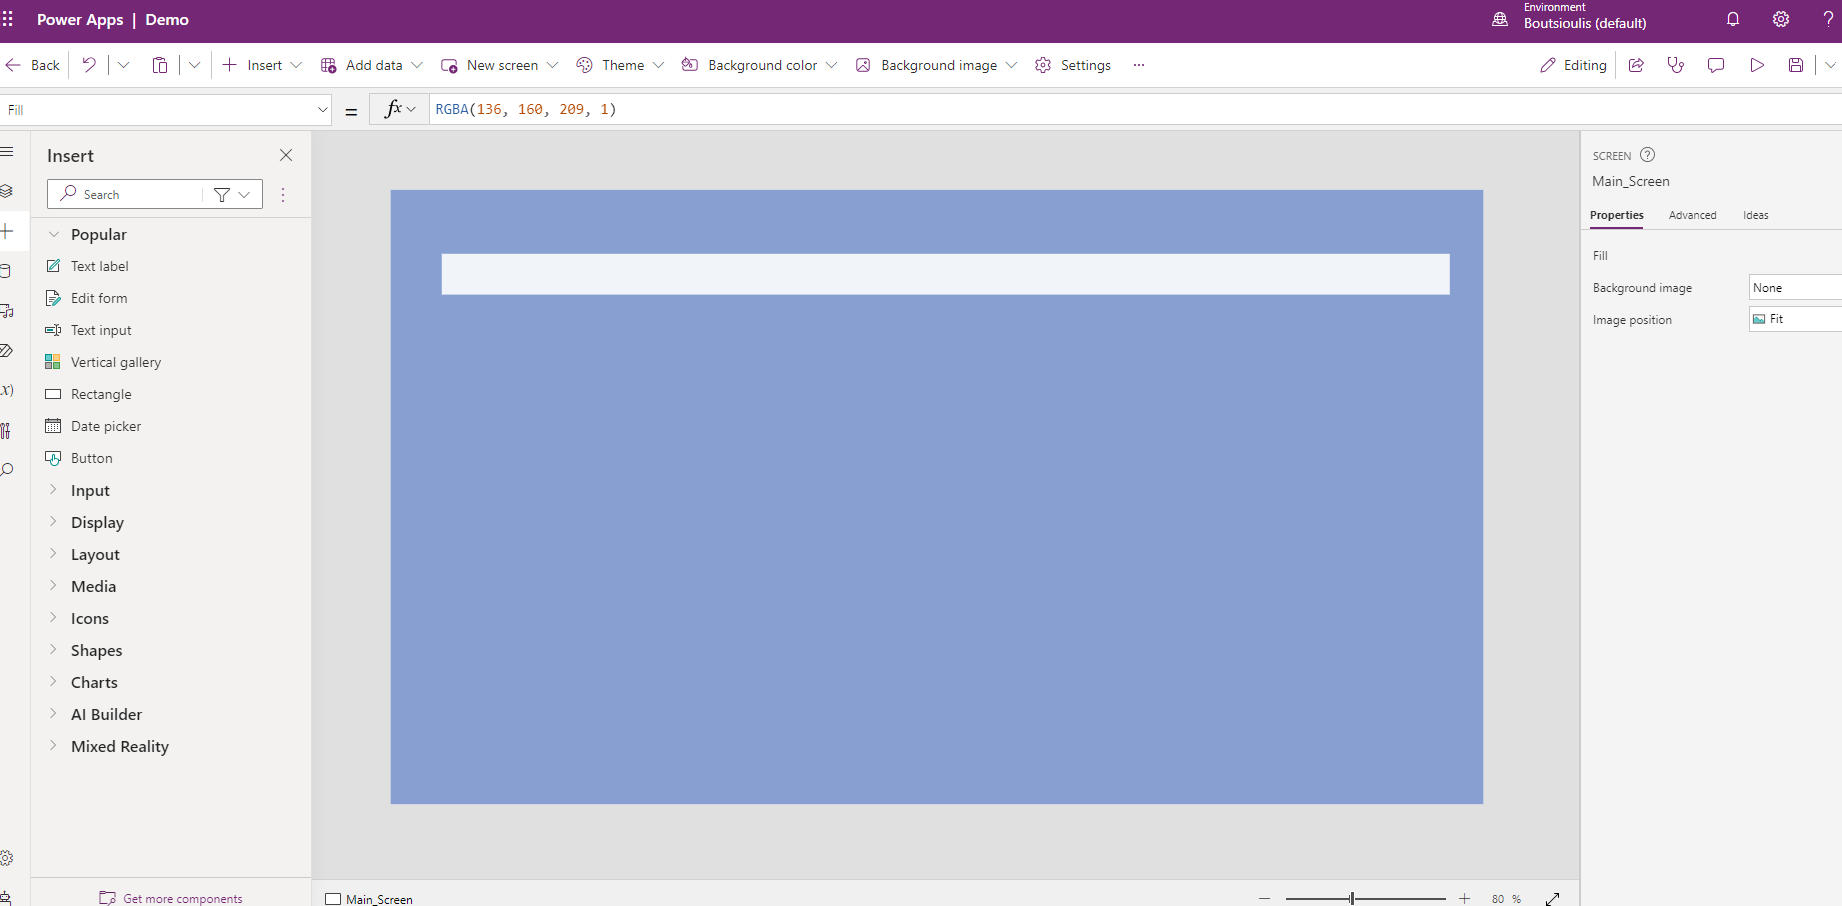
And so we go to the main page in an environment for creating and managing our new application.As you can see it reminds a bit of the logic of a powerpoint with slides only here we will have screens that will be dynamically integrated into our application. So let's take our first action in an environment that is quite friendly. We select background color from the menu at the top and choose a color from the available ones , as you can see I can choose from custom a color that does not exist in my palette
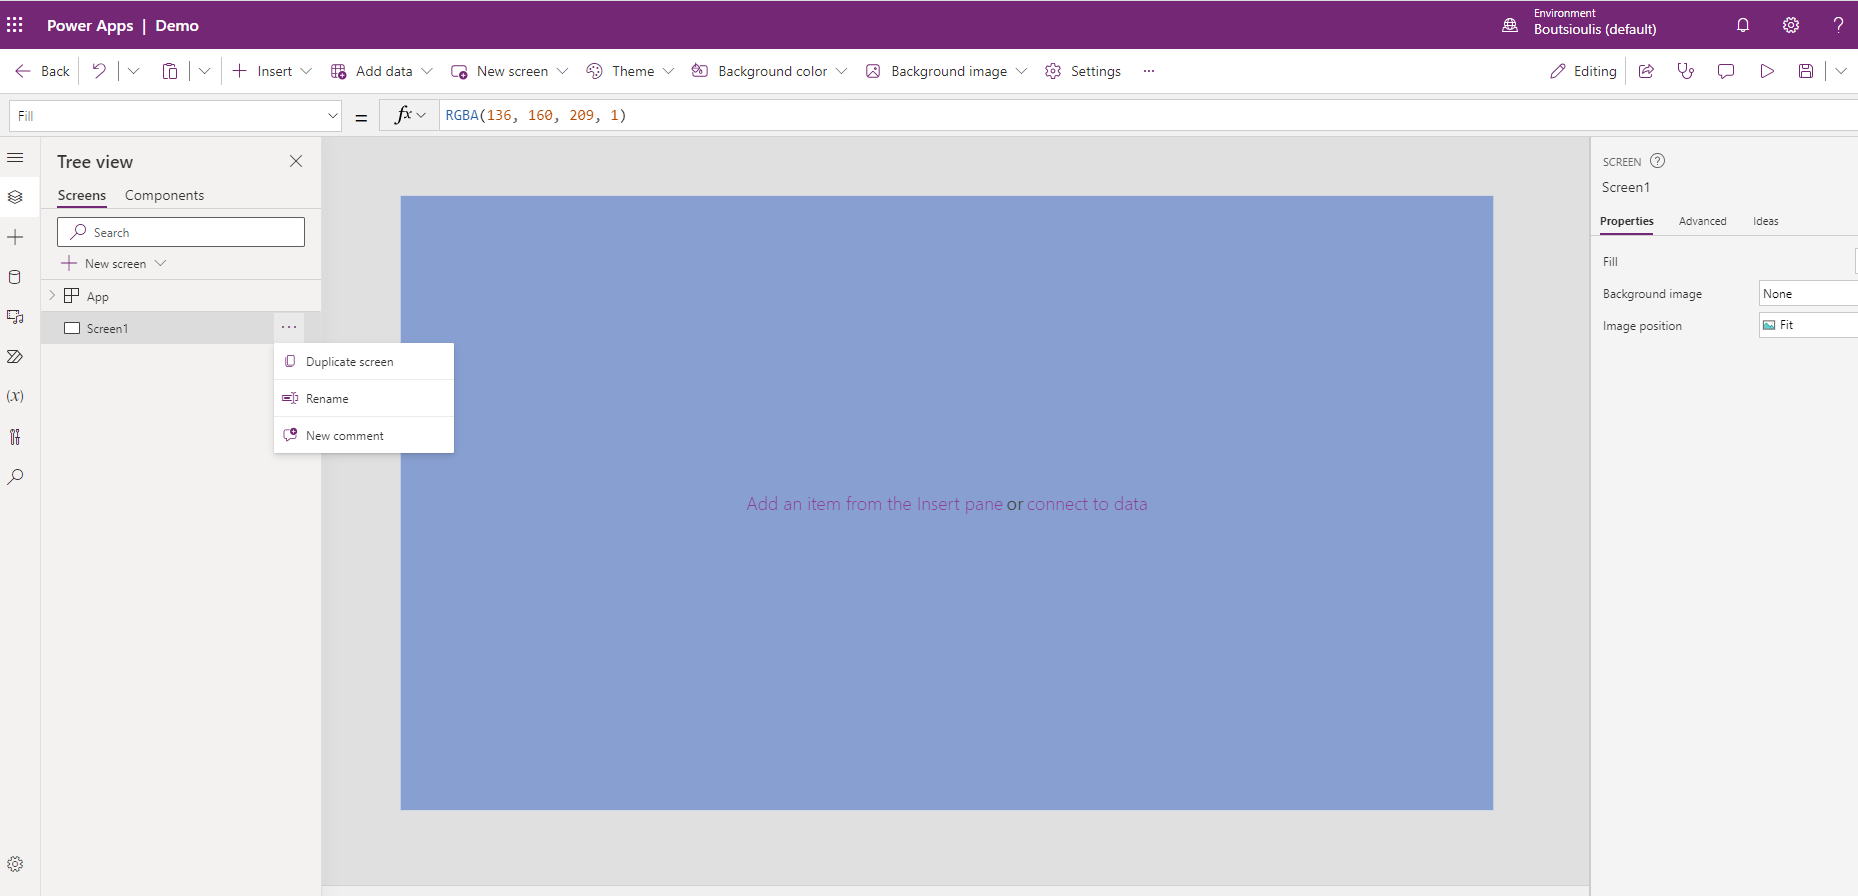
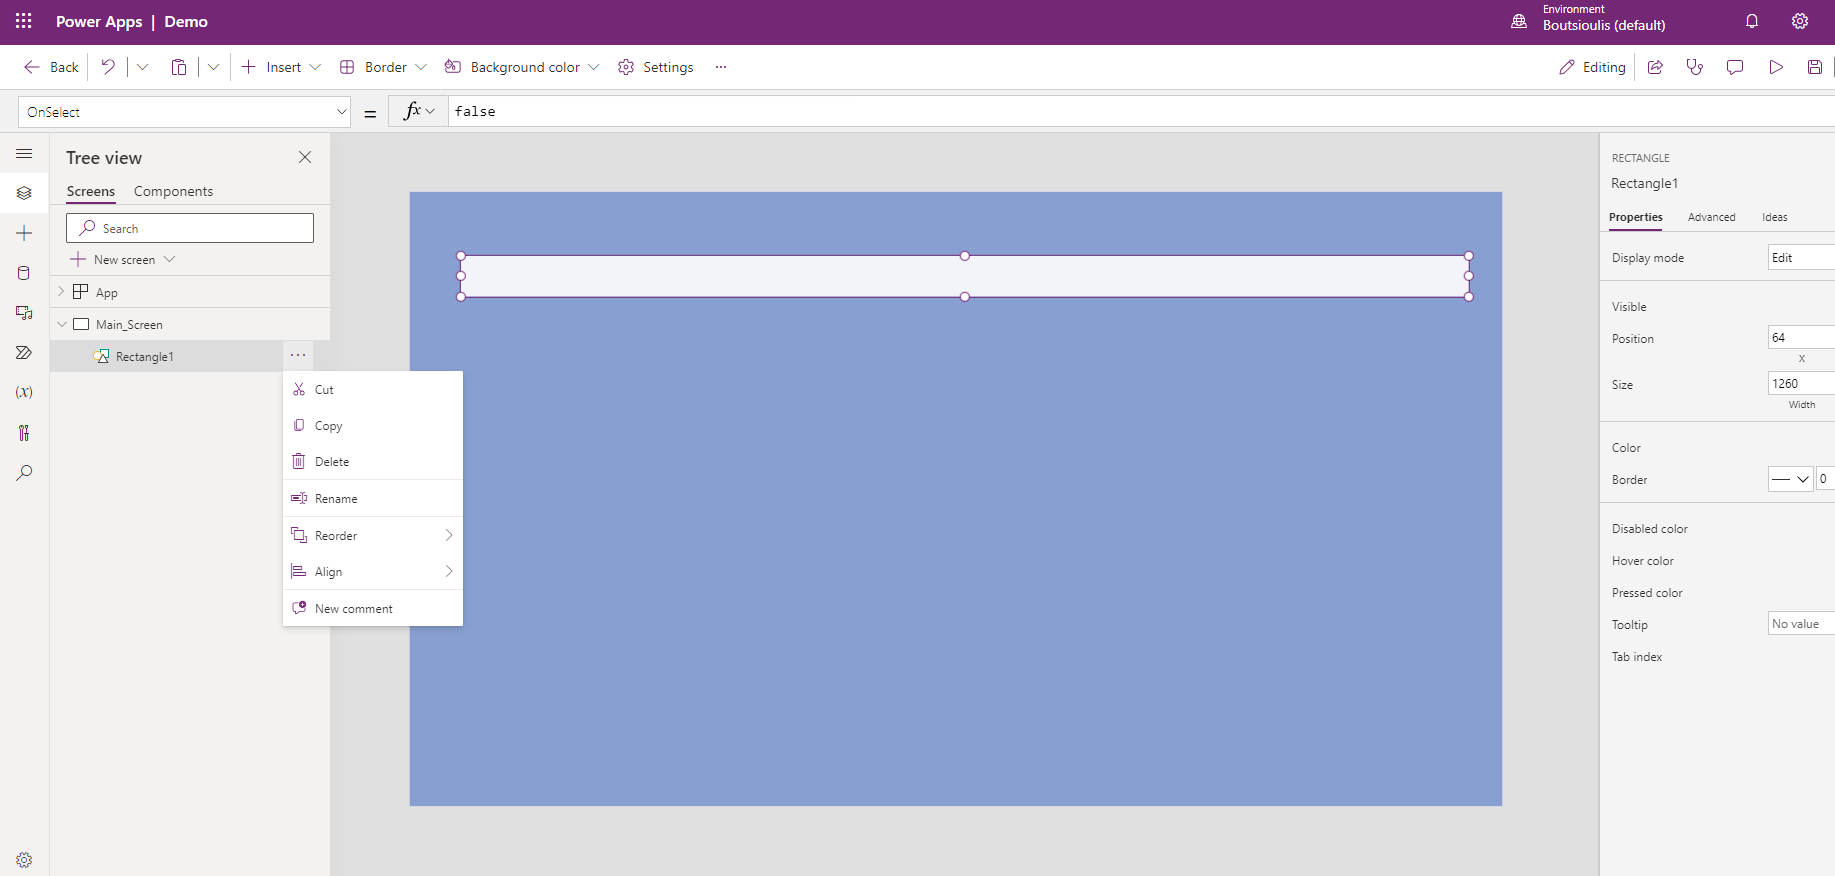
And so this way I have made my first icon and I have added a blue background If I look a little better on the left I see the name of the first screen which is called screen1 .Here I should point out that it would be good when building the new application to rename the screens and all the items that you will have in it with names that will help you later to locate the specific item or the specific screen for changes and improvements to the application . As the application gets more and more complex, the harder it will be for someone to identify which item is the one they want to change. By changing the name he can easily identify the item or screen and make the change he wants to make. So click on the 3 dots and select rename and change the name
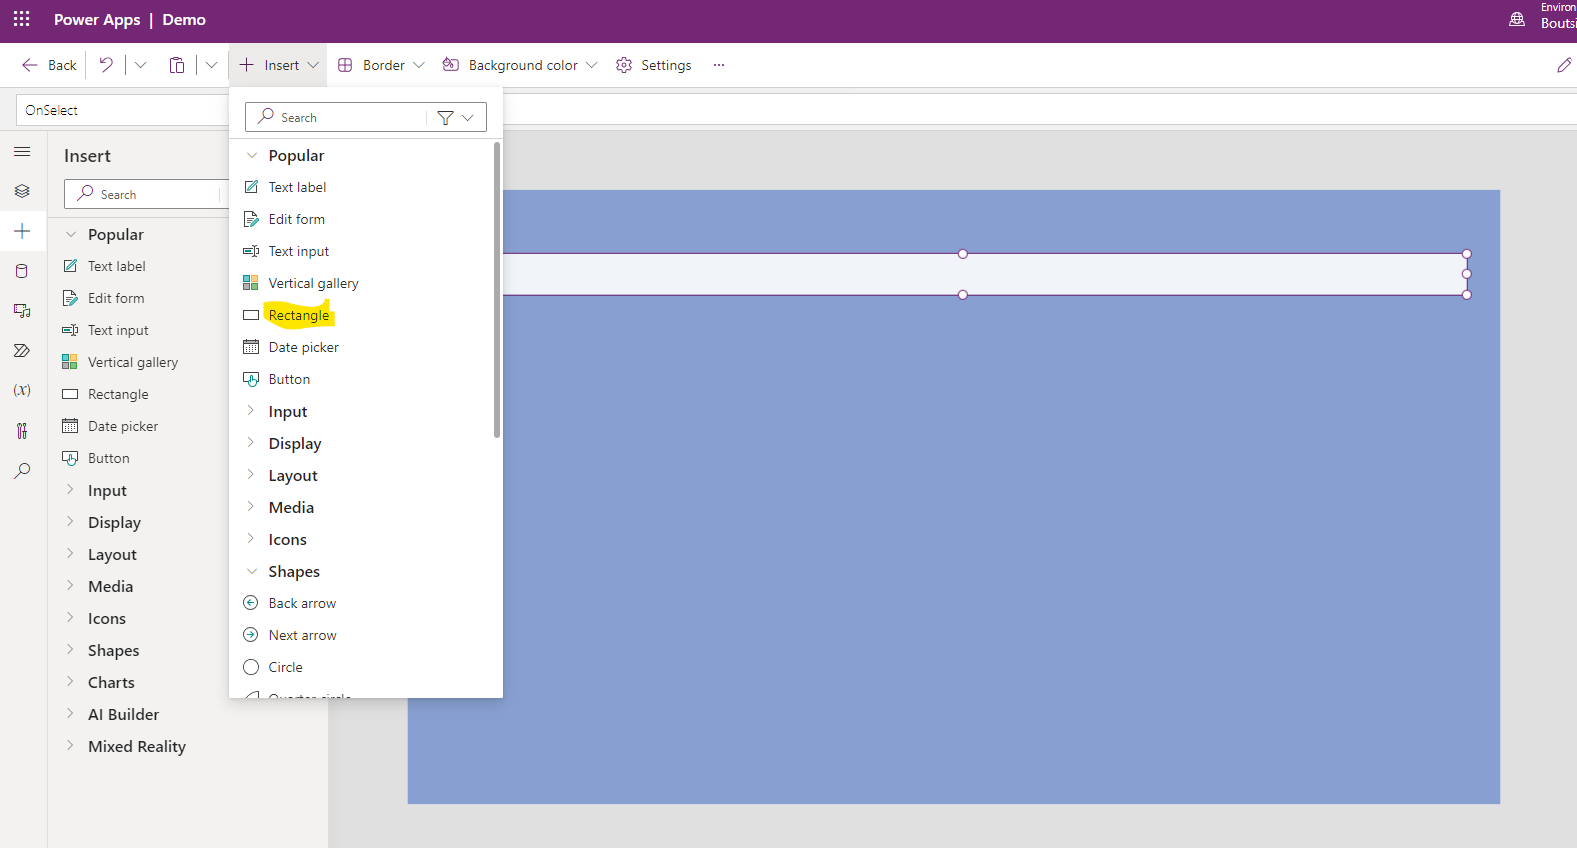
As you can see on the left there is a side toolbar in which we are in the first layers option where the screens and features are displayed. If we click on the second option we have the Insert option and so a series of Popular options appear. At the same time I have the same action from the insert option in the menu at the top. So I select it and I select from the available rectangle so that I make a square or an arthro-angle
I also change the square to a rectangle in order to create a banner for my title
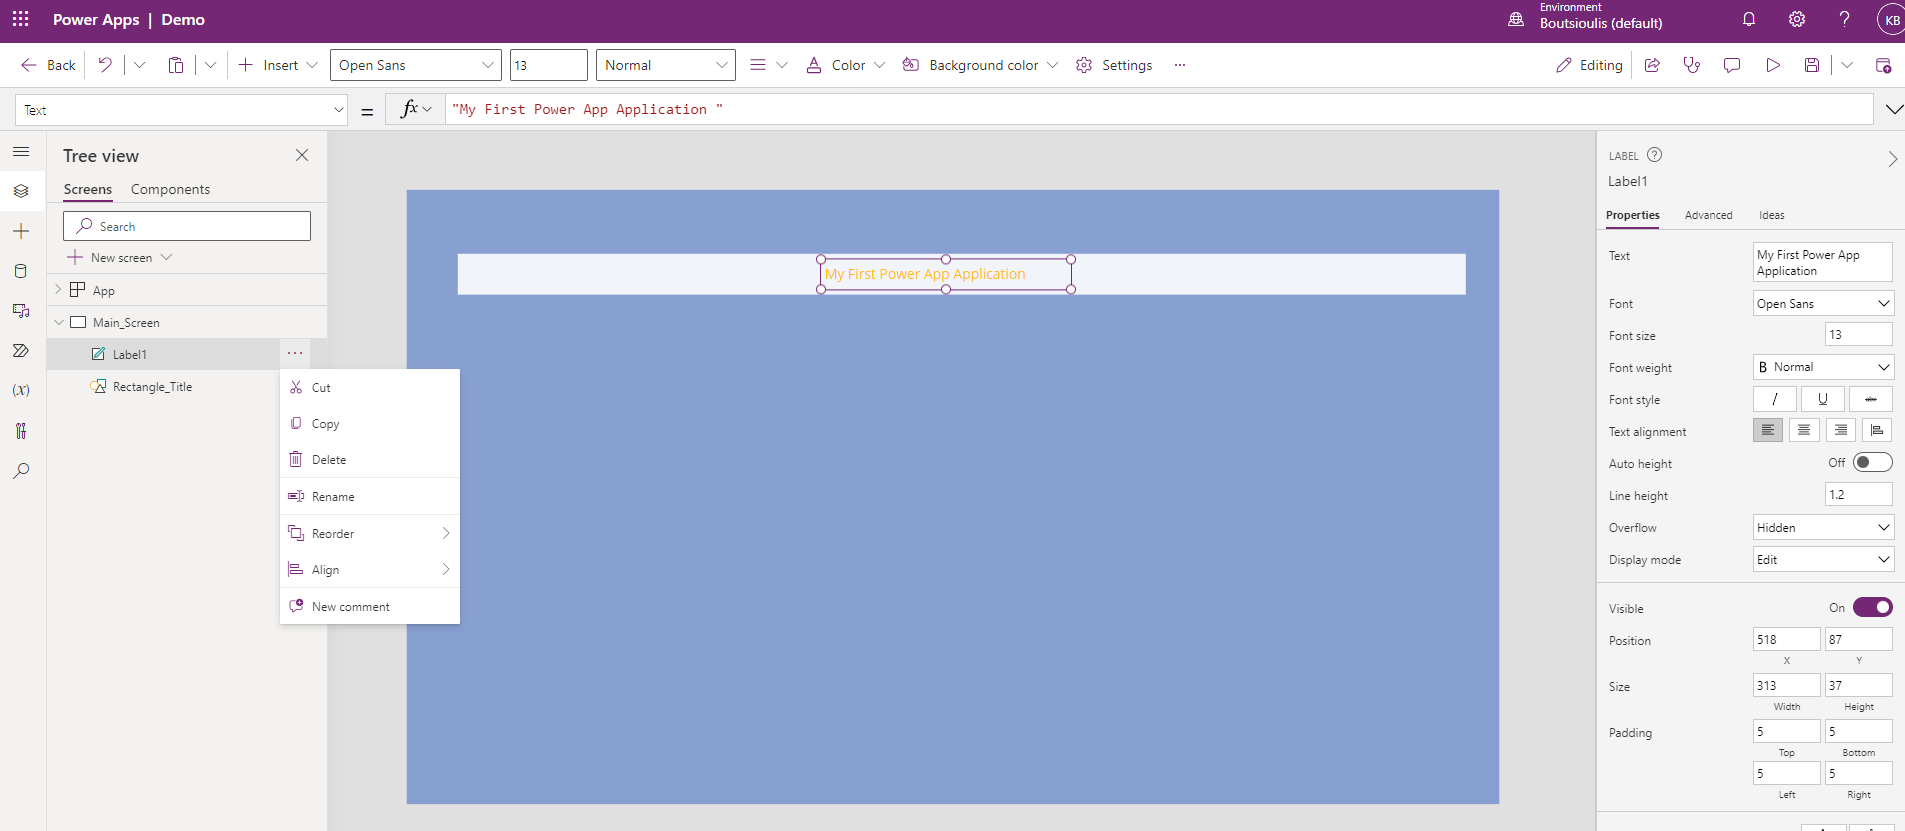
As we said earlier the correct practice is to change the name of the item each time so that we know later what it is about, so I click on the 3 dots to the right of the item and choose rename
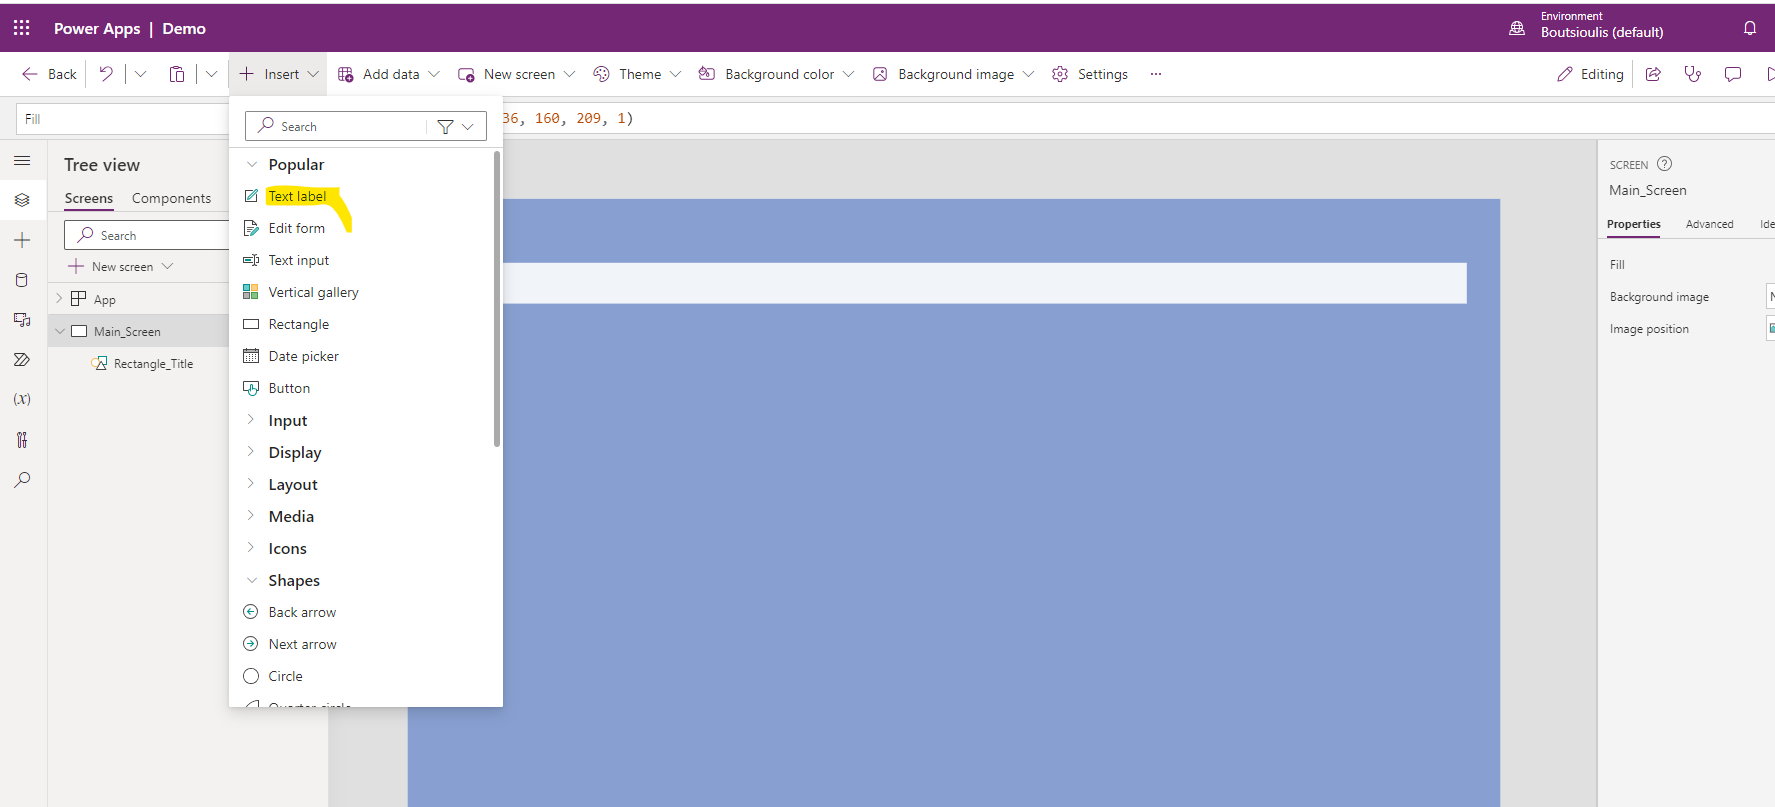
Now I need to insert a title into my banner but I can't with the rectangle .I select Insert again and this time I select text label which will give me the option to insert text
I enter the title of my application and drag it into the rectangle
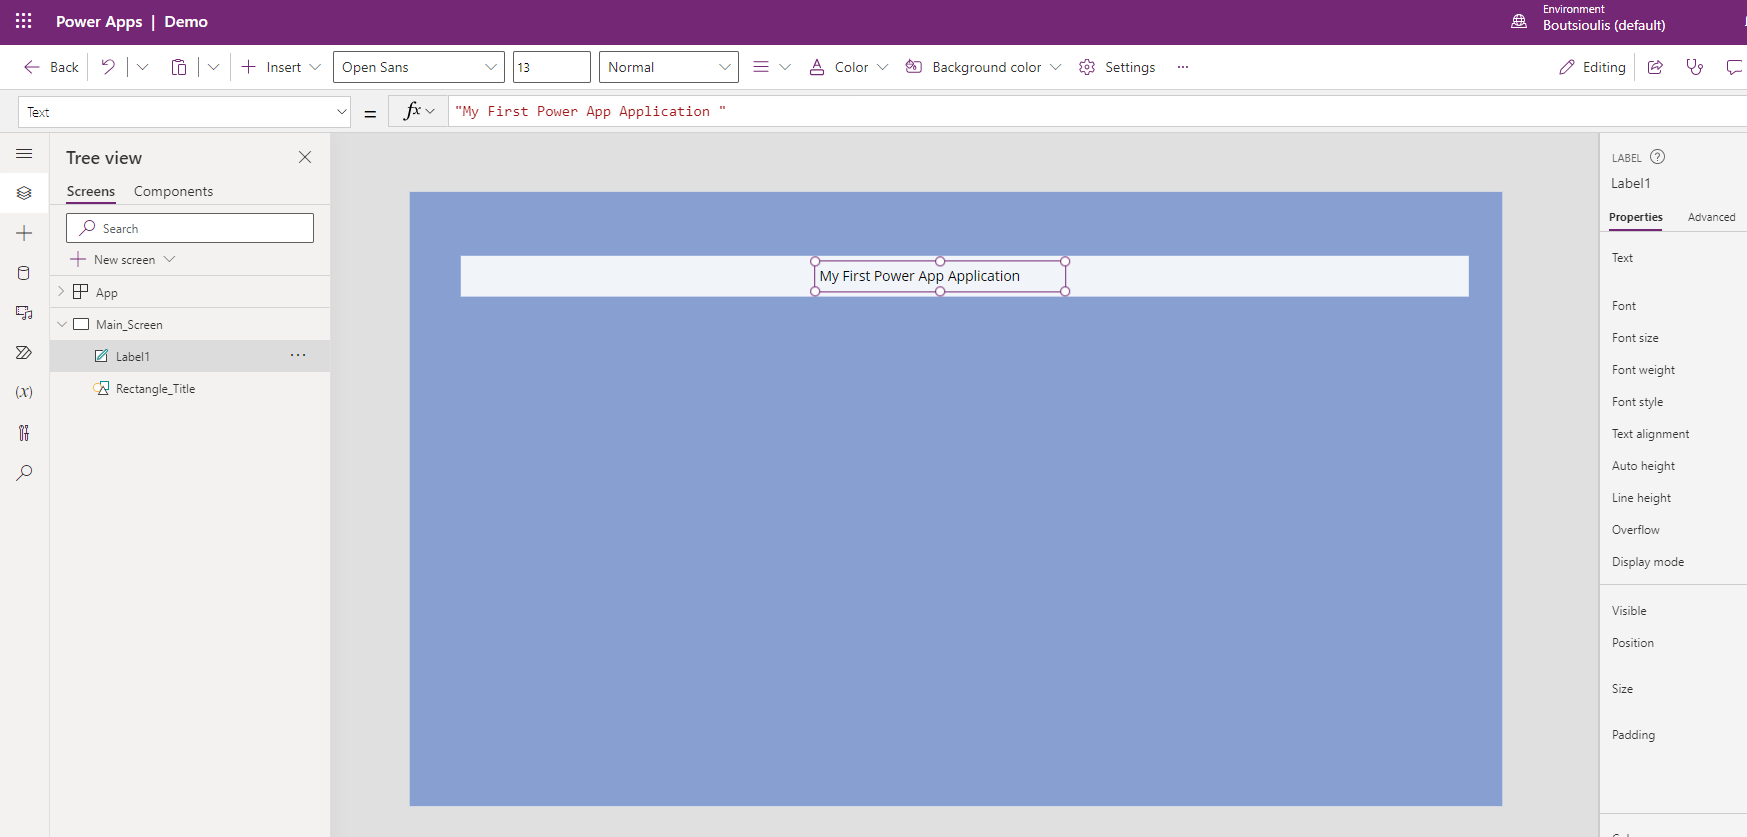
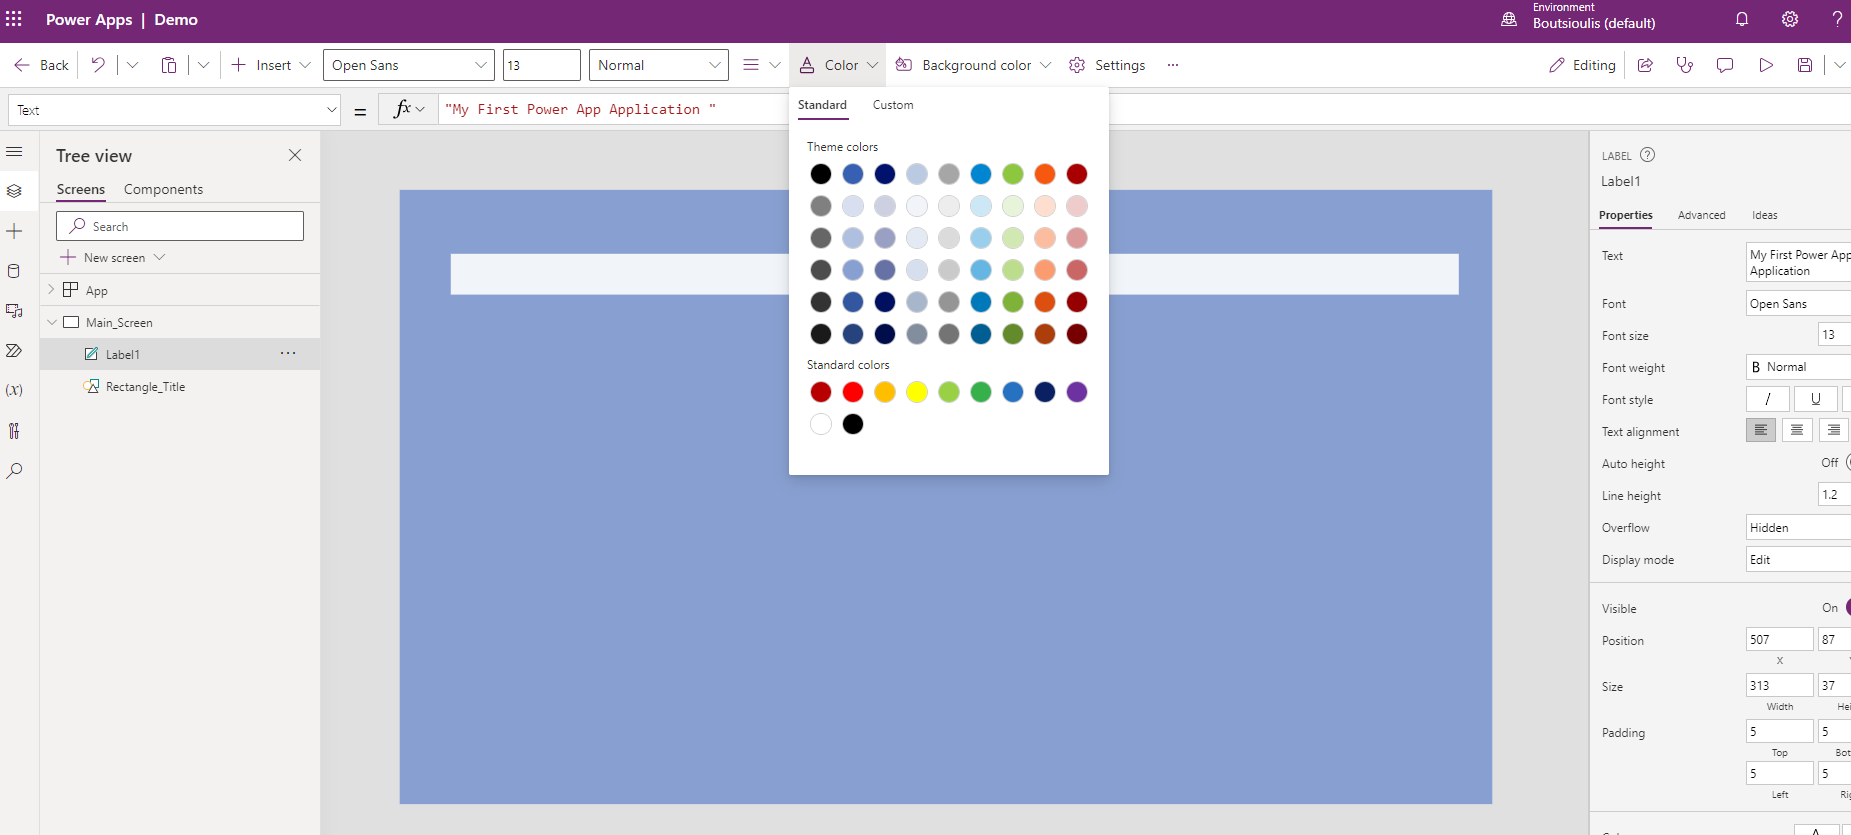
At the same time I select color from the menu at the top and change the color of the fonts
And of course now it's time to change the name on the label to know what it is and what its role is .With the same exact logic as before I select 3 dots on the right of the item and rename
In the next step I will do something that is known from other products mainly Power point , word I will group these two items into a rectangle and the label so that I treat them as one item I select both and with right click I select Group
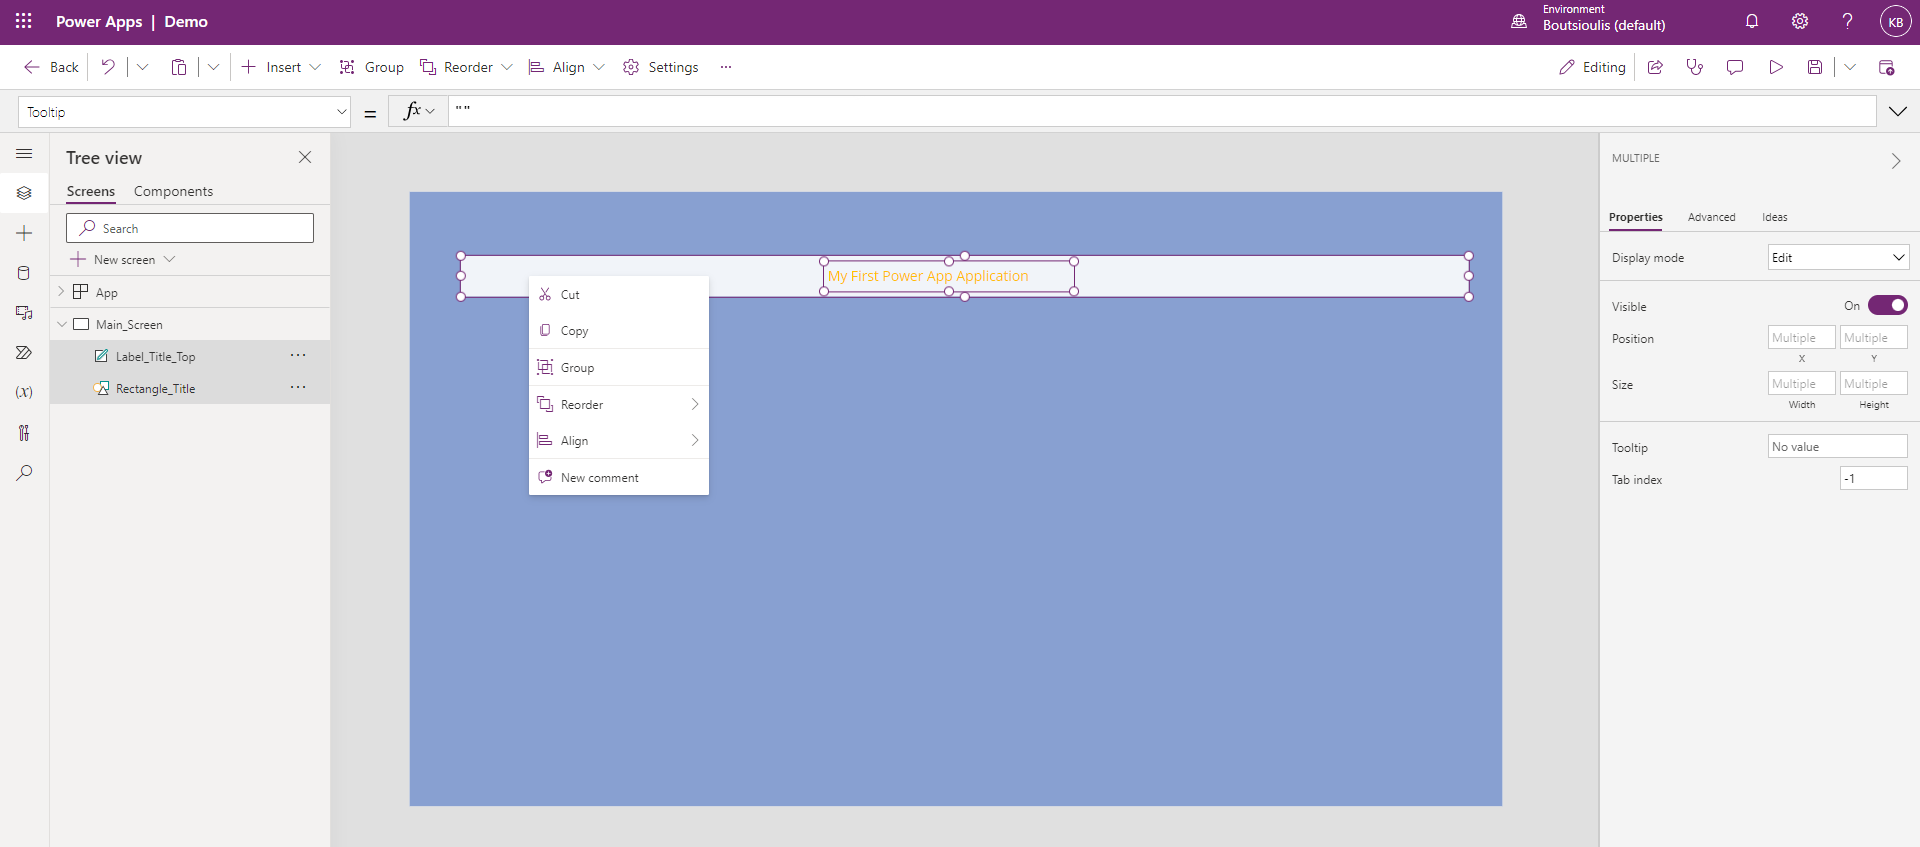
As you can see below the screen he has made a group and below that is the two items
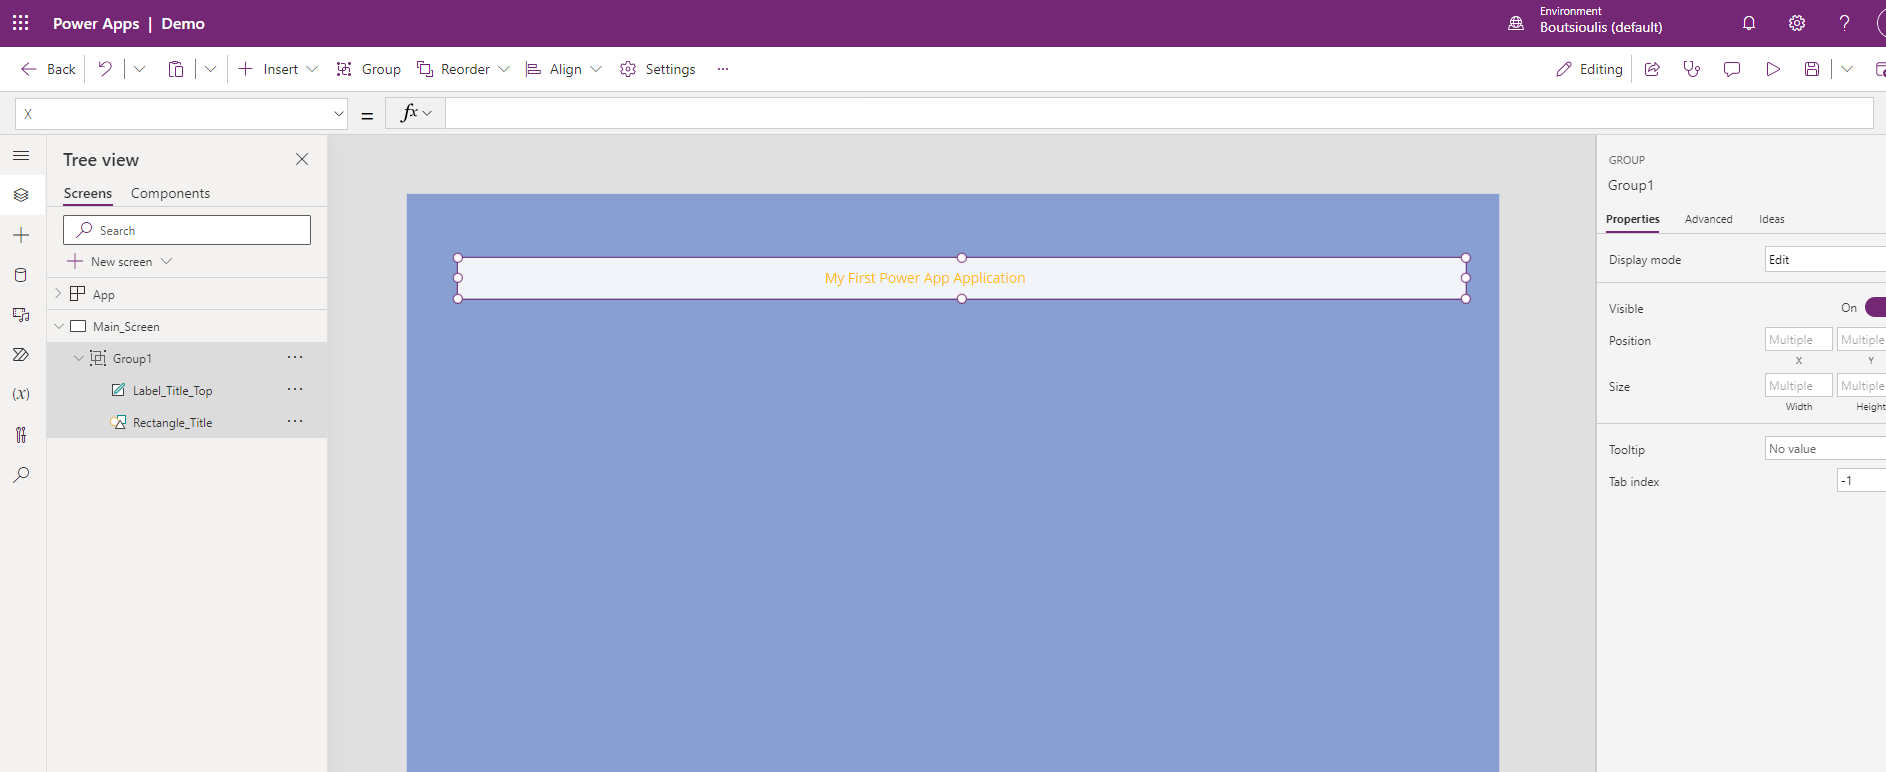
By using the align above I can find the appropriate position for my object as it will also be extended to the right of a disk where the save button is on every change of my application. As you have seen with a very simple process I have completed the first article showing the first steps to create a Power app . It is very easy to create an app and next in the next articles we will see that I have no or low code to make a fully functional app for my organization
#PowerApps #technology #microsoft #digitaltransformation #cloud #mvpbuzz #m365Visit Archives below to find more articles about Microsoft technologies on Modern Workplace