
Free Material
Find hereMore than 150 Articles about Microsoft Technologies on Modern Workplace
Official Site
Microsoft Most Valuable Professional M365 Apps & Services
Microsoft Most Valuable Professional Business Applications
Consultant & Sr Cloud Solution Architect Modern Wokrplace
Find hereMore than 150 Articles about Microsoft Technologies on Modern Workplace
20 November 2023
In the previous articles we saw how we can create our own Power App and we even saw a number of basic functions such as how to add some items inside our Application like a square, how to change background color or how to add an edit form inside our screen, and even how to connect this form to a SharePoint List In today's article we will see in detail how we can retrieve items from the SharePoint List and in this way show them inside our application First as always we need to have an active M365 subscription where we need to Login to the home page
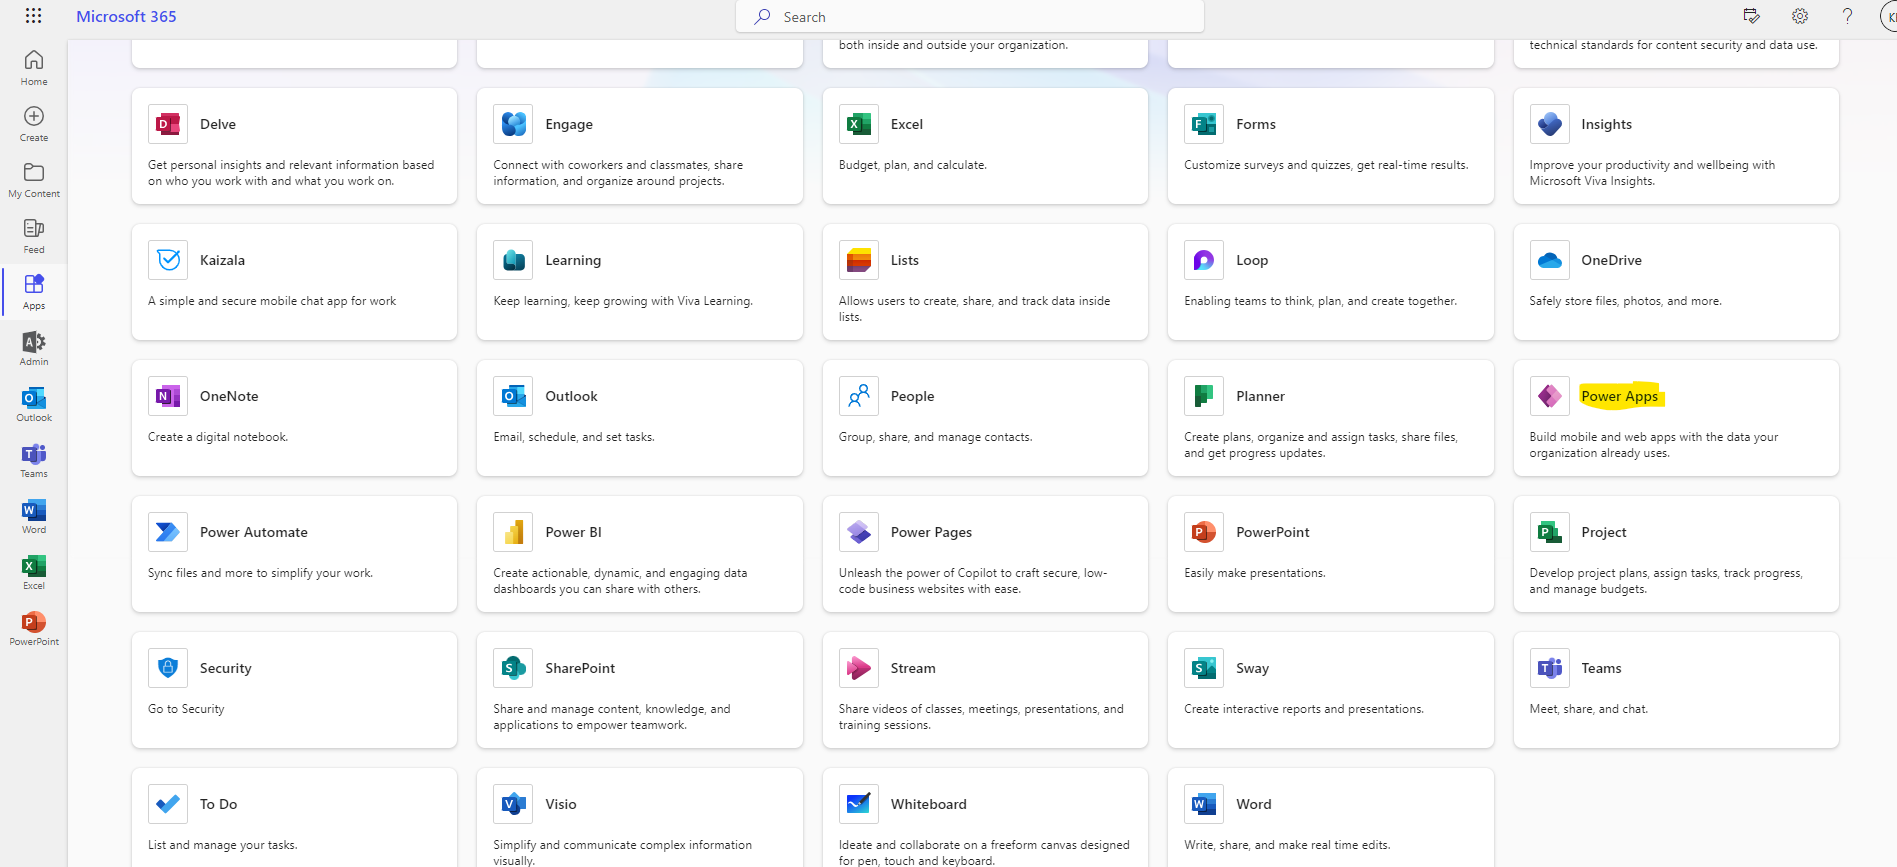
Then we will select all apps and select power apps
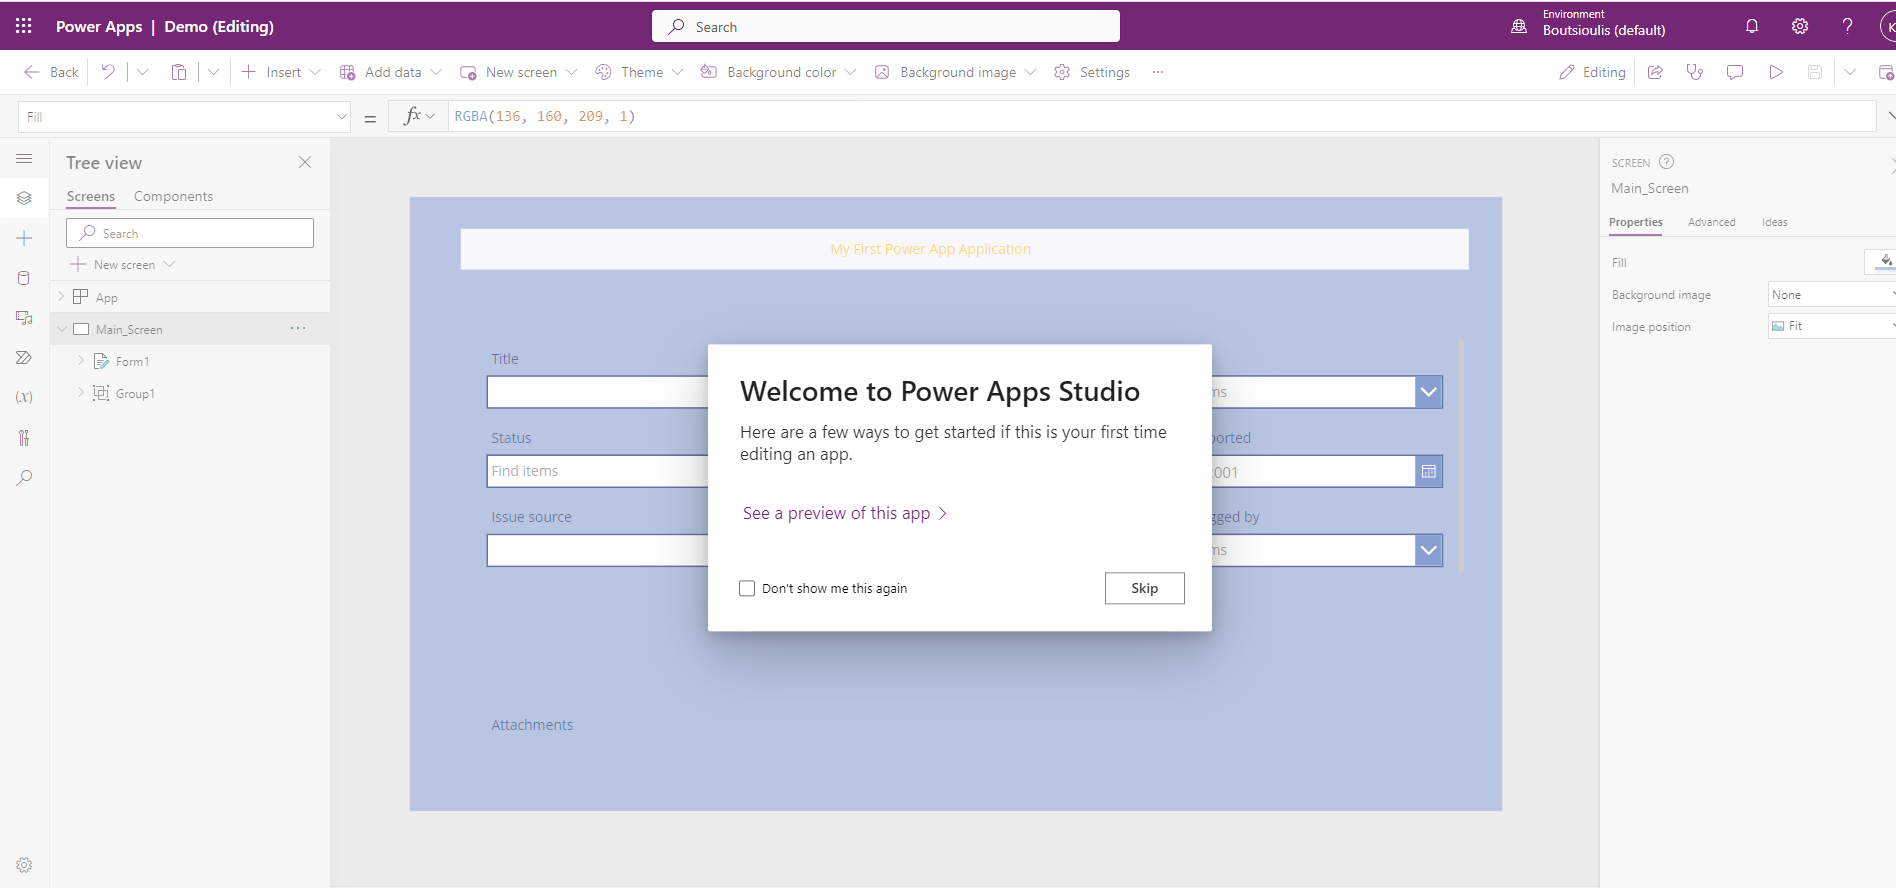
This will take us to the main Power Apps page where we will need to locate our app and on the 3 dots on the right in the drop down menu select edit

We are now in the main screen of our application and select skip
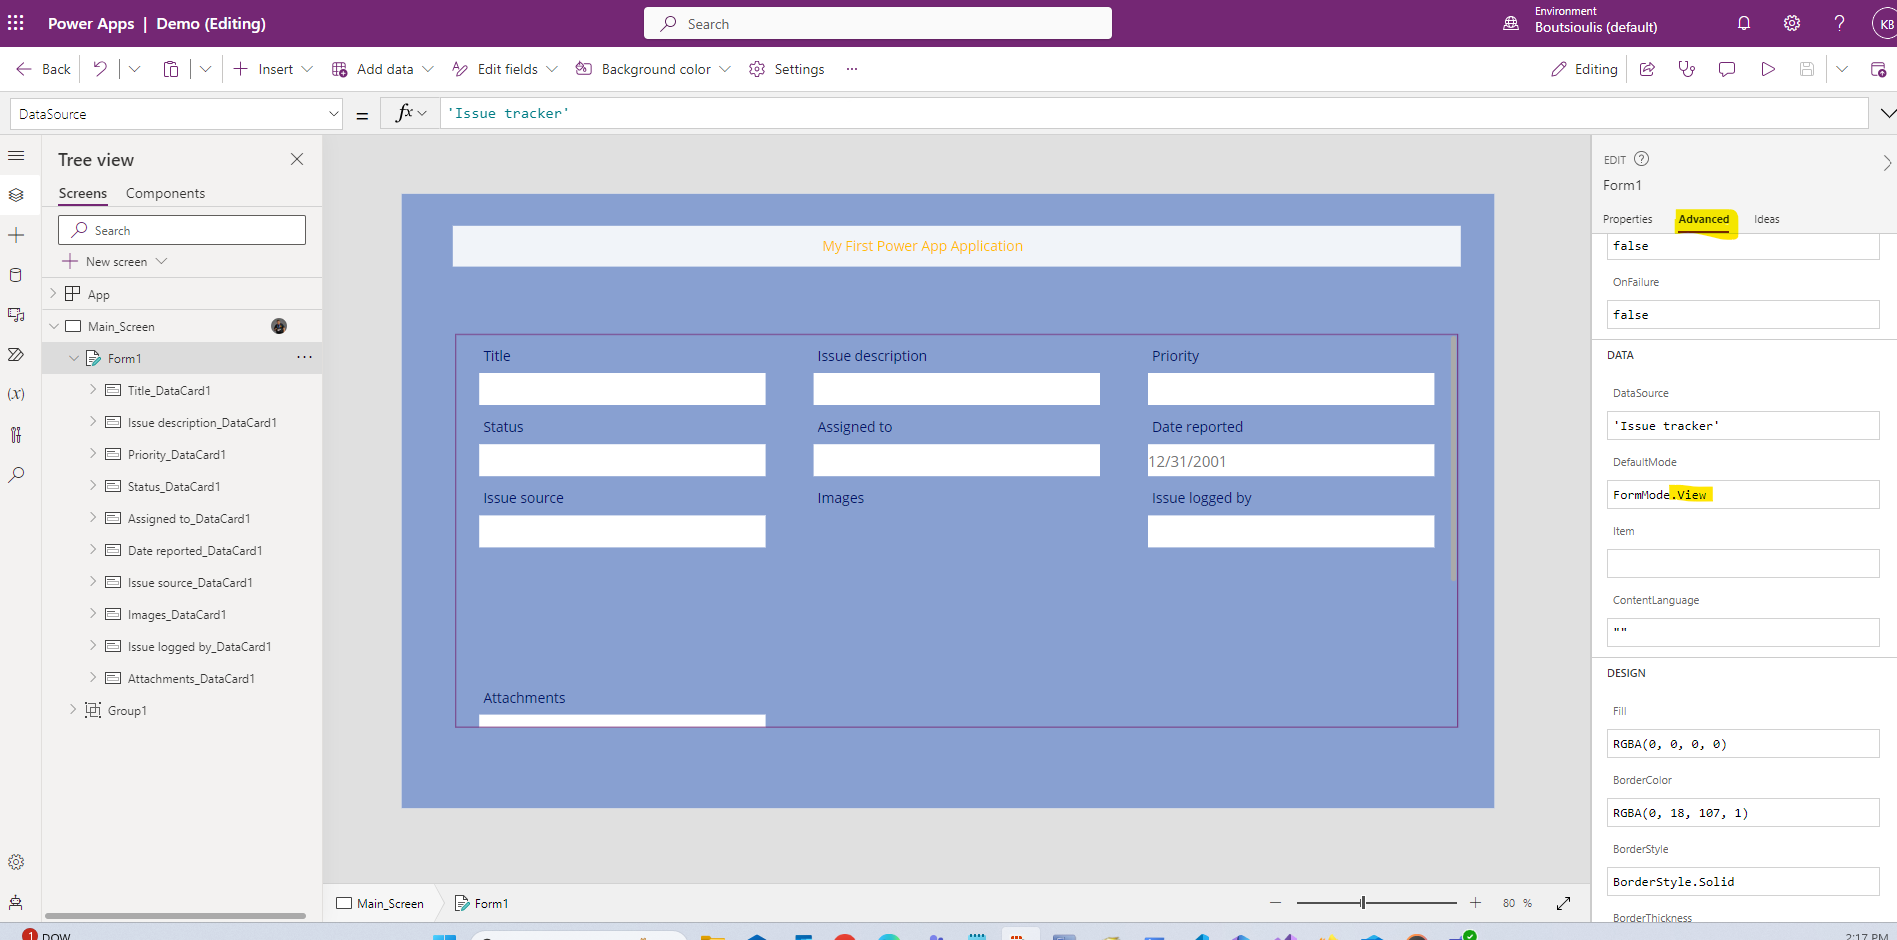
From the left side column we select form1 and so we have selected the form in its frame.In the right column below default mode we can select view so that the user is not given the opportunity to change the elements of the form that we will bring in a little from the SharePoint List
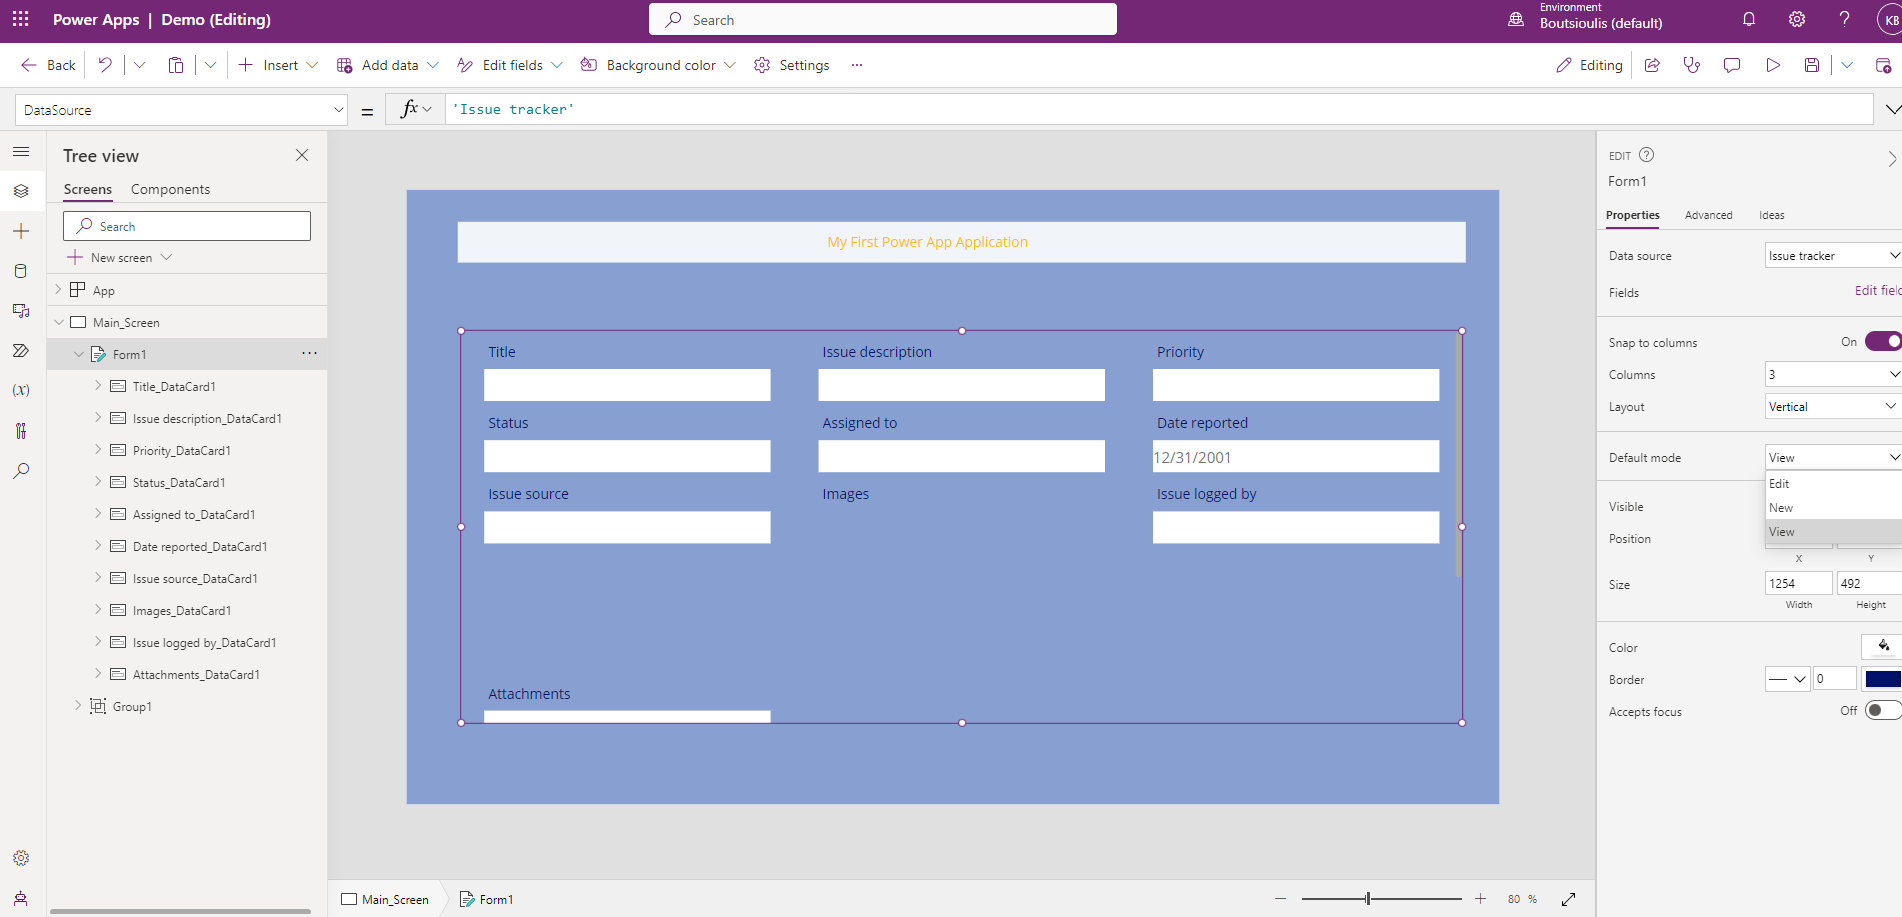
Alternatively we can from the advanced mode of the right column below the default mode change by code to view by typing FormMode.View
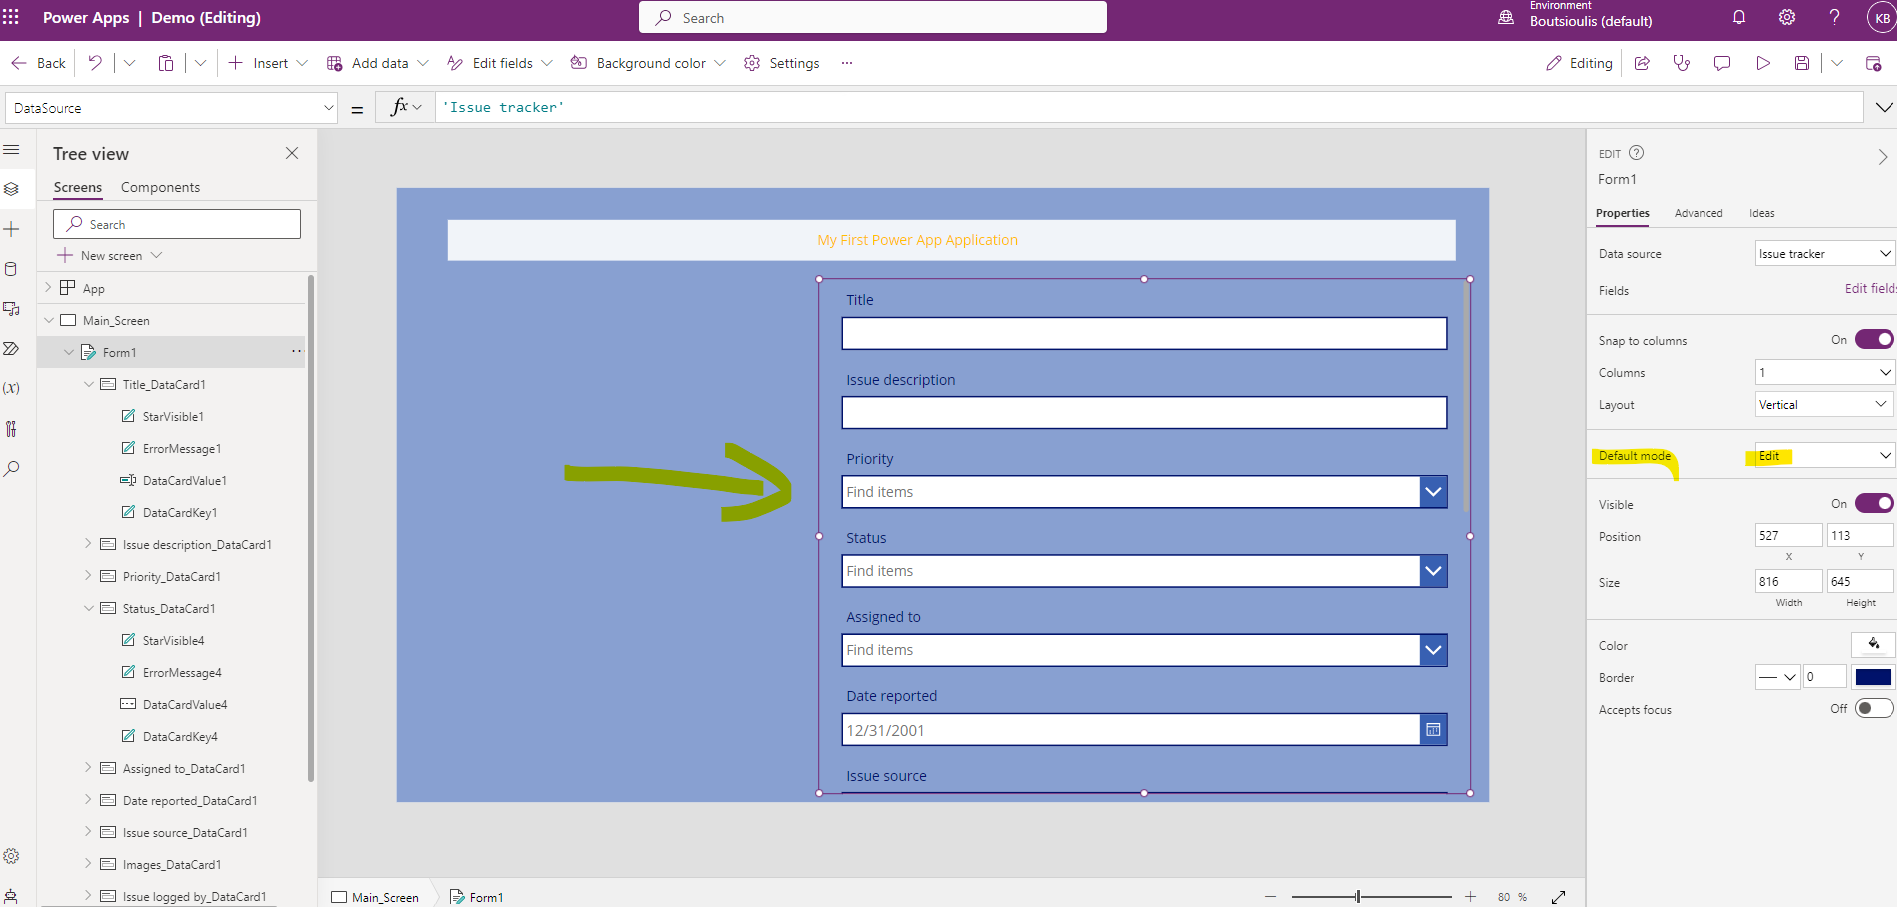
Then using the columns we can change the form format and make it a column or rearrange its fields. If we want the user to be able to edit the item in the list we have to change the default mode to edit
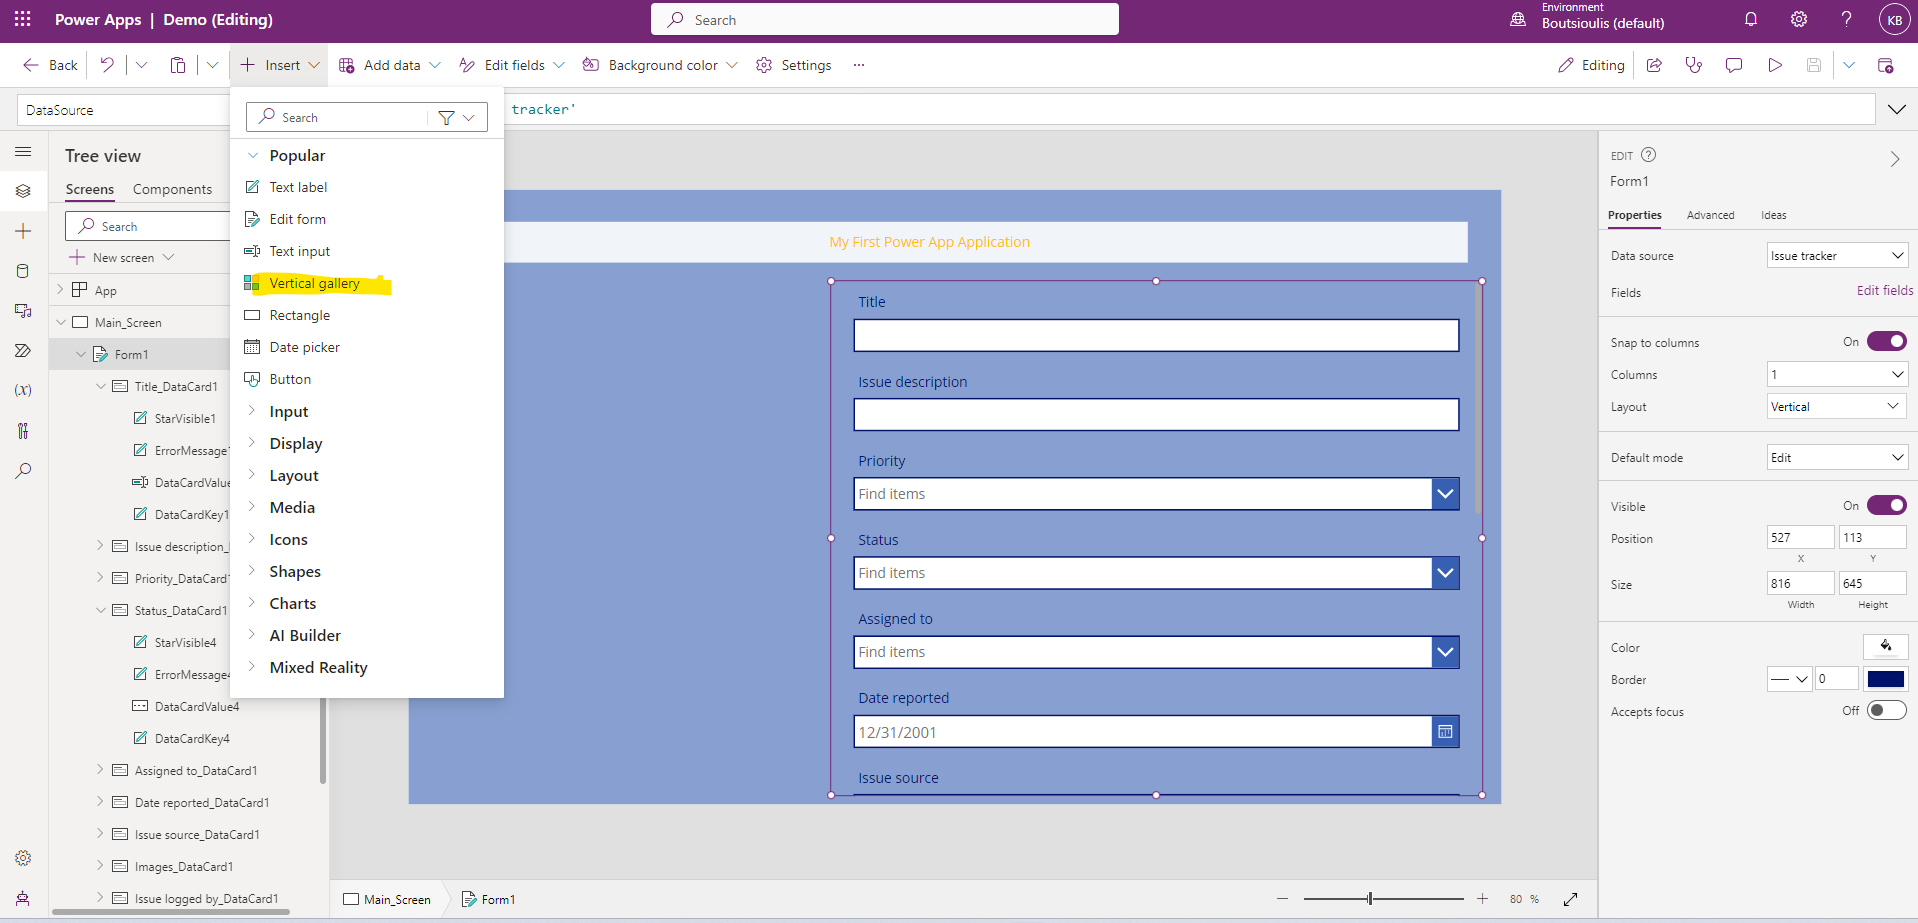
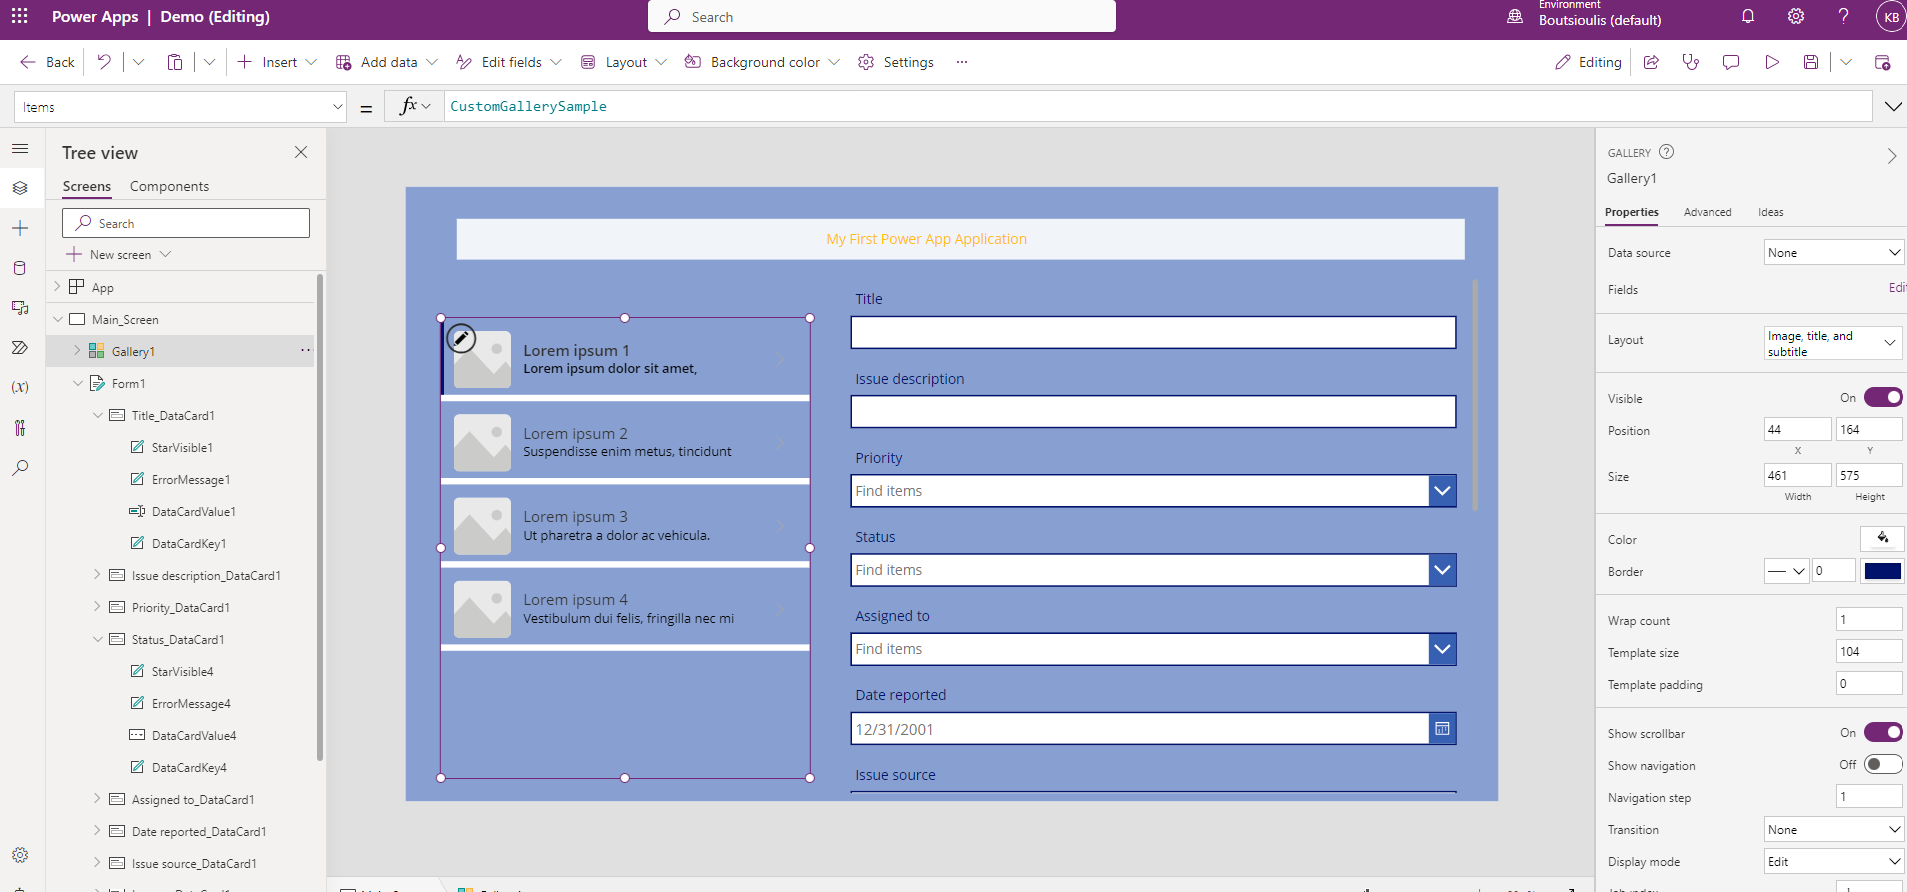
However we still can't see the items from our list . To navigate the items we need to add another item to the screen called Vertical Gallery
Now change the margins so that the frame is next to the edit form
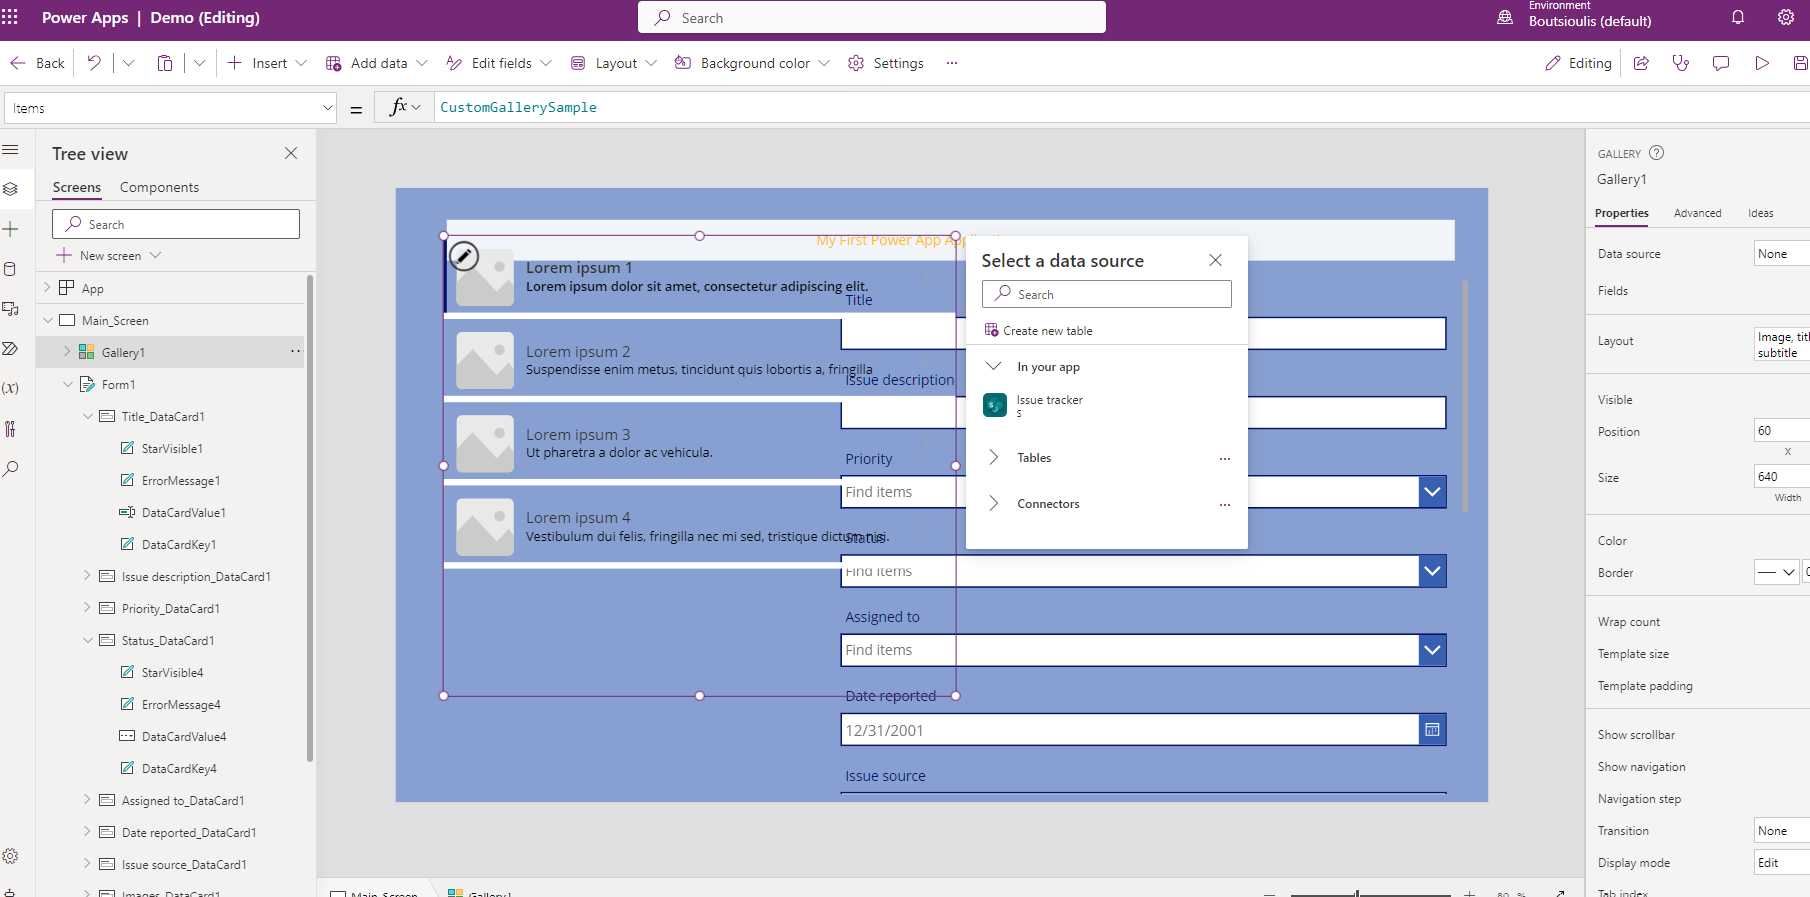
We haven't chosen a data source yet .We can either from the popup menu around the gallery frame or from the right column in the data source
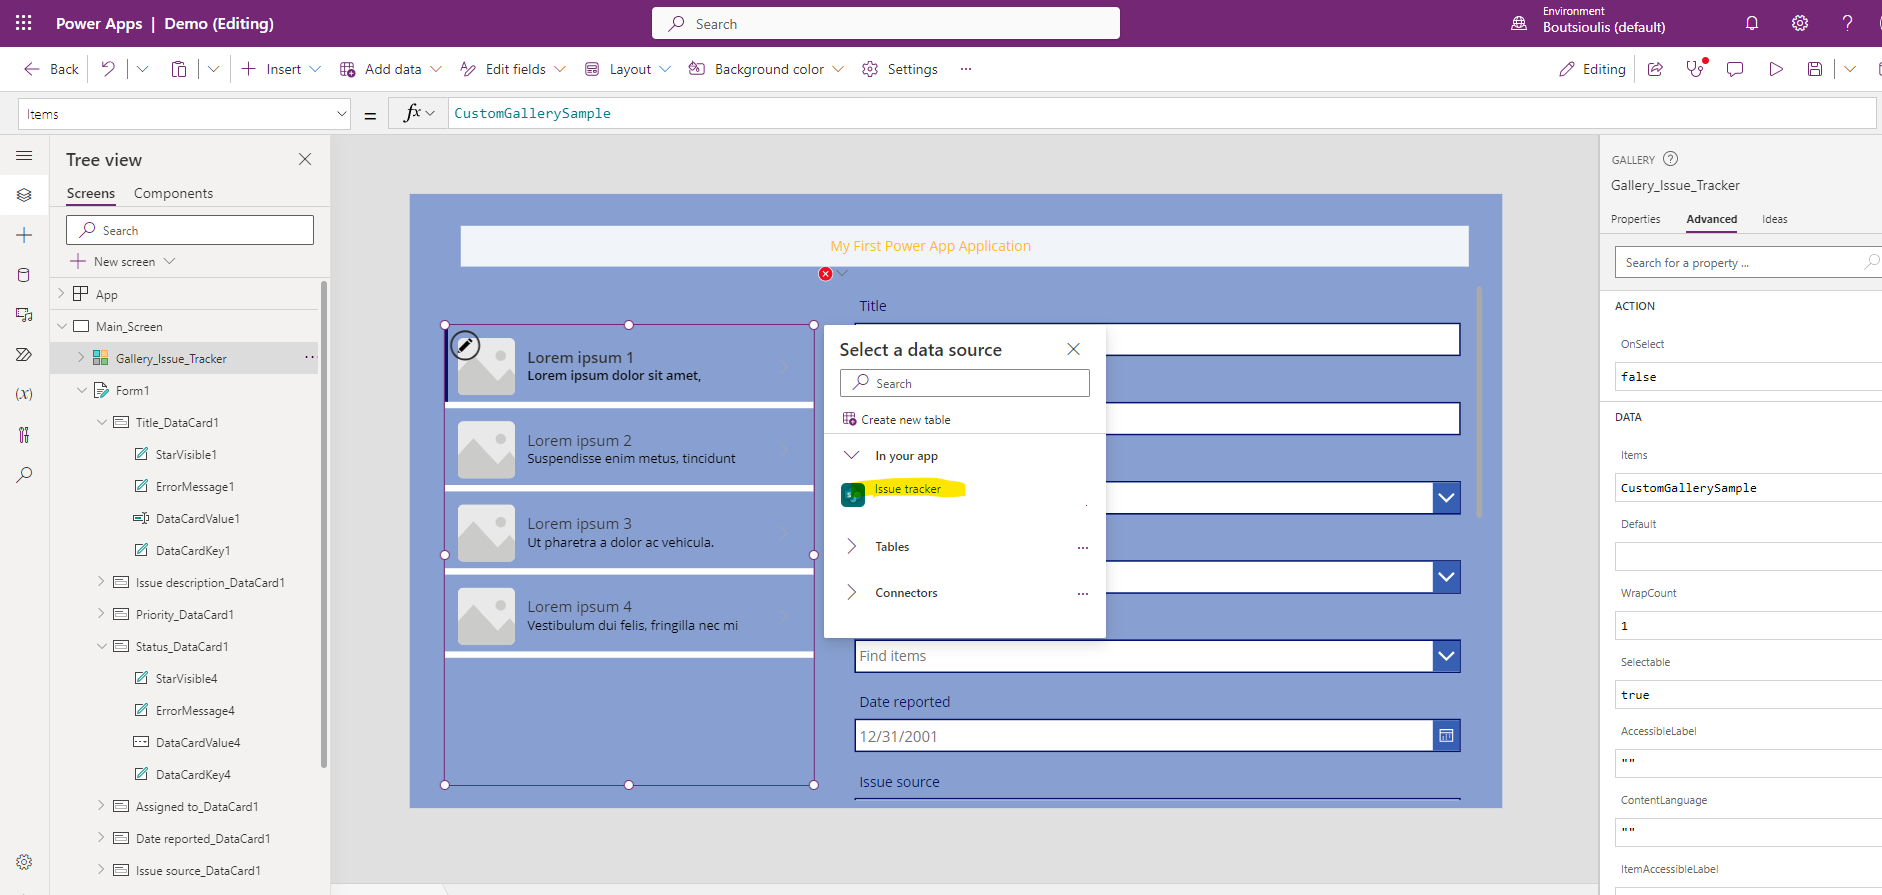
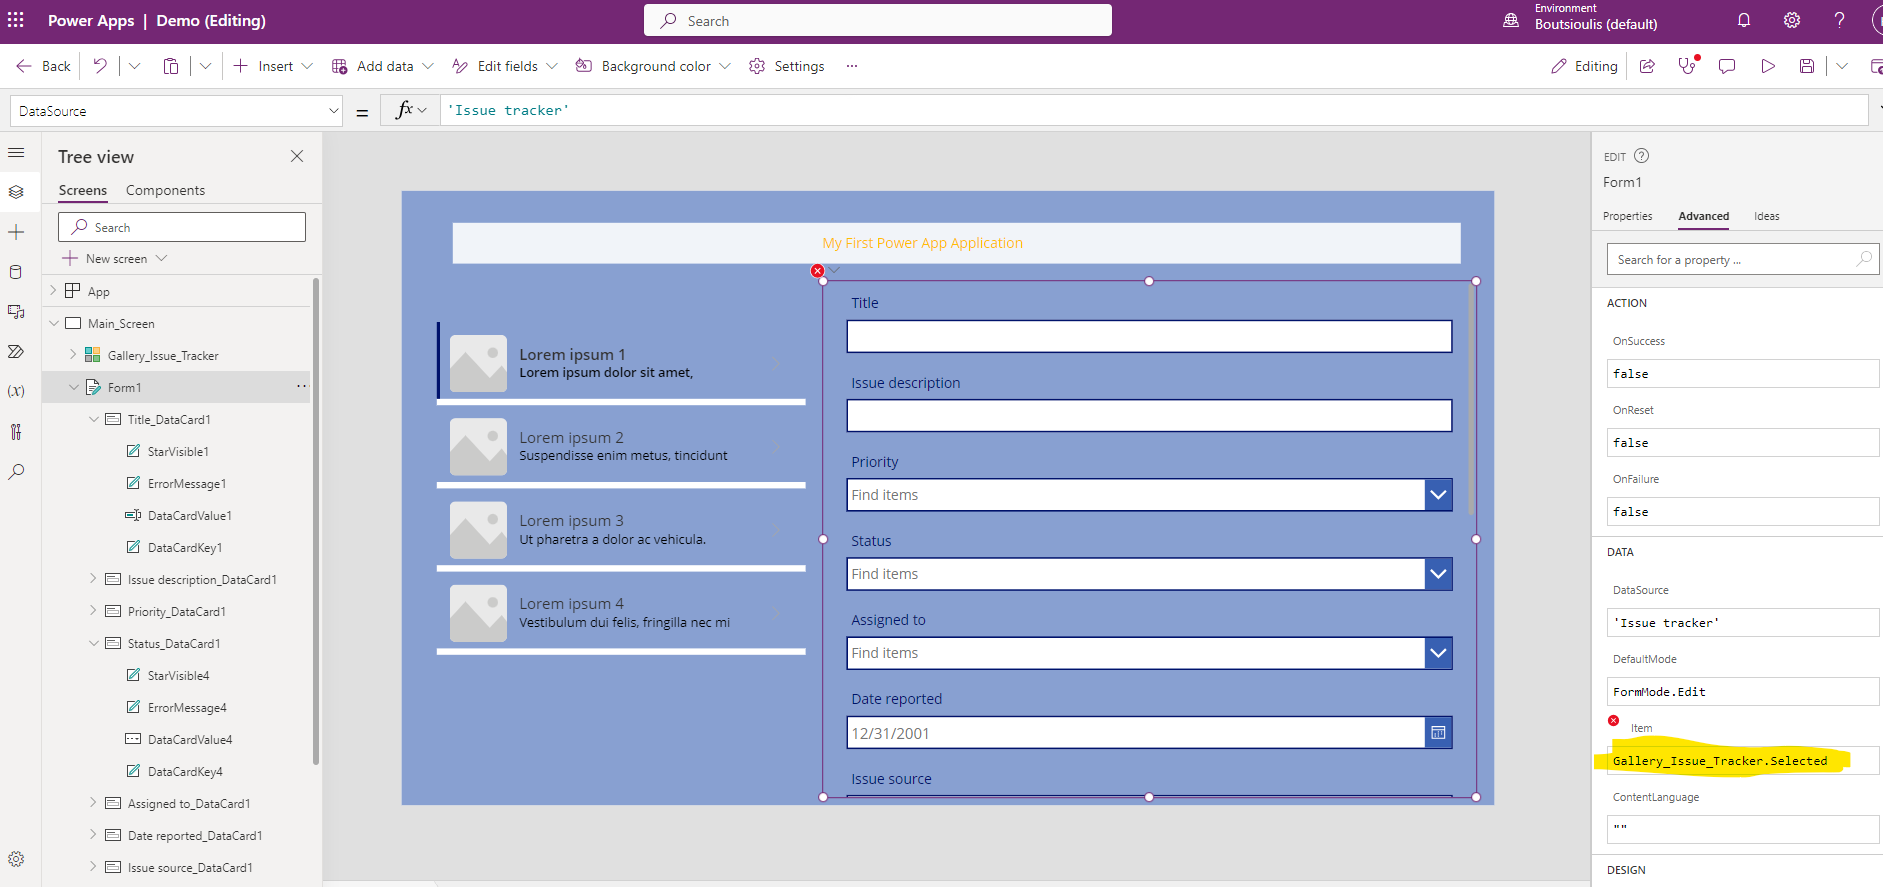
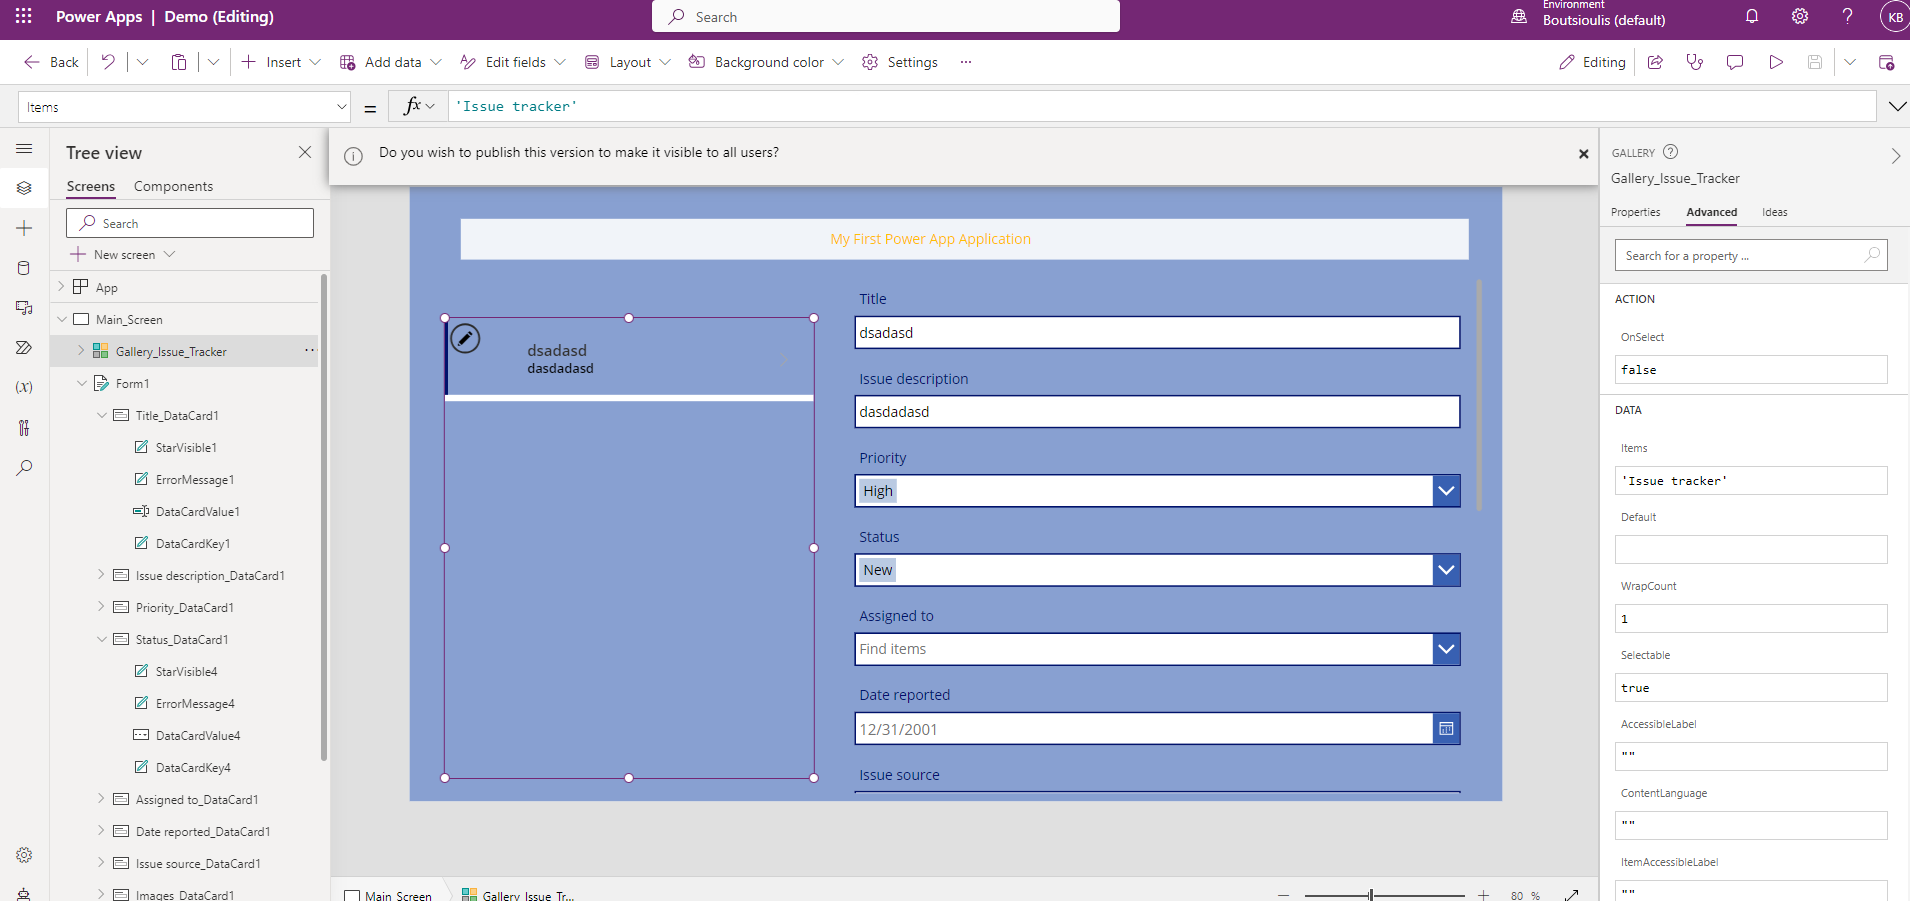
We will also need from advanced under Item to change the code with the name of the gallery and the property selected as shown below , Gallery_Issue_Tracker.Selected
Once everything has been done correctly you should now see the items in the list in the gallery
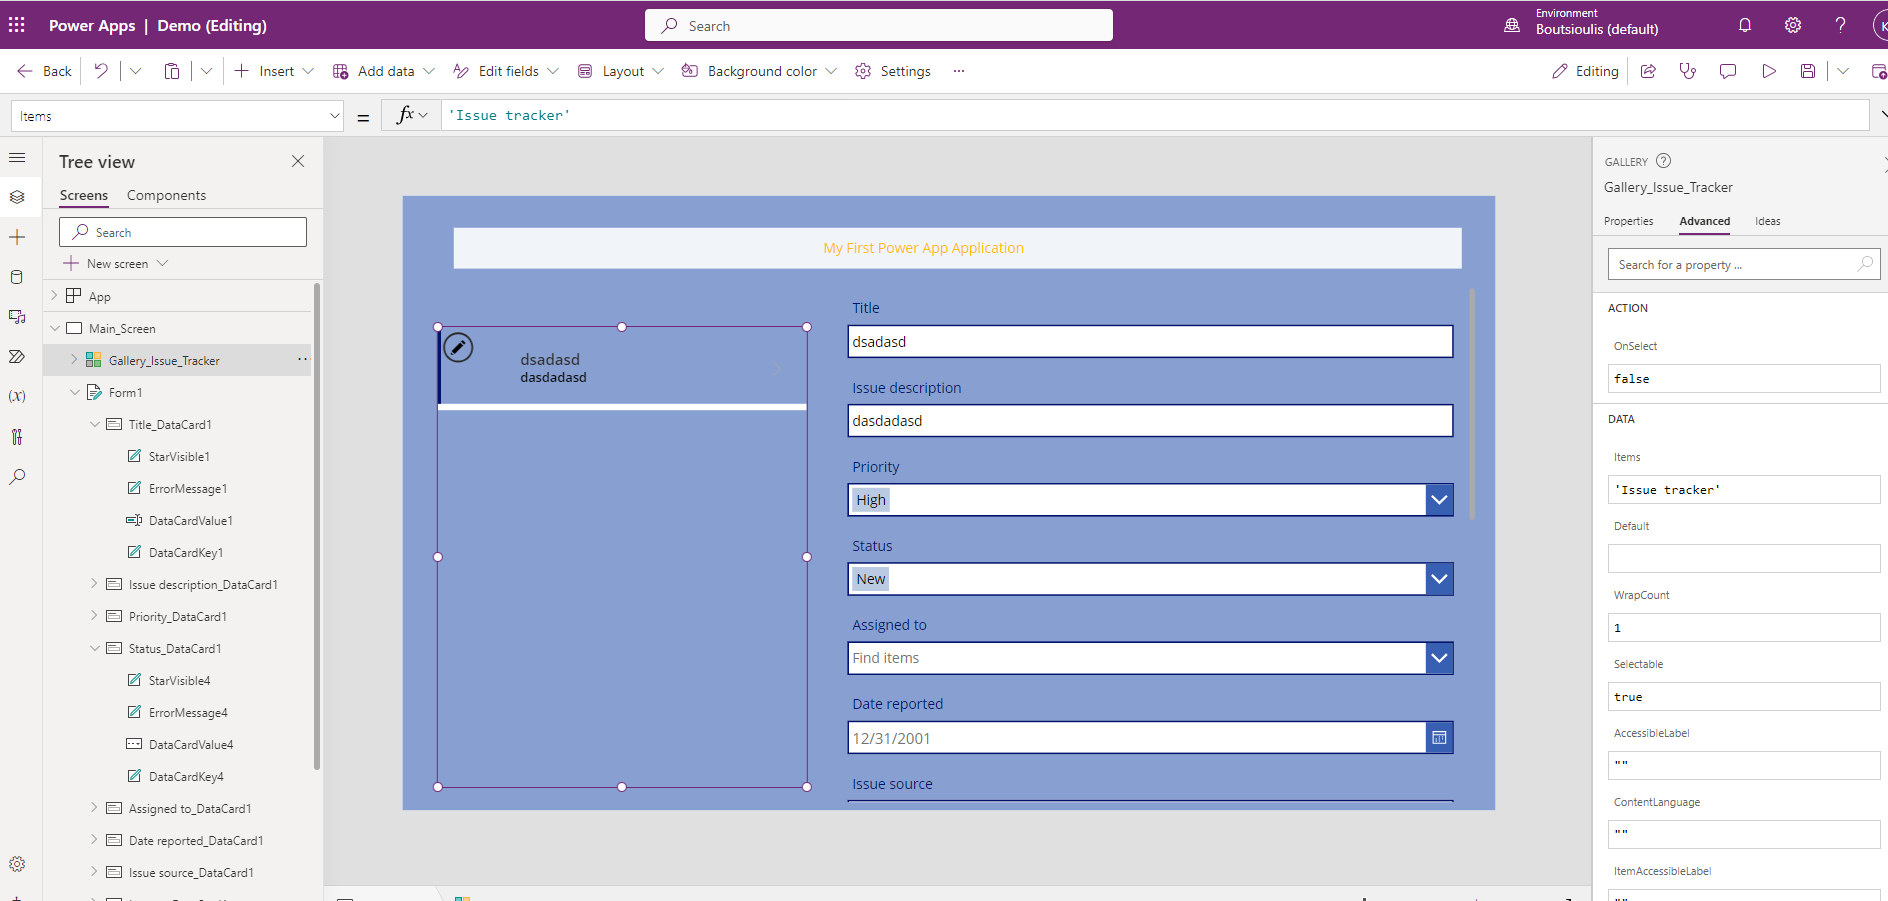
This way we have now retrieved all the items of a list in a power app
and even we can either edit it through the app and let's see with a play how it will appear to the user
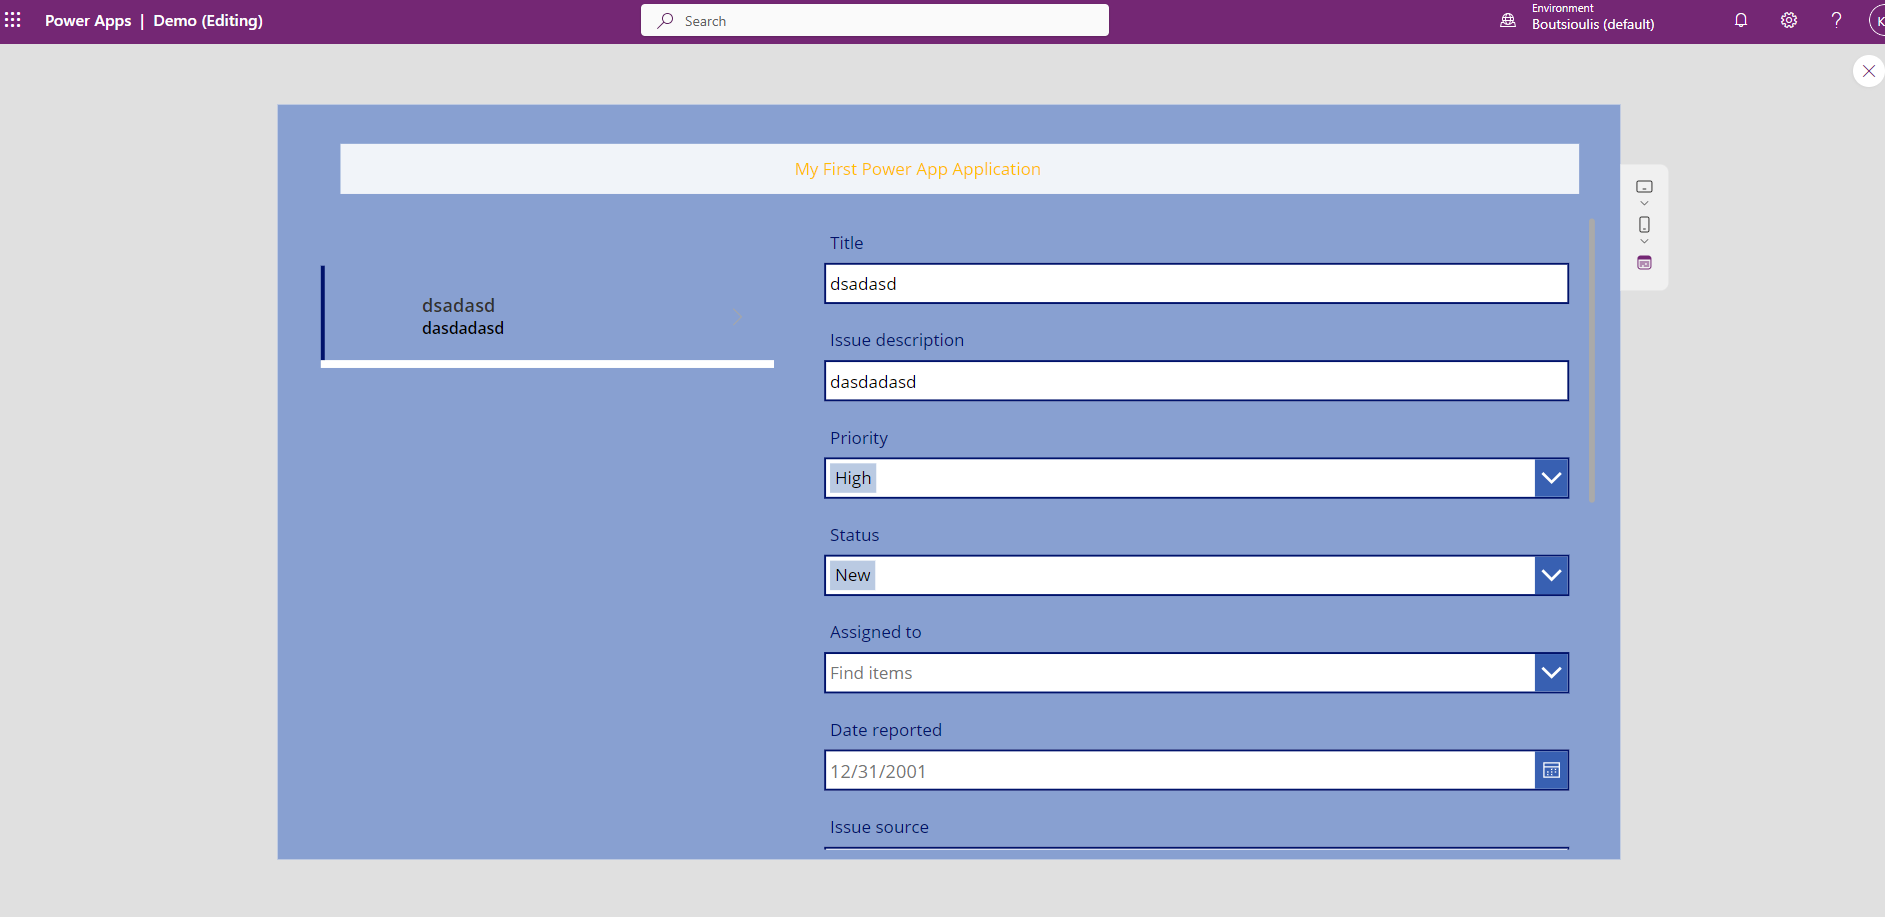
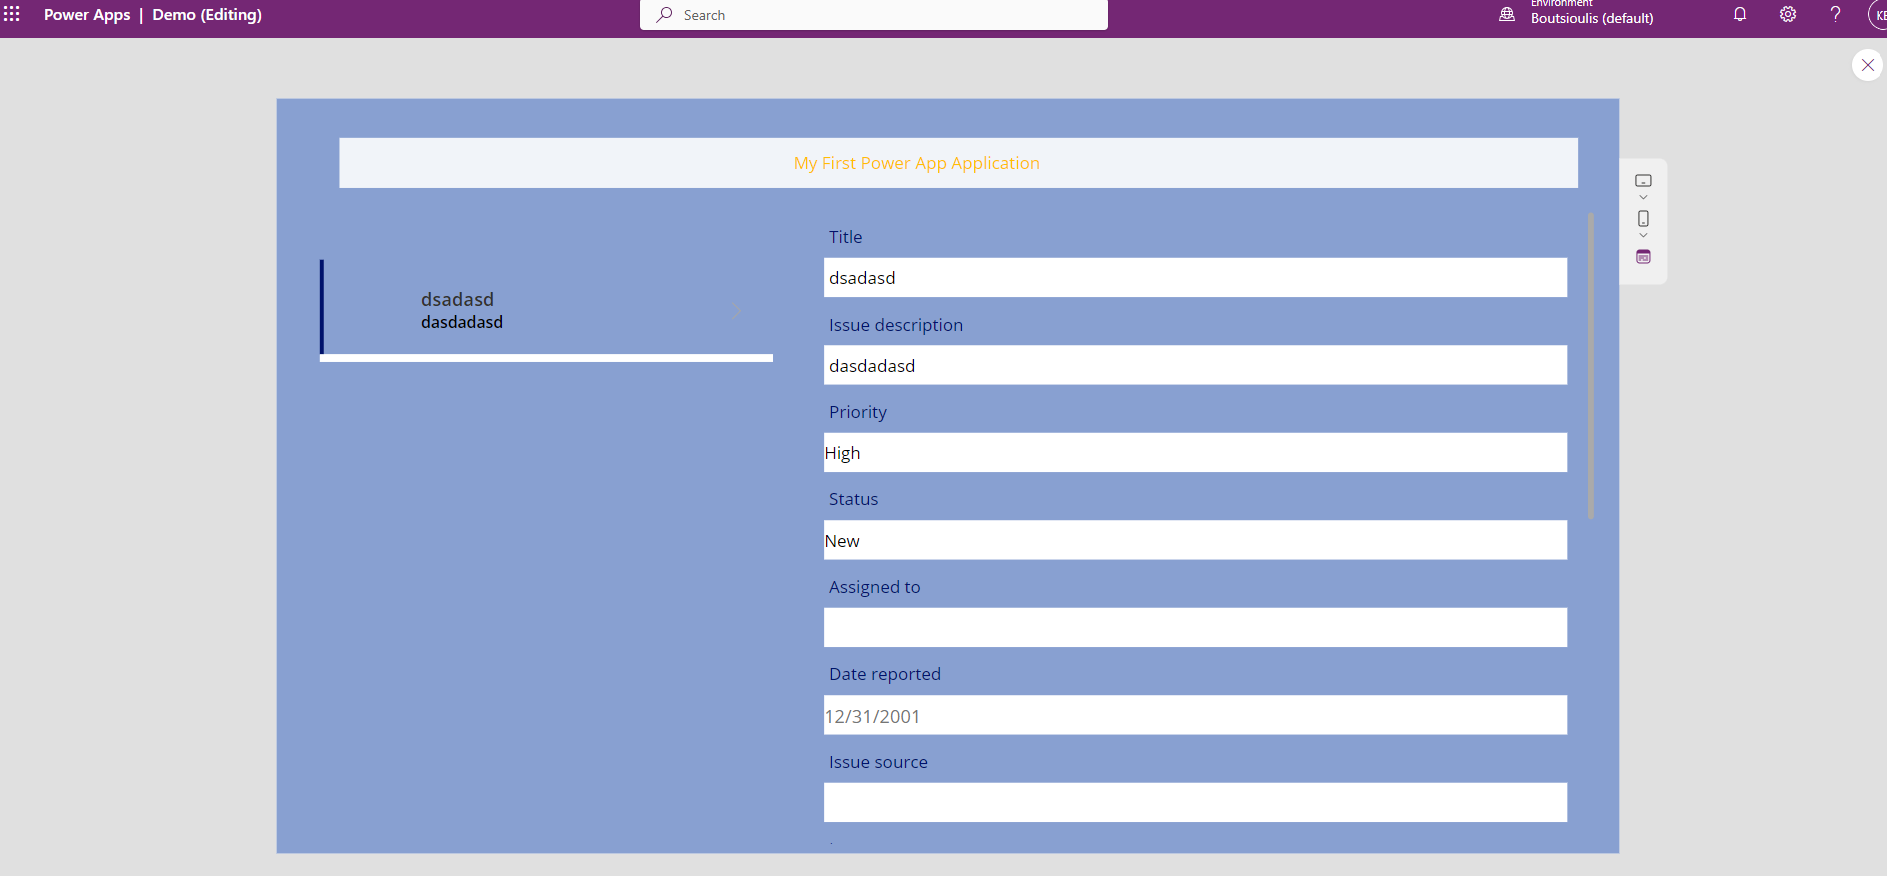
Also as we said in the beginning if we change the default mode to view we can simply show the end user the items and their details

And finally the user will see the following picture
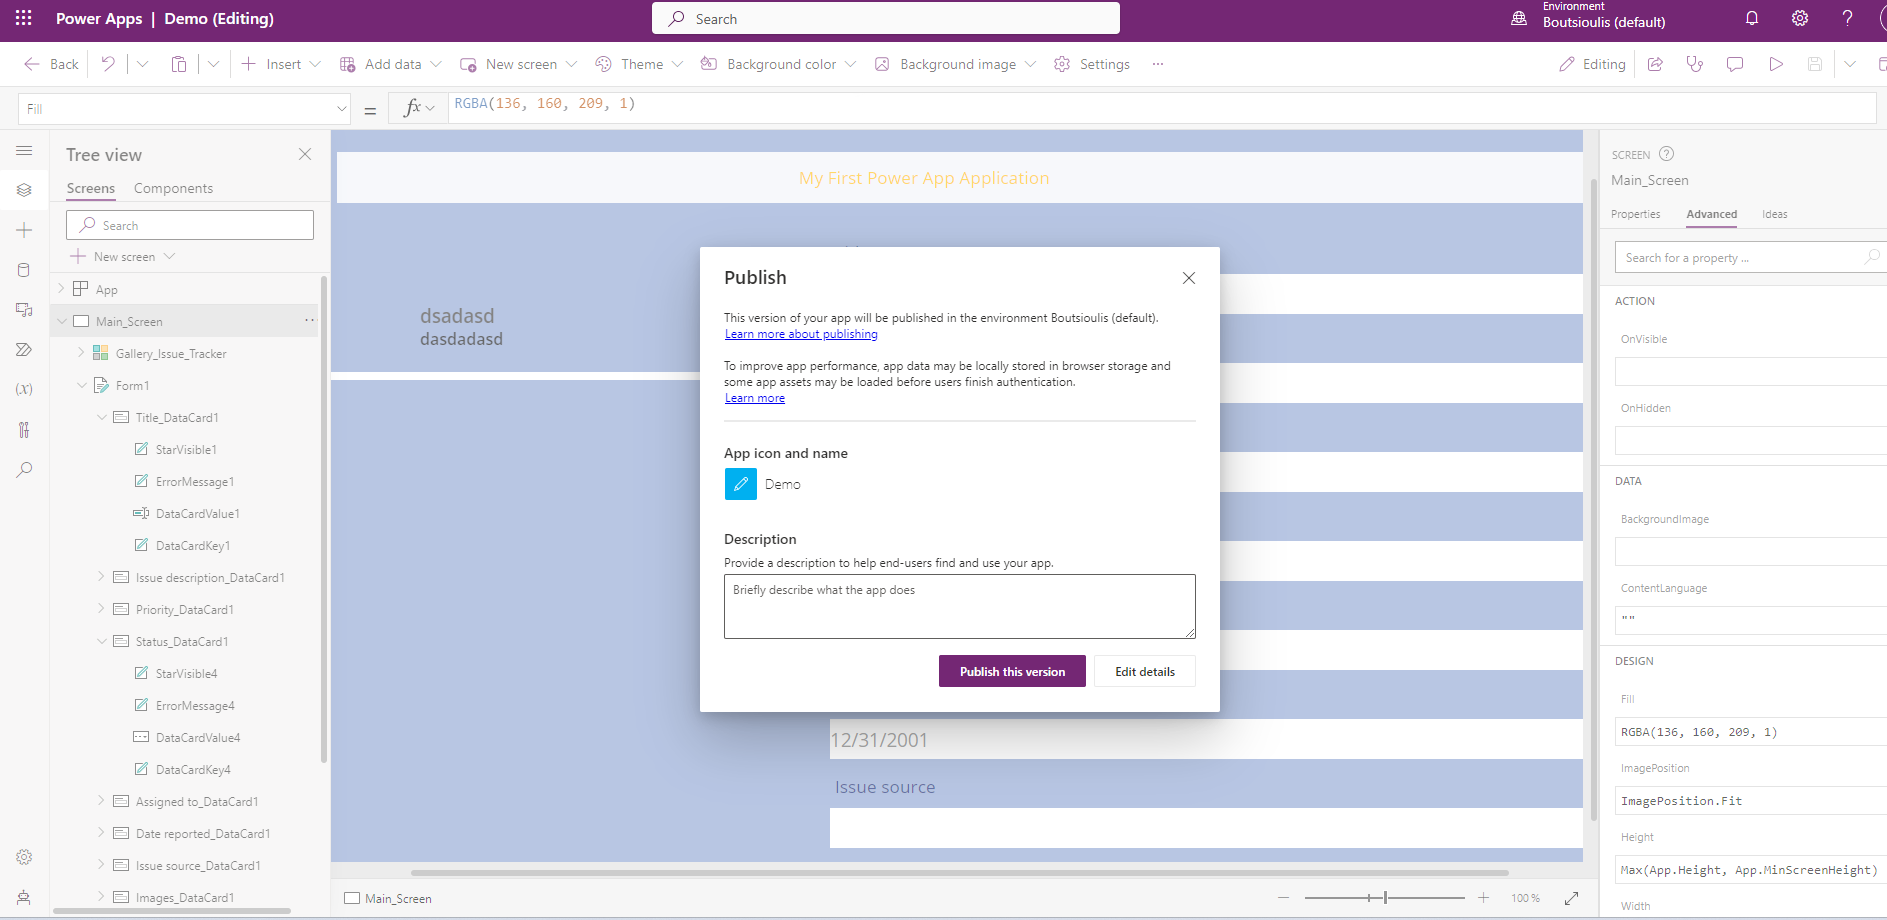
We just need to publish our application to make all the changes visible to the users who have access to this application
In a next article I will show how we can make changes inside the application and they will update the Items inside the SharePoint list
#PowerApps #technology #microsoft #digitaltransformation #cloud #mvpbuzz #m365Visit Archives below to find more articles about Microsoft technologies on Modern Workplace