
Free Material
Find hereMore than 150 Articles about Microsoft Technologies on Modern Workplace
Official Site
Microsoft Most Valuable Professional M365 Apps & Services
Microsoft Most Valuable Professional Business Applications
Consultant & Sr Cloud Solution Architect Modern Wokrplace
Find hereMore than 150 Articles about Microsoft Technologies on Modern Workplace
25 March 2024
In today's article, we will see how to create a list and custom columns in that list on SharePoint using HTTP POST and Power Automate.
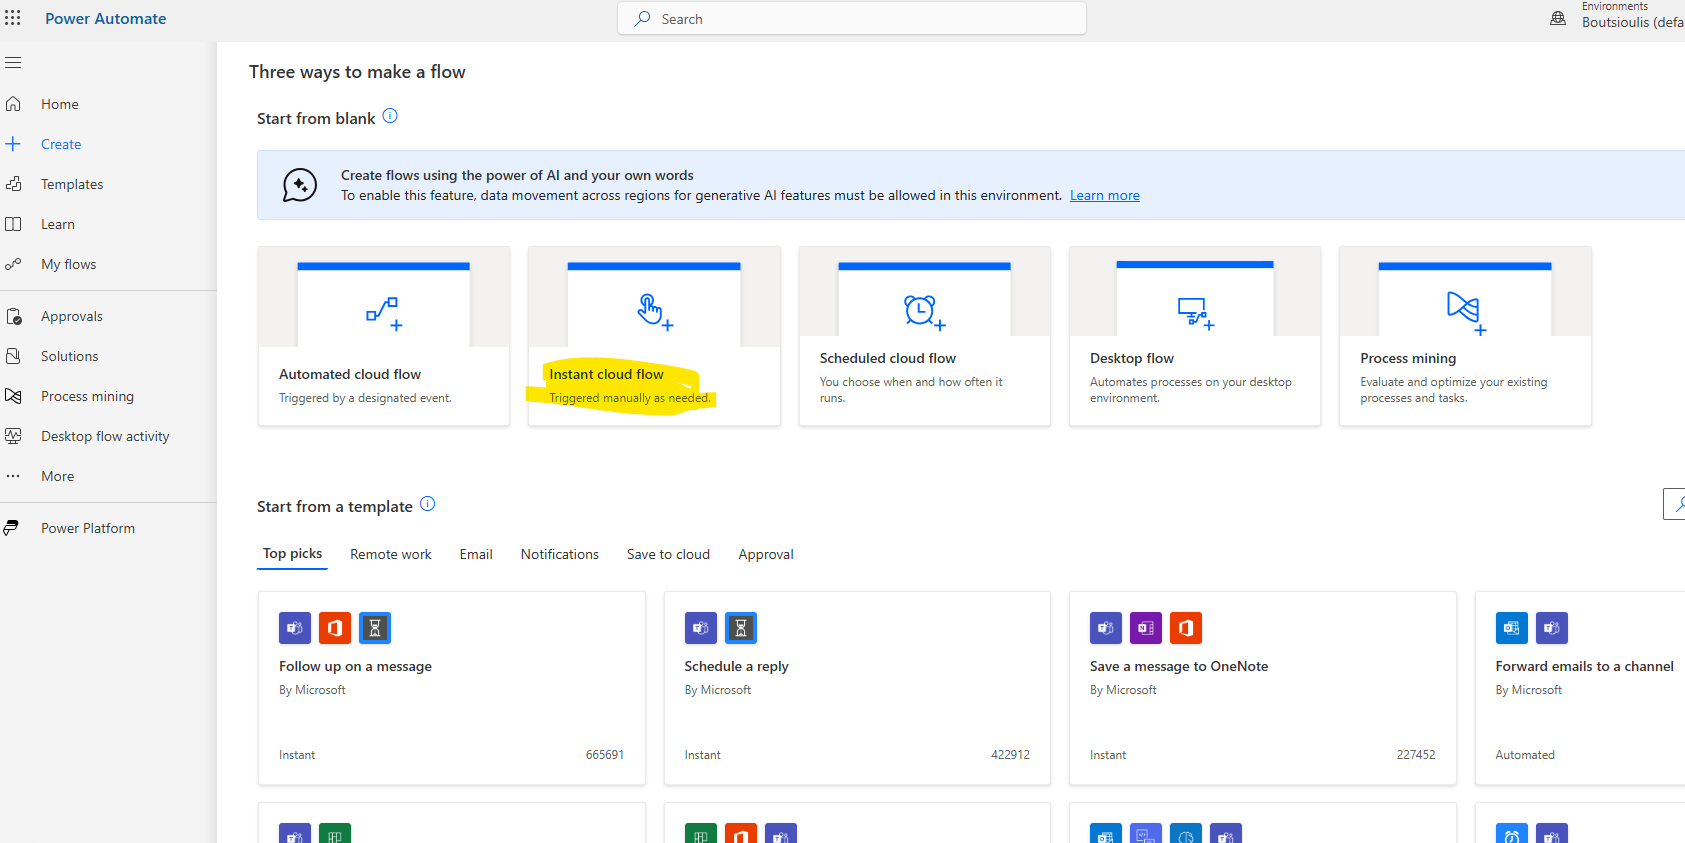
First, you need to have an active M365 subscription and navigate to the Power Automate homepage. Then, select "Create" from the left menu and choose "Instant cloud flow.".
Select the first action "Manually trigger a flow" and give your flow a name.
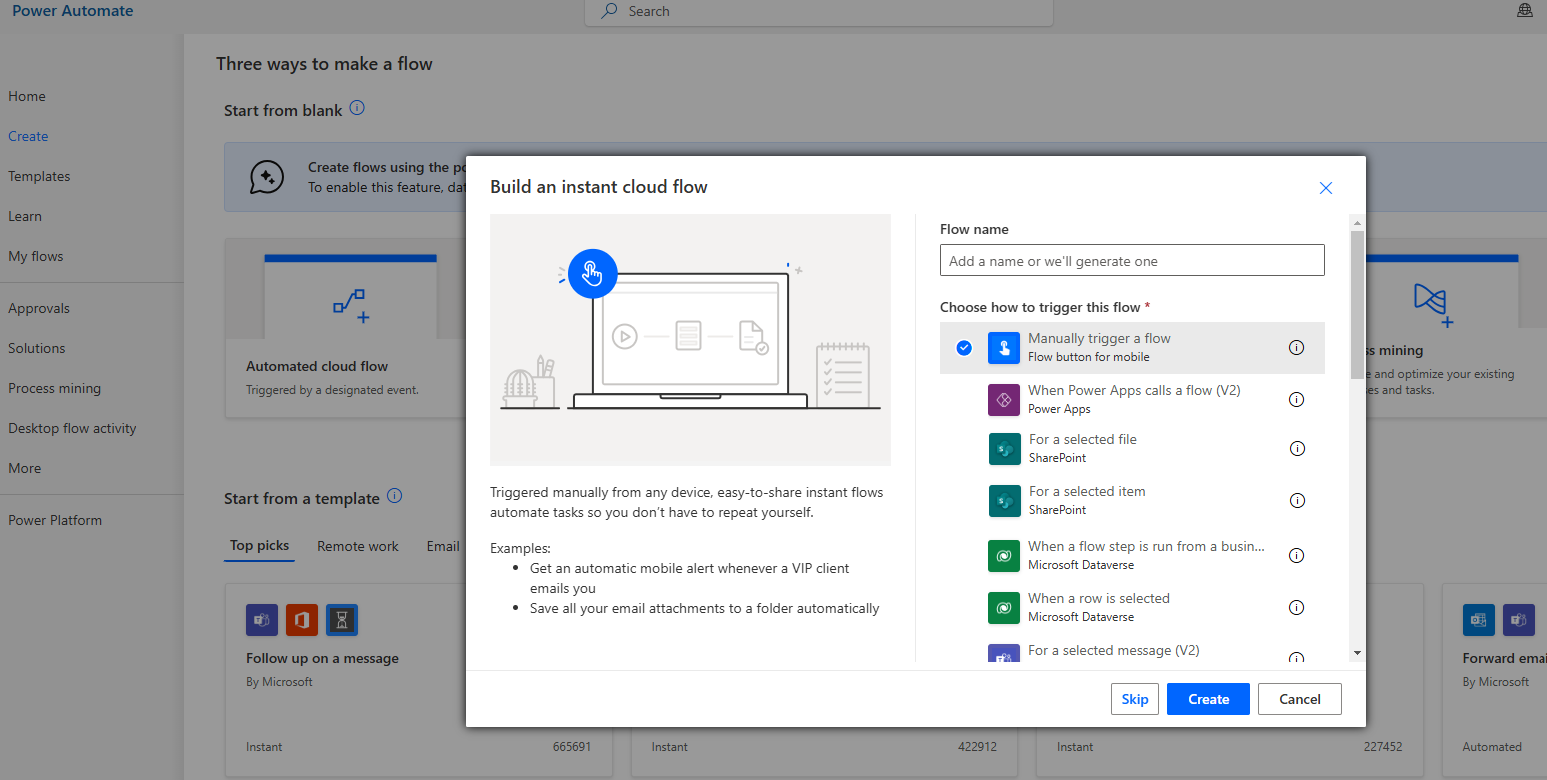
The first action is "Manually trigger flow," and you select the parameter that will trigger your flow.
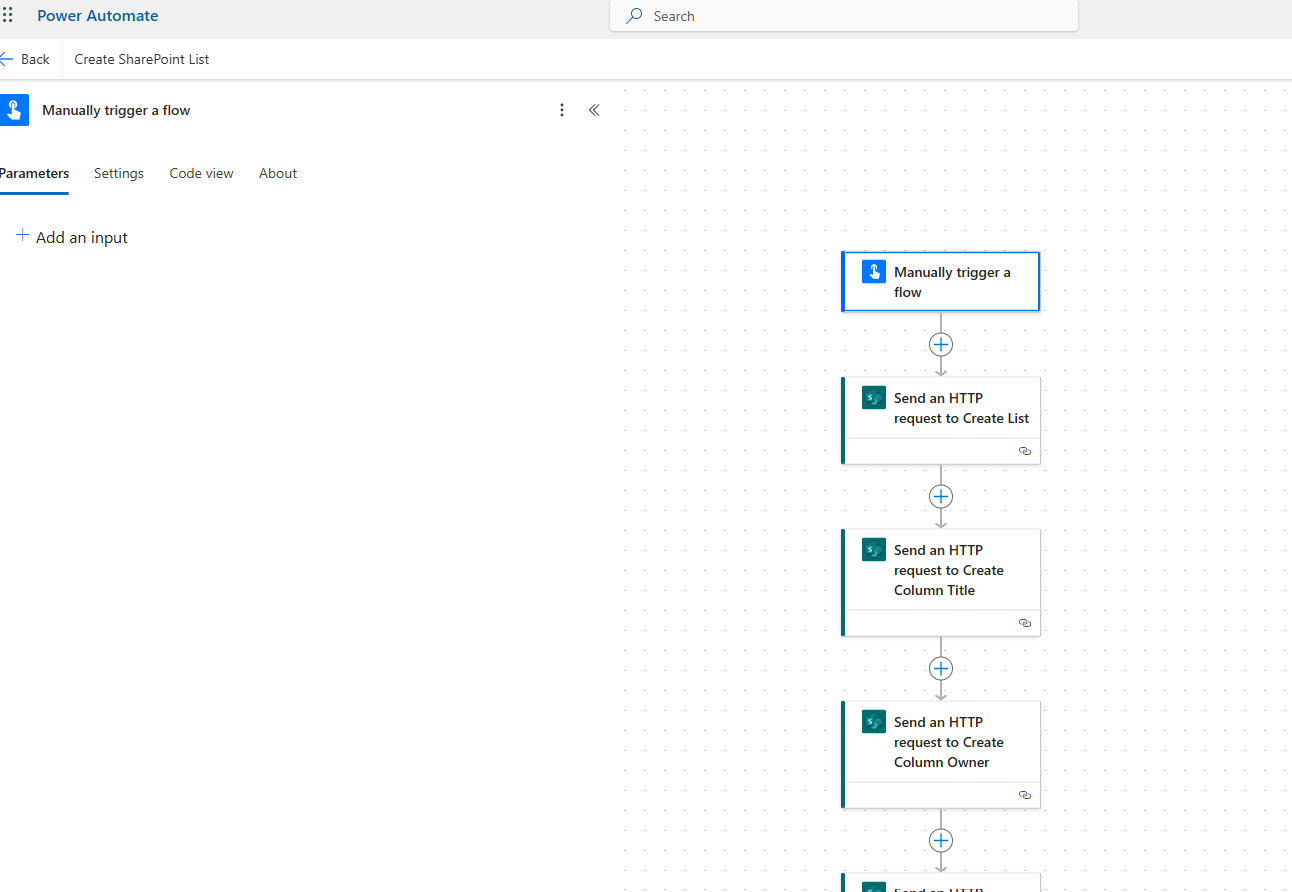
Next, select "Send HTTP request to create list" to create your list. Choose the site that will host the list and set the method to POST. In the URI field, enter _api/web/lists. In the headers field, enter Accept: application/json;odata=verbose and Content-Type: application/json;odata=verbose. In the body, enter:
    {
    "__metadata": { "type": "SP.List" },
    "AllowContentTypes": true,
    "BaseTemplate": 100,
    "ContentTypeEnabled": true,
    "Description": "My List Description",
    "Title": "Template List 03"
    }
Then, create a new HTTP request to create the custom columns. If the automate does not execute correctly, you may need to split the automate into two parts: one for creating the list and one for creating custom columns, or alternatively, add a delay between the HTTP requests to give SharePoint time to create the list first and then create the custom columns.
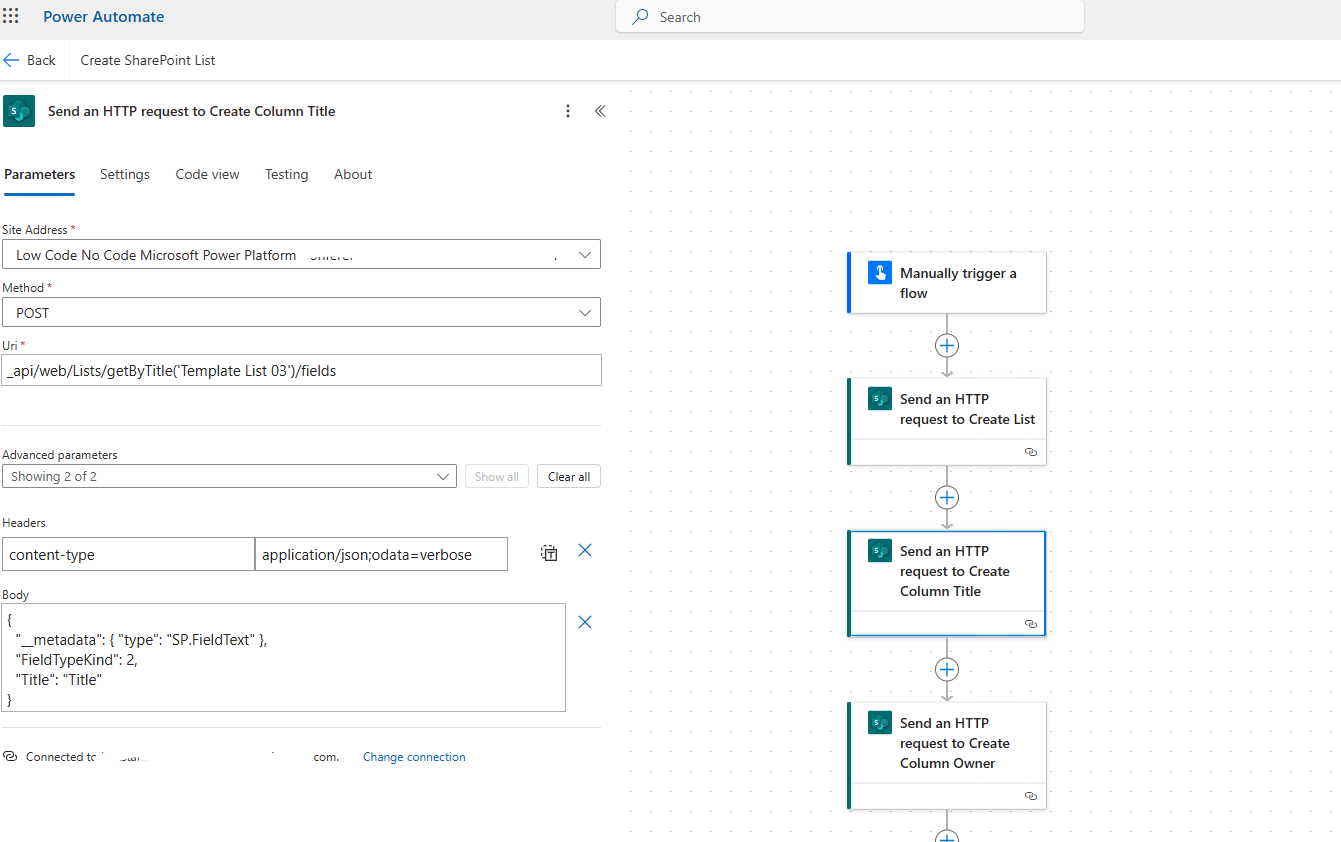
To create the custom columns, enter the site address that will host your list. The method will be POST, and in the URI field, enter _api/web/List/getByTitle('Template List 03')/fields. In the headers field, enter content-type:application/json;odata=verbose. Finally, in the body of the request, enter:
    {
    "__metadata": { "type": "SP.List" },
    "FieldTypeKind": 2,
    "Title": "Title"
    }
Where FieldTypeKind = 2 corresponds to the string data type.
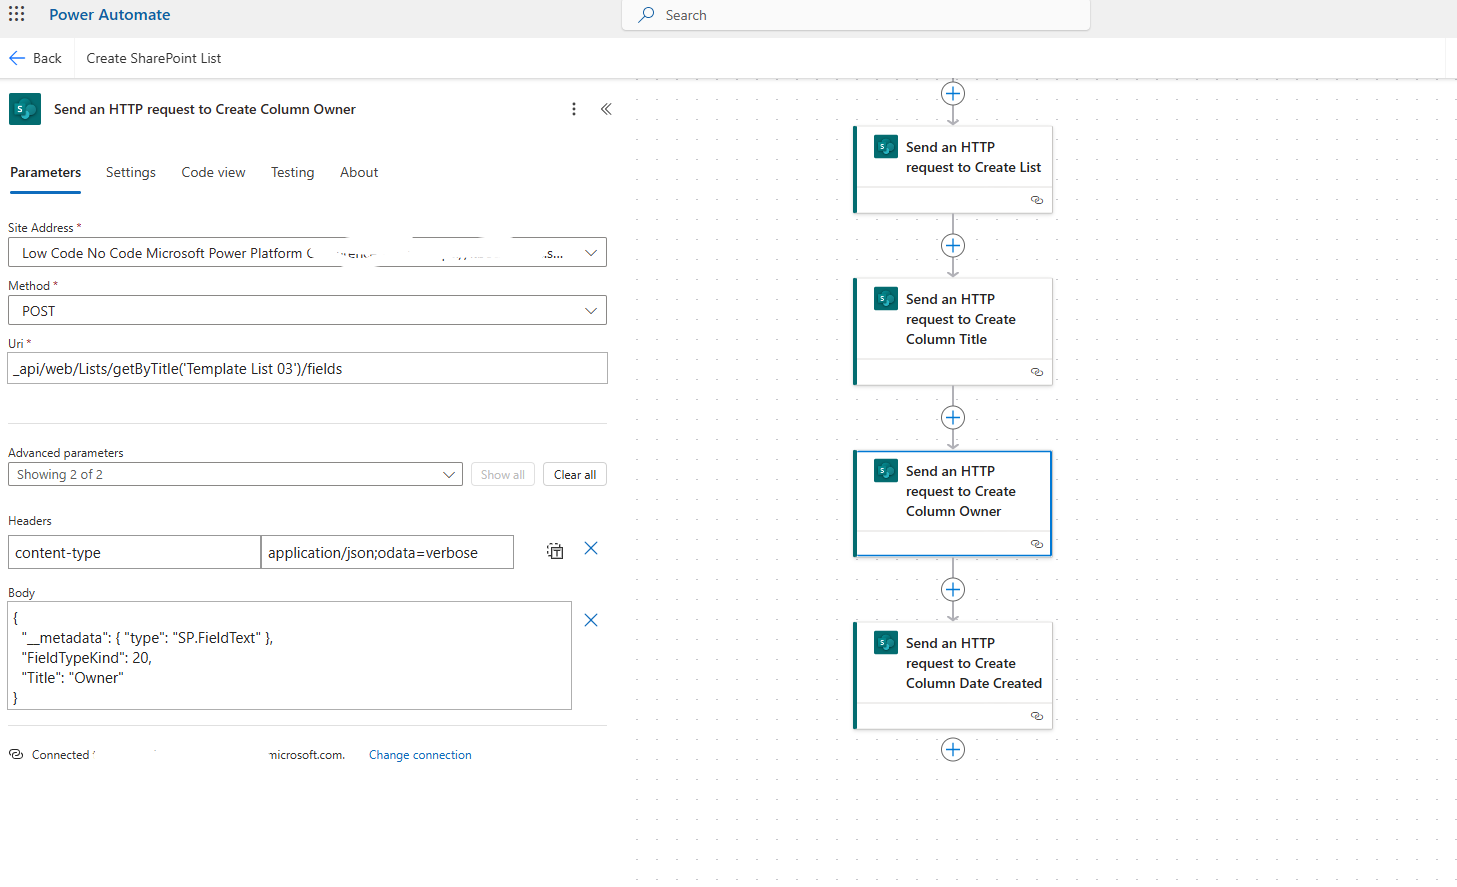
In the next action, select HTTP request again and follow the same process as above, but change the details of the new column:
    {
    "__metadata": { "type": "SP.List" },
    "FieldTypeKind": 20,
    "Title": "Owner"
    }
Where FieldTypeKind = 20 corresponds to the people data type.
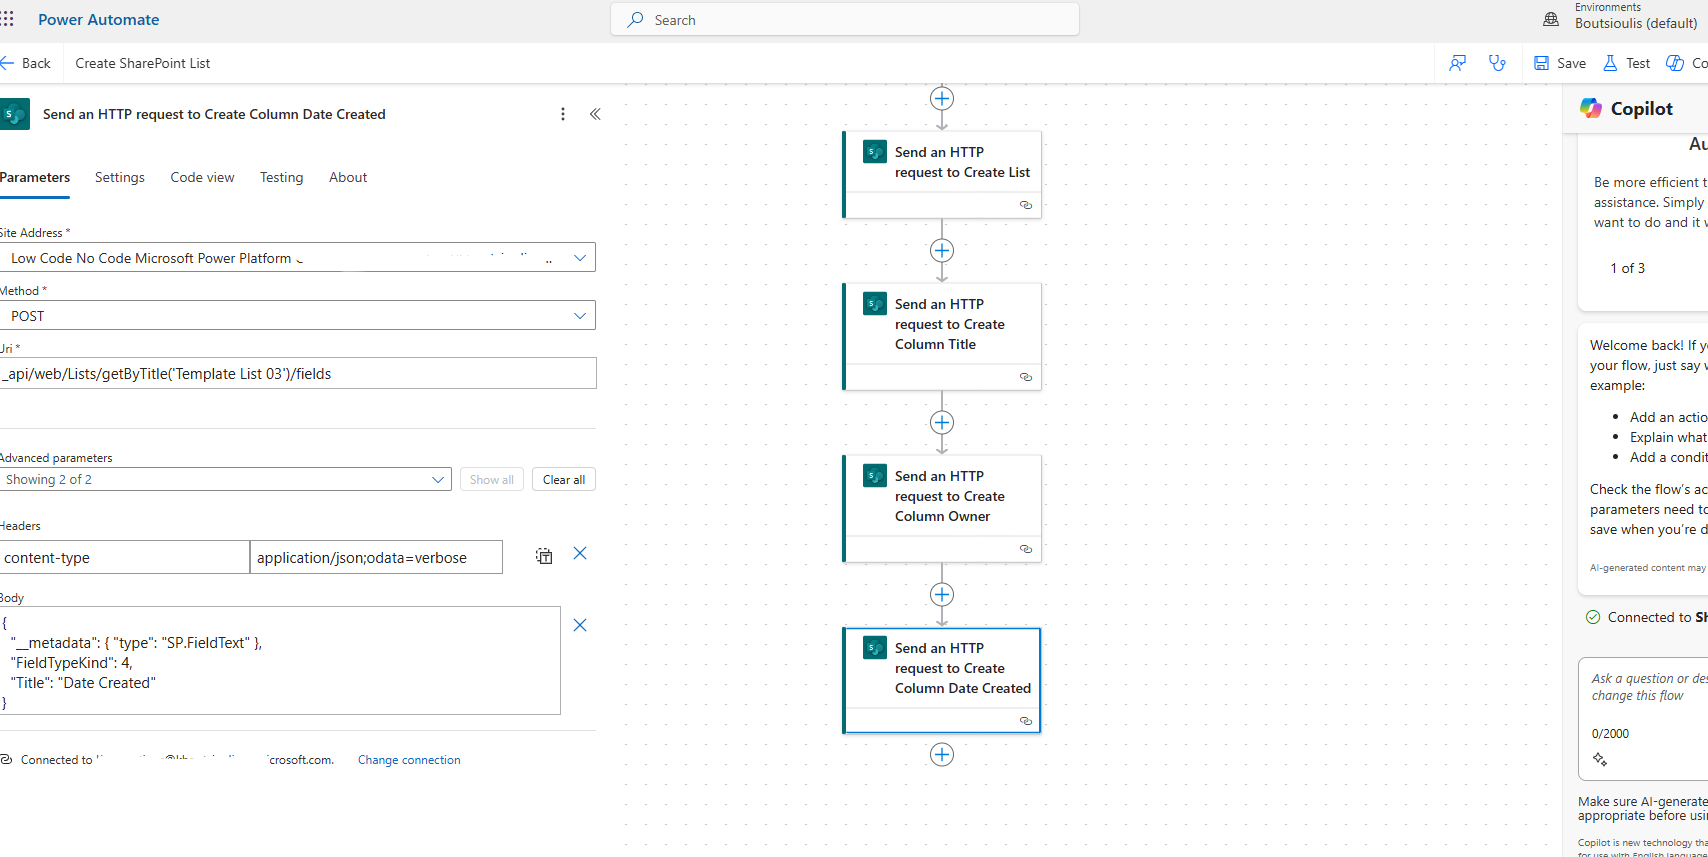
In the next action, select HTTP request again and follow the same process as above, but change the details of the new column:
    {
    "__metadata": { "type": "SP.List" },
    "FieldTypeKind": 4,
    "Title": "Date Created"
    }
Where FieldTypeKind = 4 corresponds to the date data type.
Finally, you need to save and save the changes to your automate and then perform a manual test to ensure that the automate runs correctly without any problems. As you can see, the automate successfully executes and creates a list with all the custom columns we want.
#ModerWork
#M365_Apps_Services
#BusinessApps
#SharePoint
#PowerAutomate
#technology
#microsoft
#digitaltransformation
#cloud
#mvpbuzz
#m365
Visit Archives below to find more articles about Microsoft technologies on Modern Workplace