
Free Material
Find hereMore than 150 Articles about Microsoft Technologies on Modern Workplace
Official Site
Microsoft Most Valuable Professional M365 Apps & Services
Microsoft Most Valuable Professional Business Applications
Consultant & Sr Cloud Solution Architect Modern Wokrplace
Find hereMore than 150 Articles about Microsoft Technologies on Modern Workplace
26 July 2024
In today's article, we will see how to create a complicated request approval from everyone for a selected item using Power Automate.
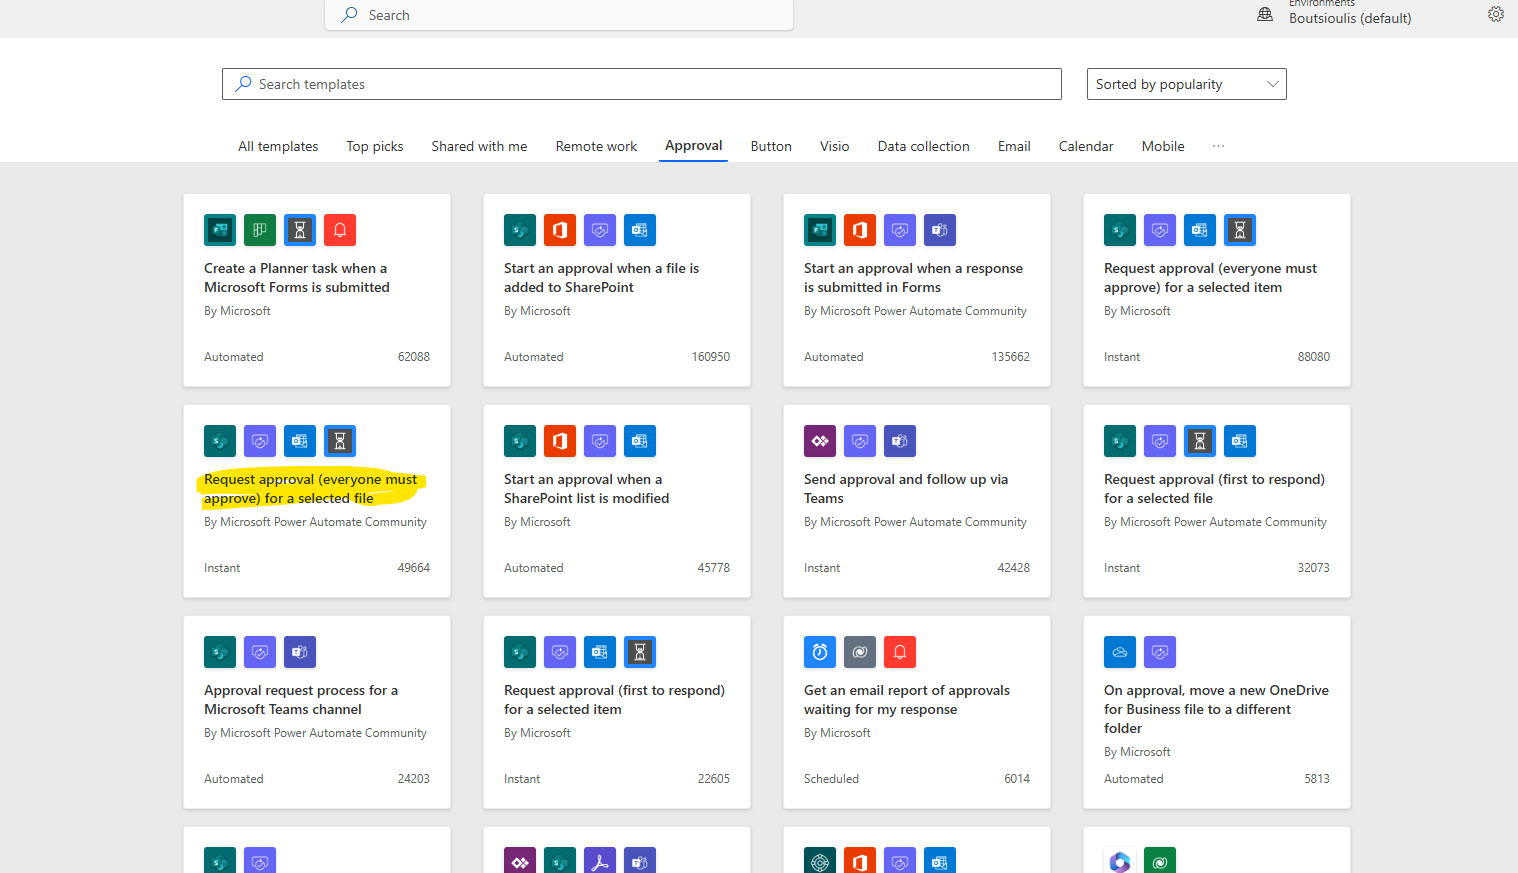
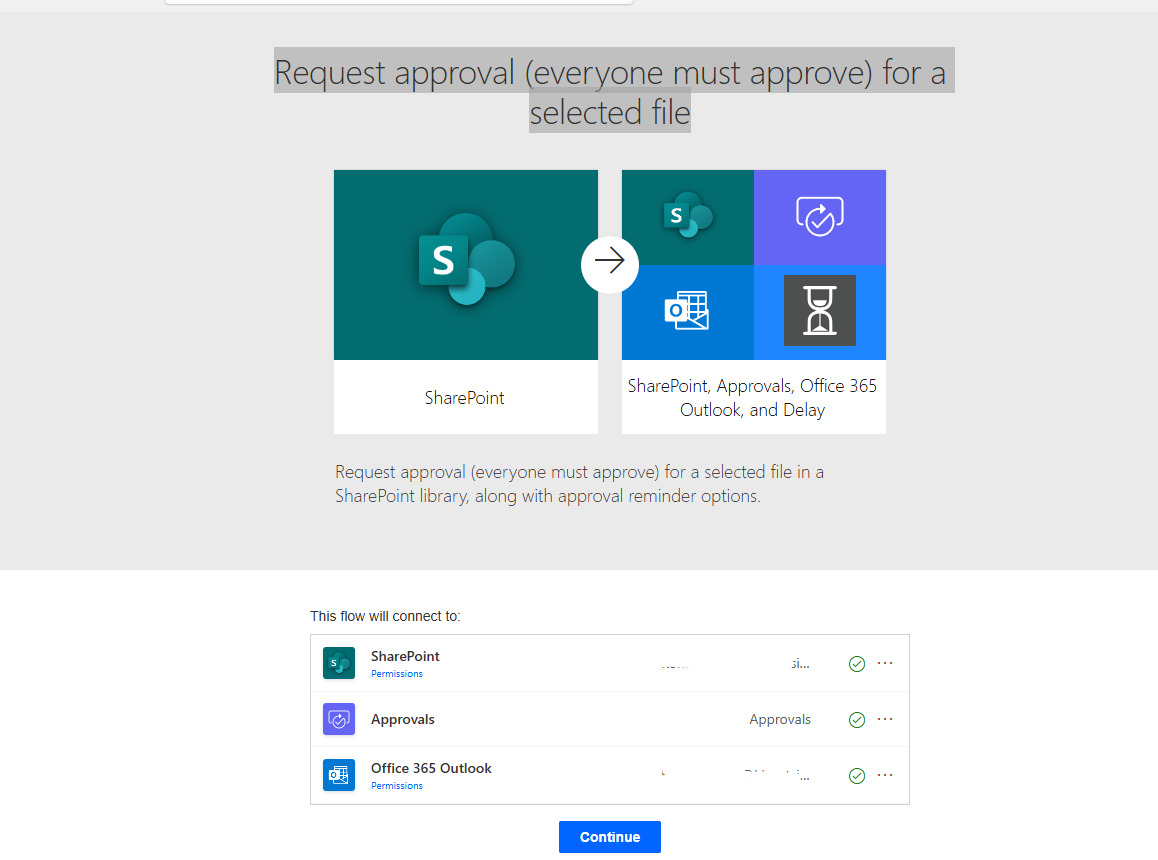
First, we need an active M365 subscription. We need to log in to the service and then select Power Automate from the available apps. On the Power Automate homepage, we select templates then choose the automate named Request approval (everyone must approve) for a selected file.
In the next step, we need to allow all the necessary connections and press continue.
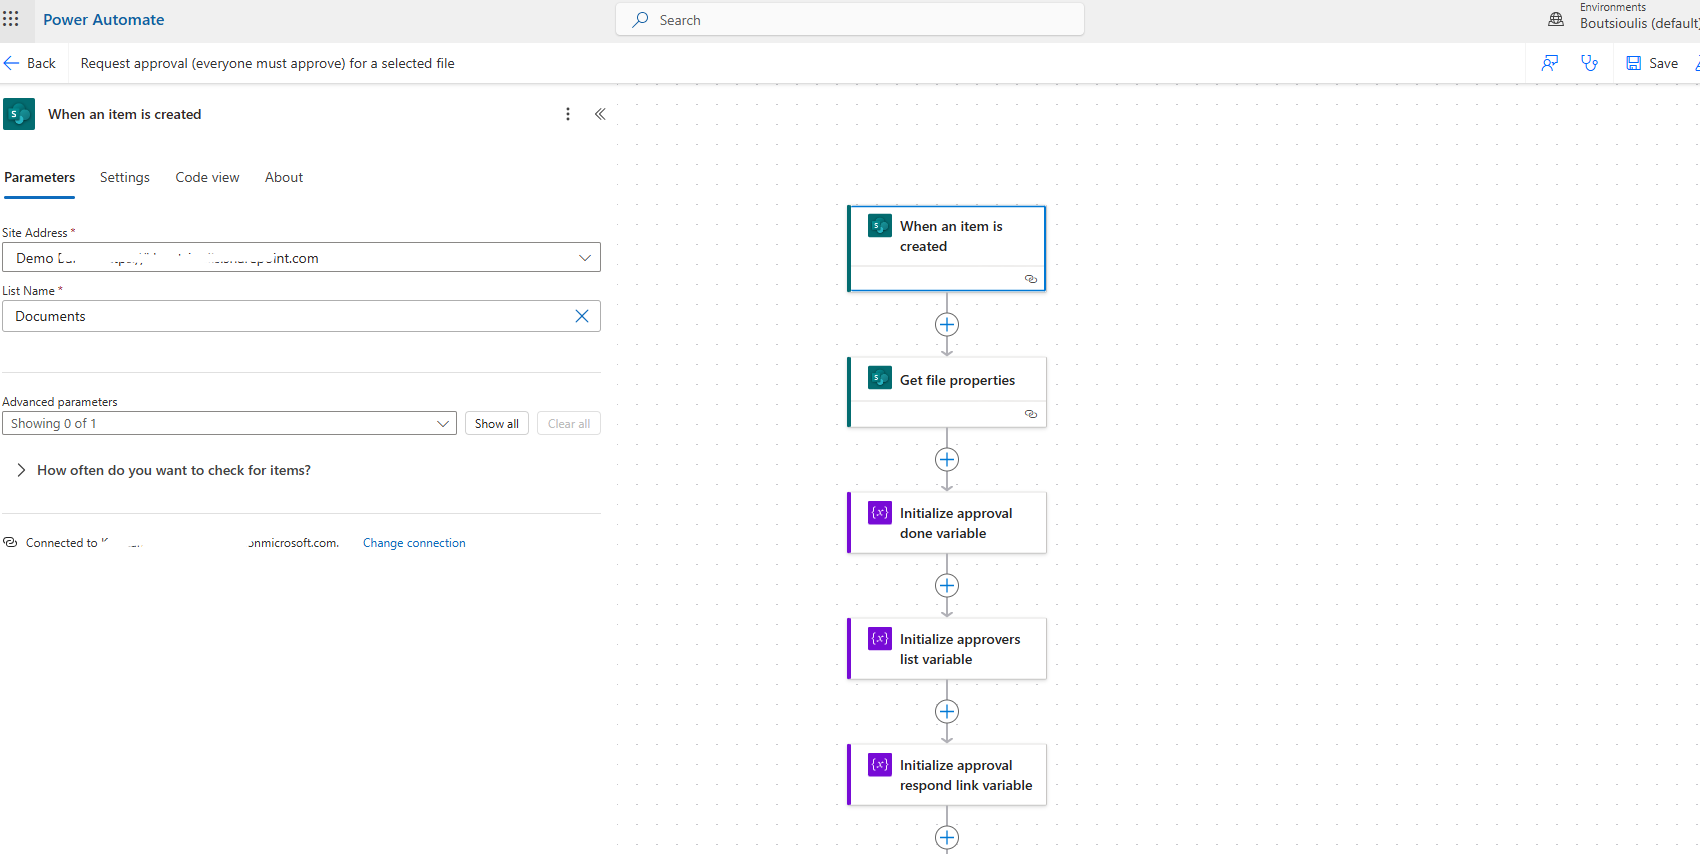
As you can see, we have a rather complex automate. Initially, we have the trigger action which is of the type "when an item is created" in a SharePoint List from where the flow starts. Here, we need to specify the site in the site address and the list in the List Name.
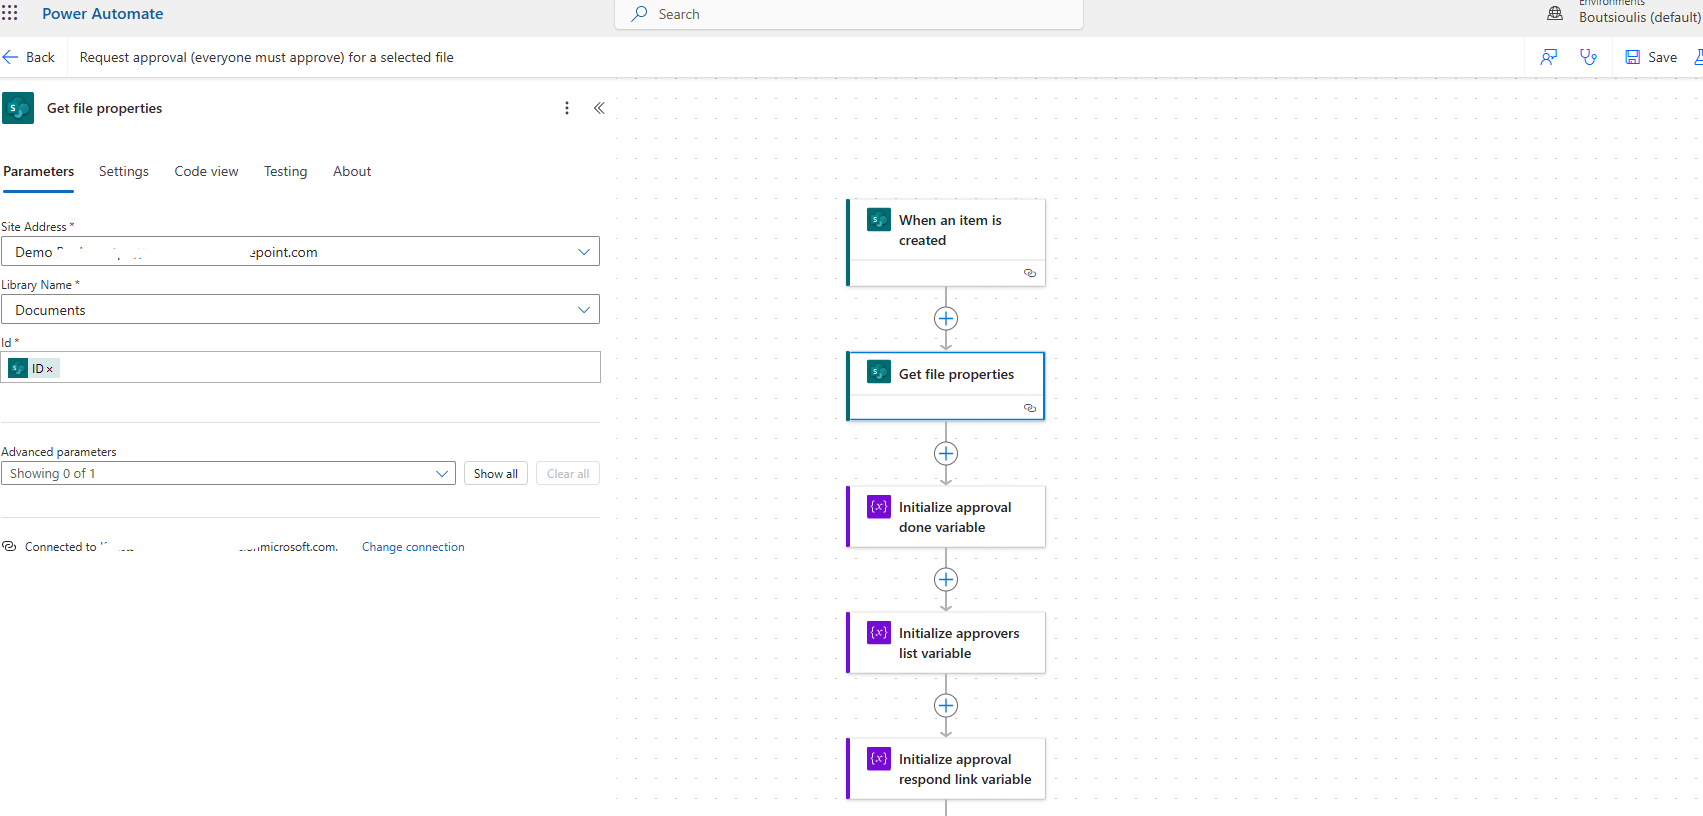
Then, we select an action of the type "get file properties" where we need to specify the site that hosts the library containing the file in the site address. In the library name, we select the library containing the file and in the ID, the ID of the file we received from the properties.
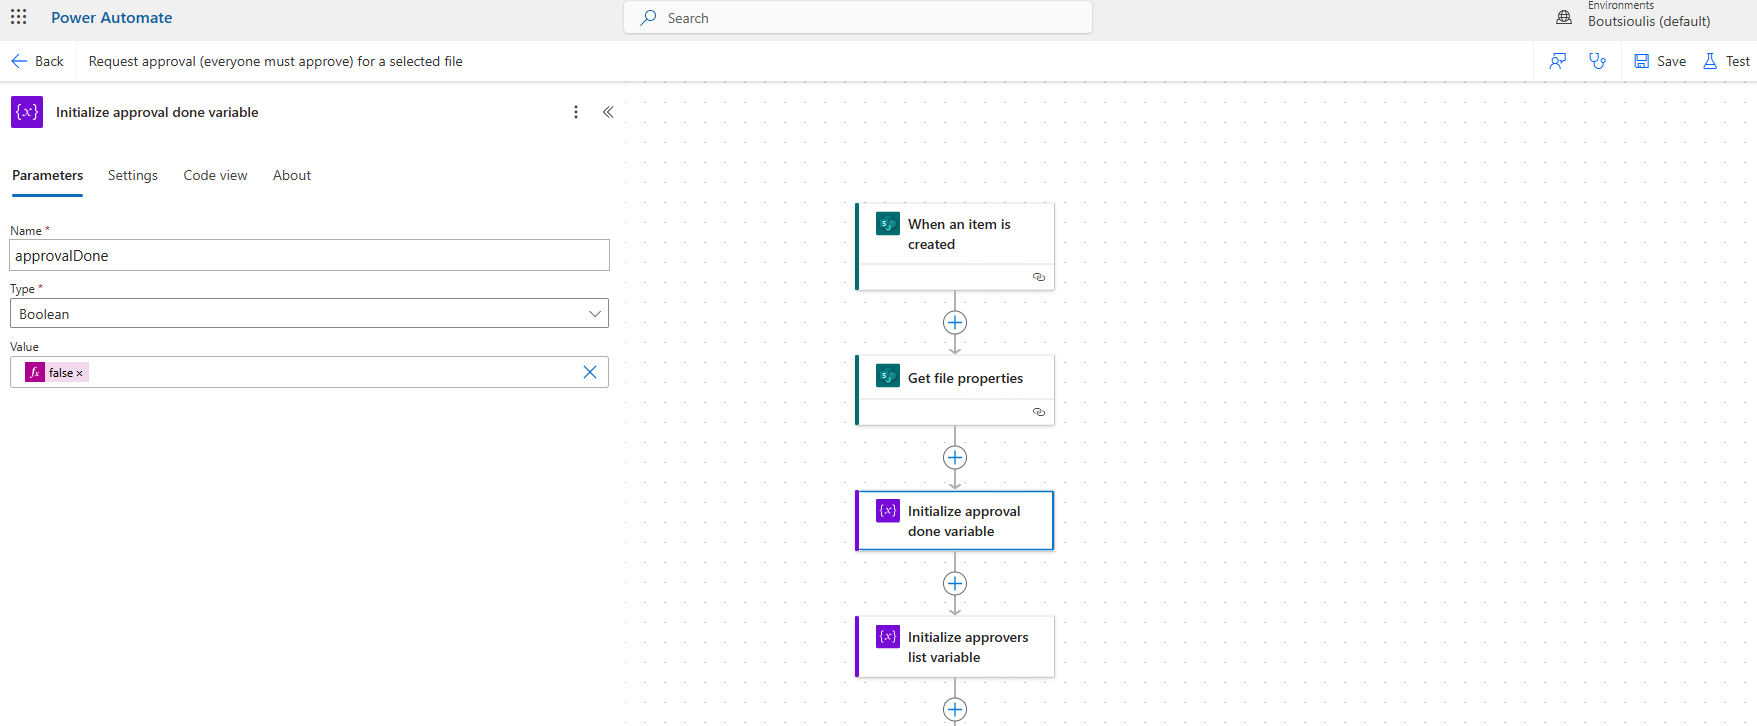
In the next step, we need to create a Boolean variable named approvalDone and set it to false, which we will use later in a check in our flow.
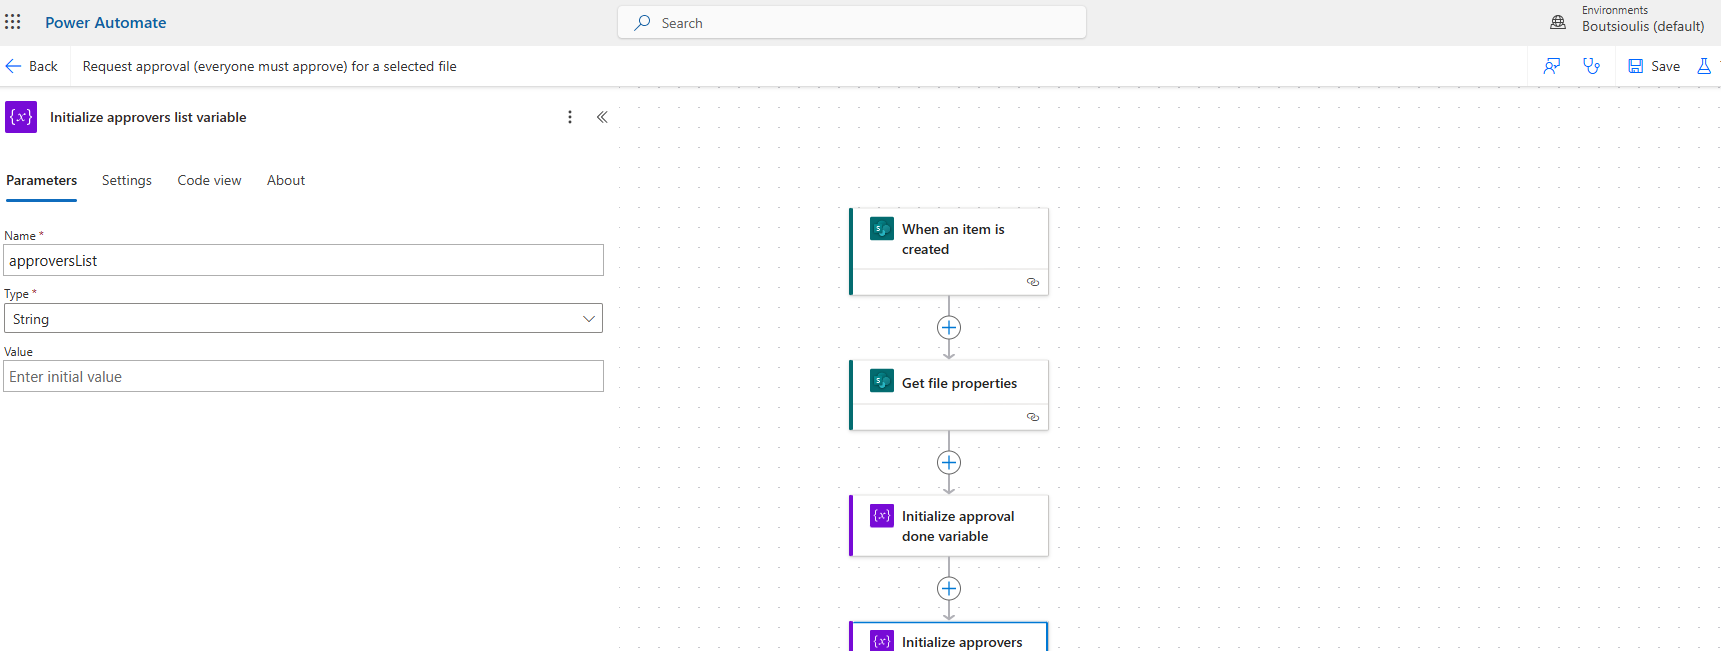
Next, we create a string variable that will be null and name it approversList so that we can pass the list of approvers into it.
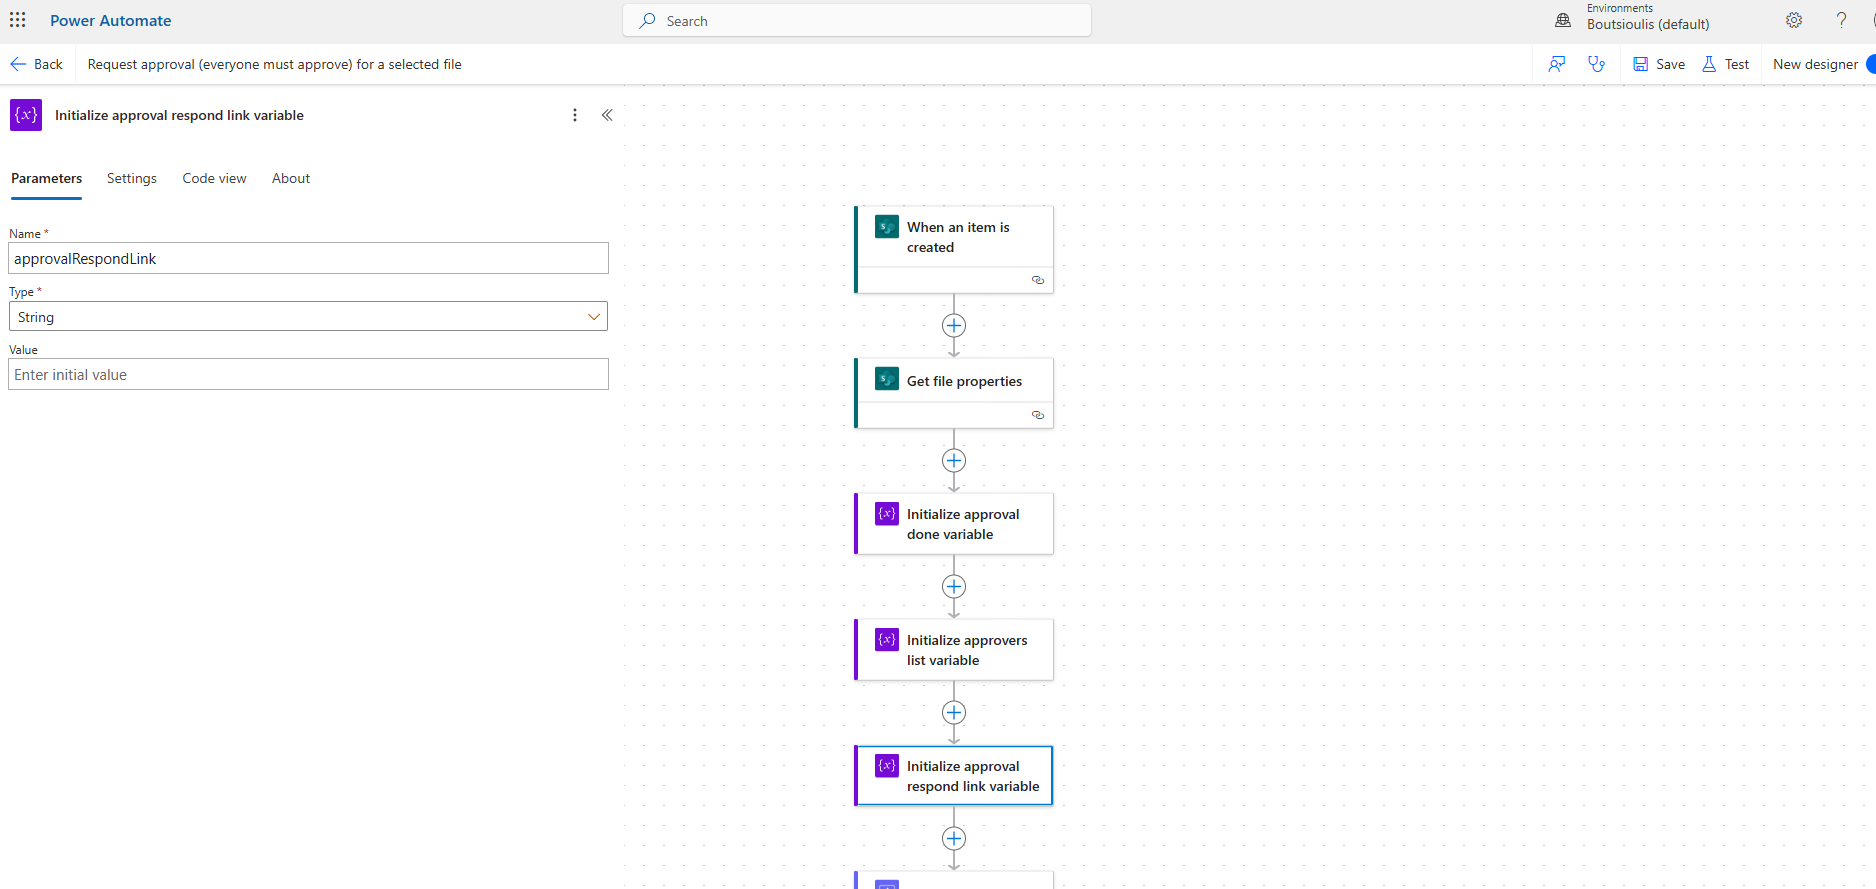
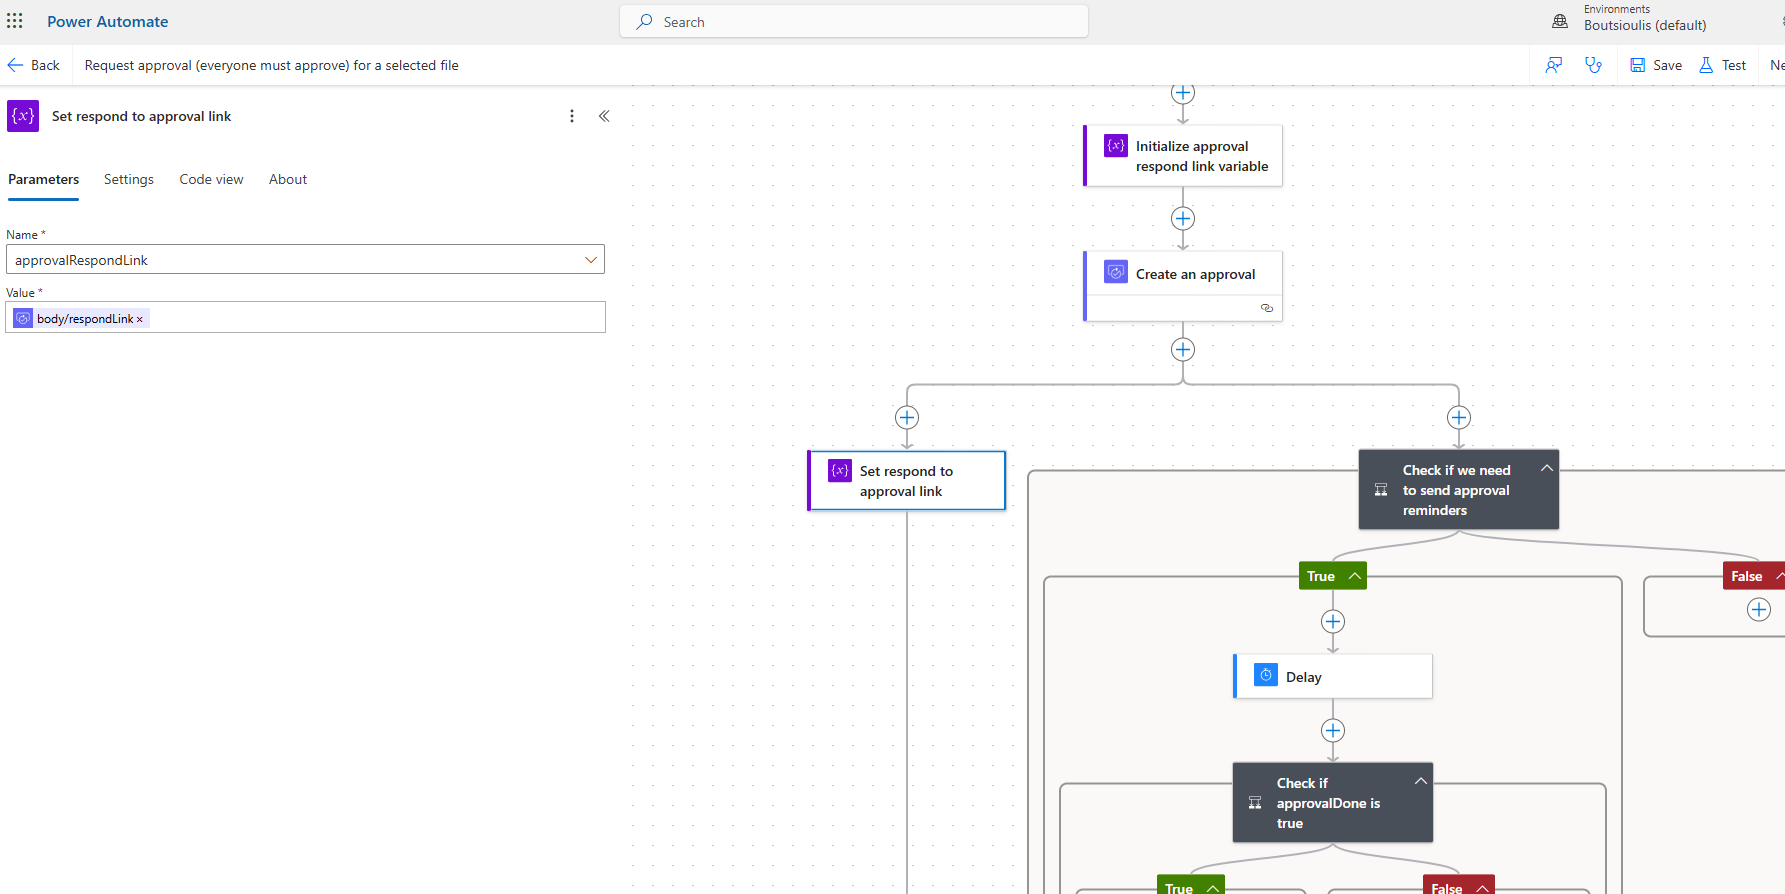
The next step is to create another string variable named approvalRespondLink with an initial value of null so that we can pass the ResponseLink into it.
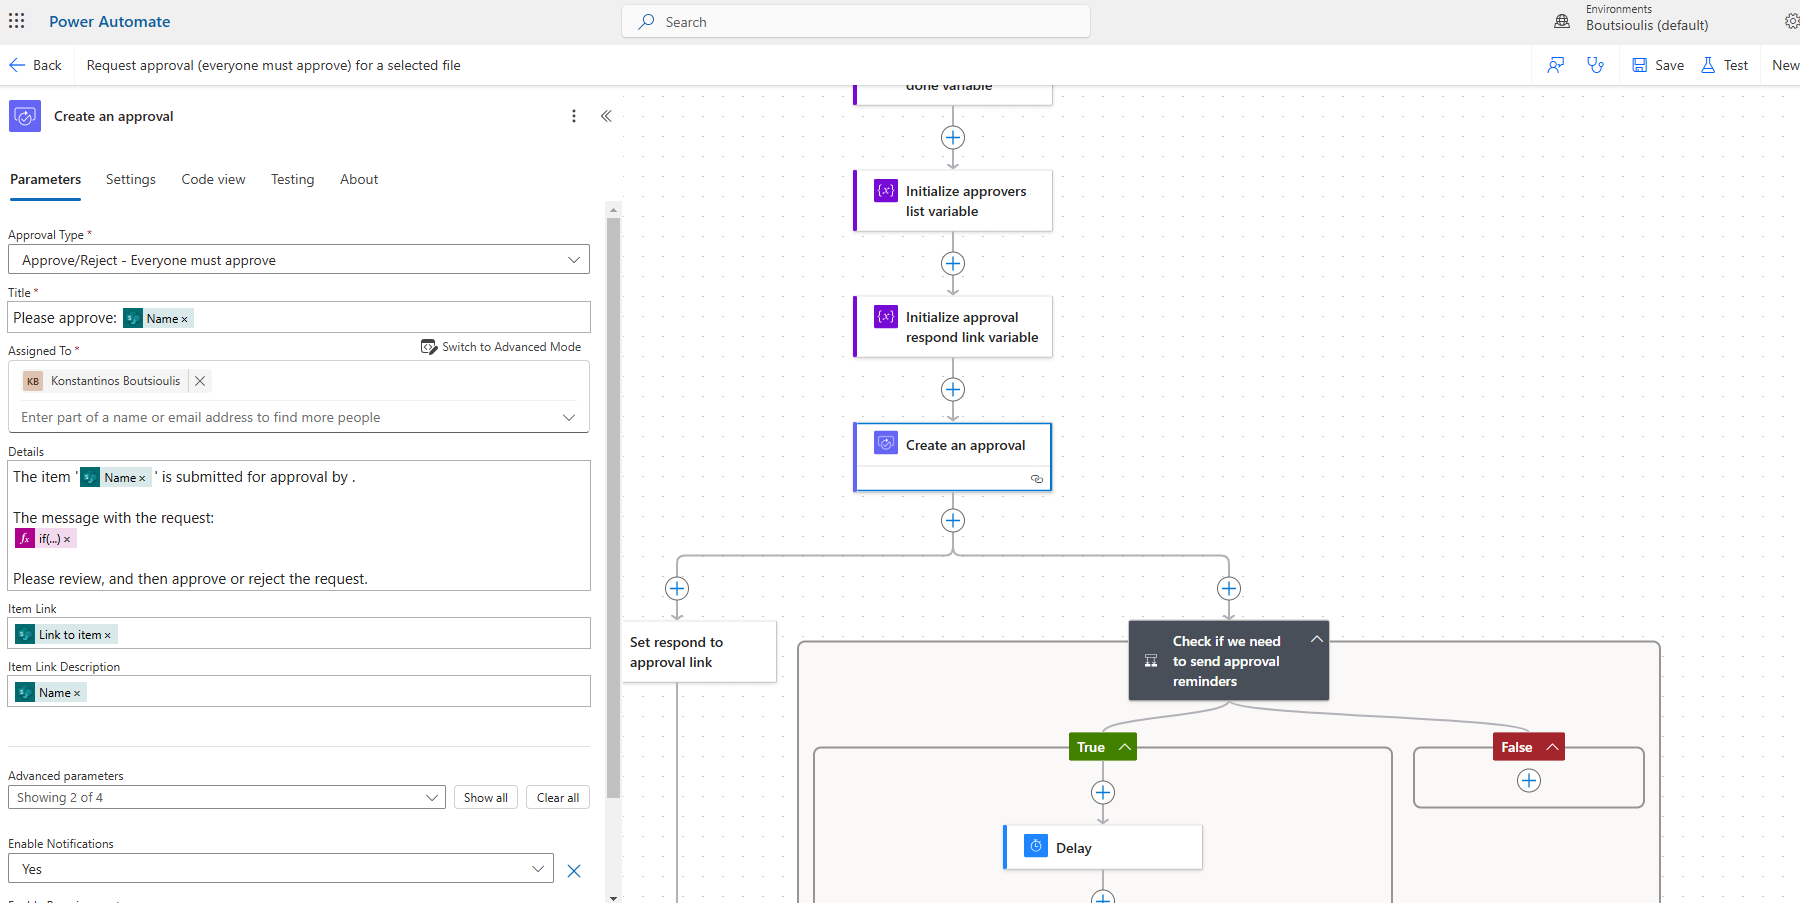
In the next step, we need to create an action of the type approval and there we need to select Approve/Reject - Everyone must approve in the Approval type. In the title, we will set the title from the new item in the SharePoint List and in Assigned to, we will set the approvers. In the details, we will have a combination of text and properties mentioned above, such as in the Item link where we need to set the link of the specific item and in the Link description, the name from the properties of the item.
Our flow continues from the left branch where we have a new action of the type variable named approvalRespondLink, where we assign the output of the respondLink as the value.
Next, we have an action of the type wait for approval and in the approval ID, we will set the name from the properties of the create an approval action.
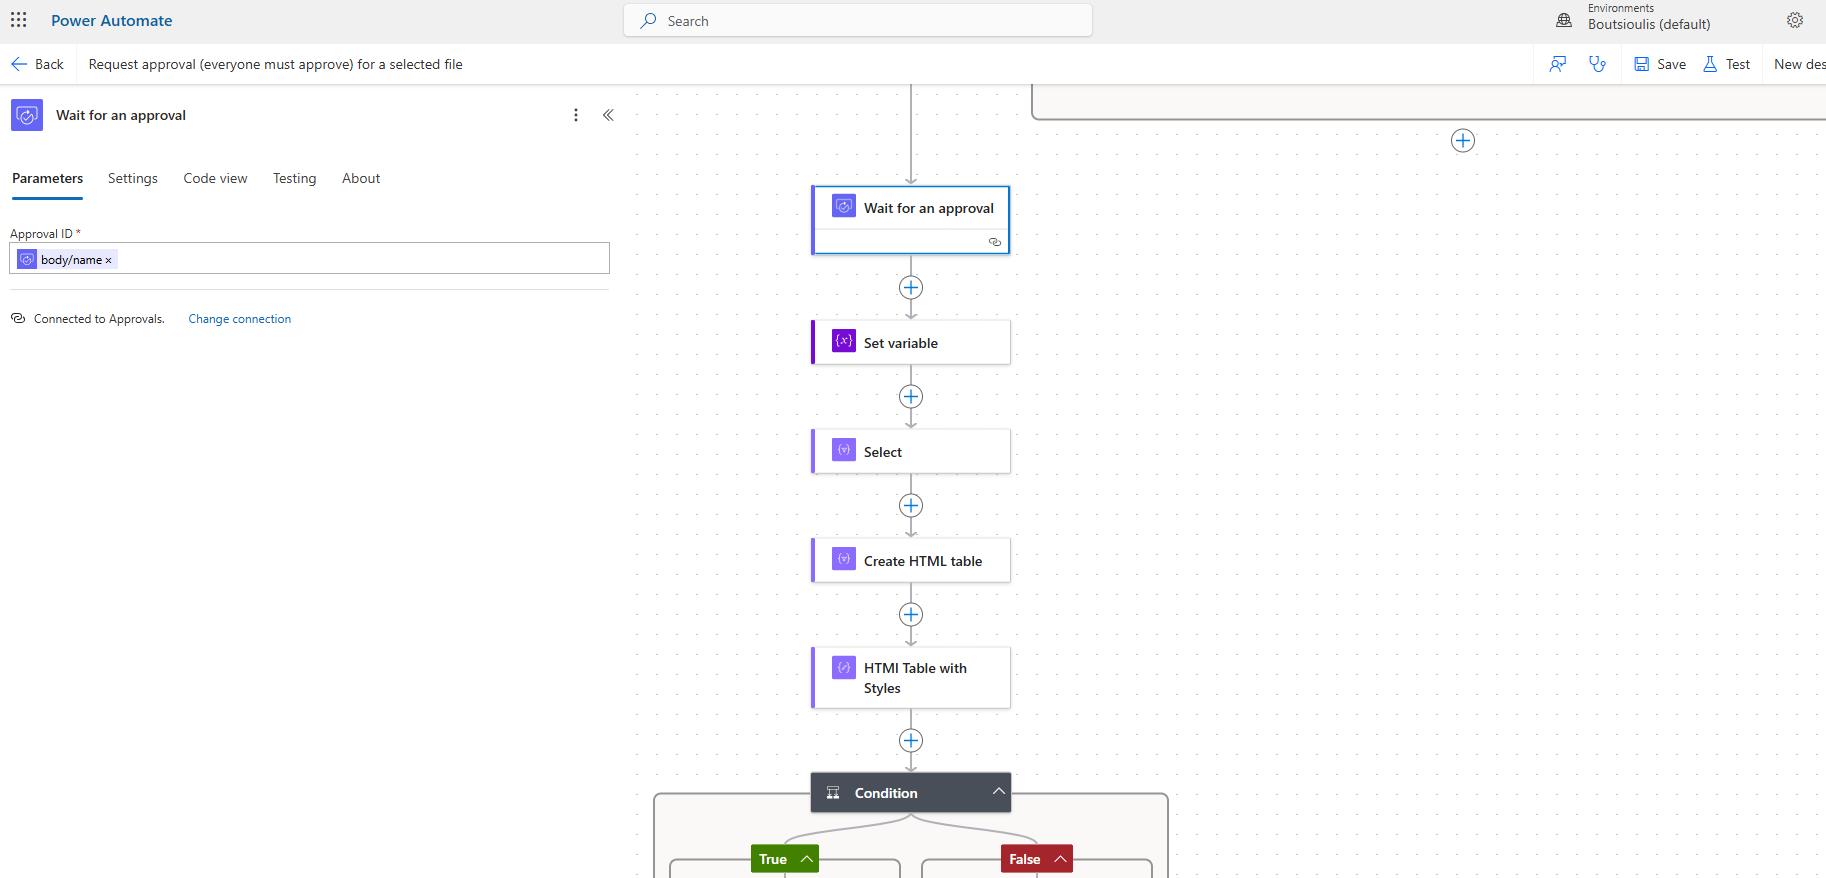
In the next step, we need to set the ApprovalDone variable, which we created at the beginning and initialized to false, to true.
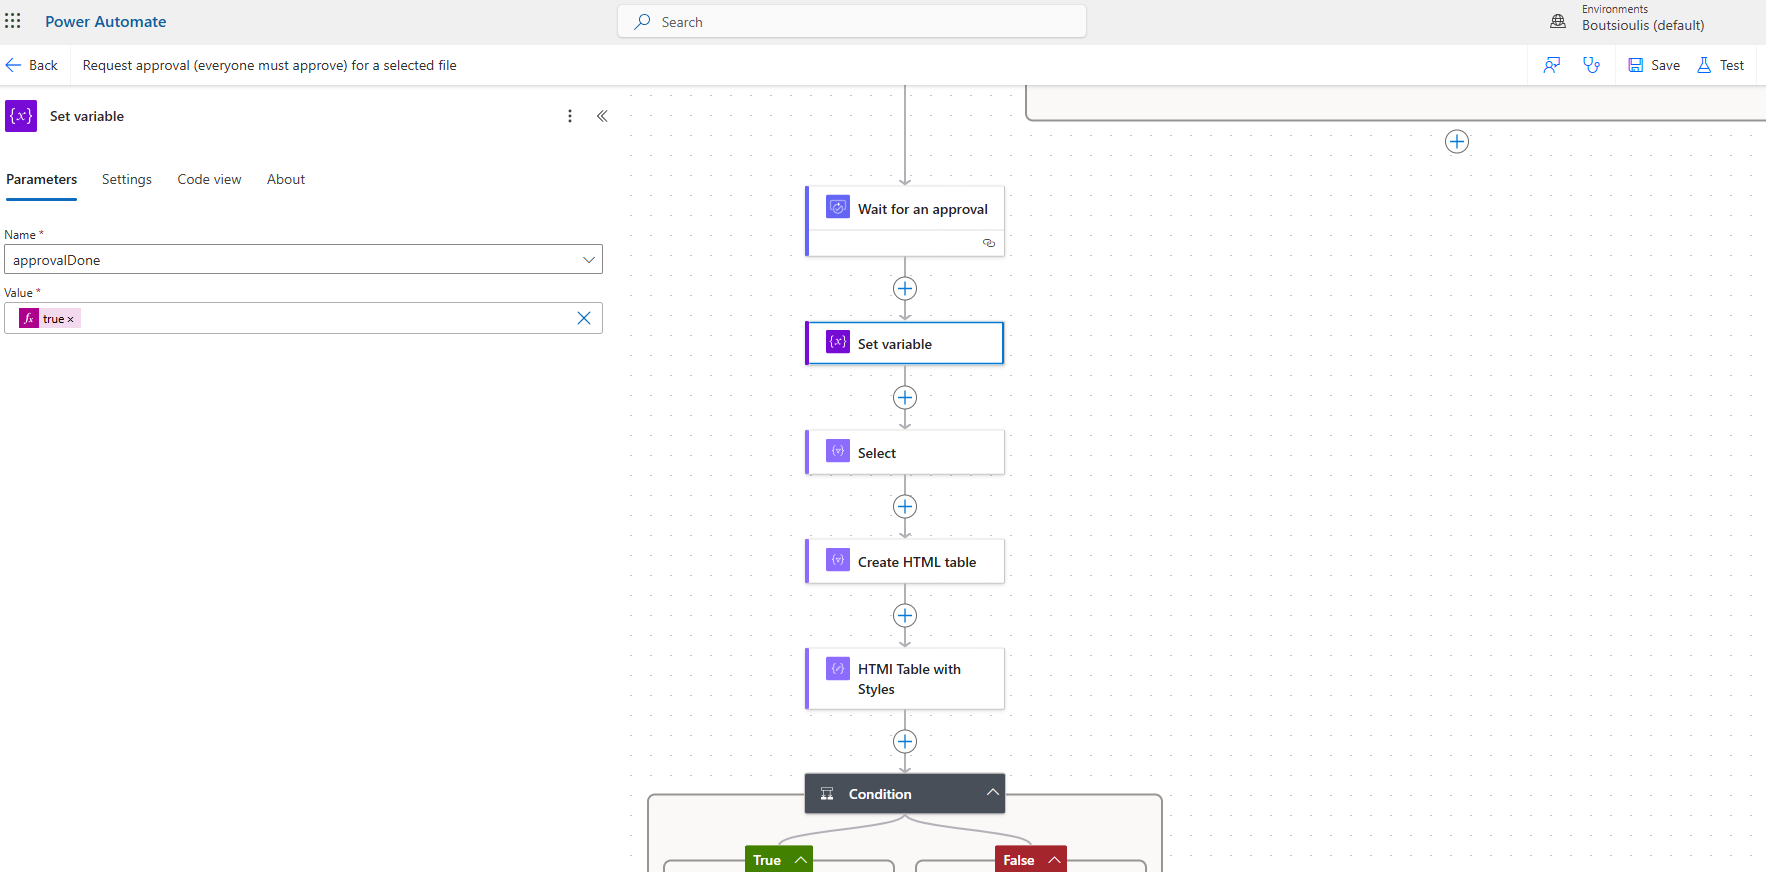
The next action is of the type select where we will set the source in the from field to the responses from the wait for approval action mentioned above. In the map field, we need to set in the first row Approvers the display name of the approver, in the second row, we check if the comments field is empty and if there is nothing, we leave it empty, and in the third row, we need to enter the approver's response.
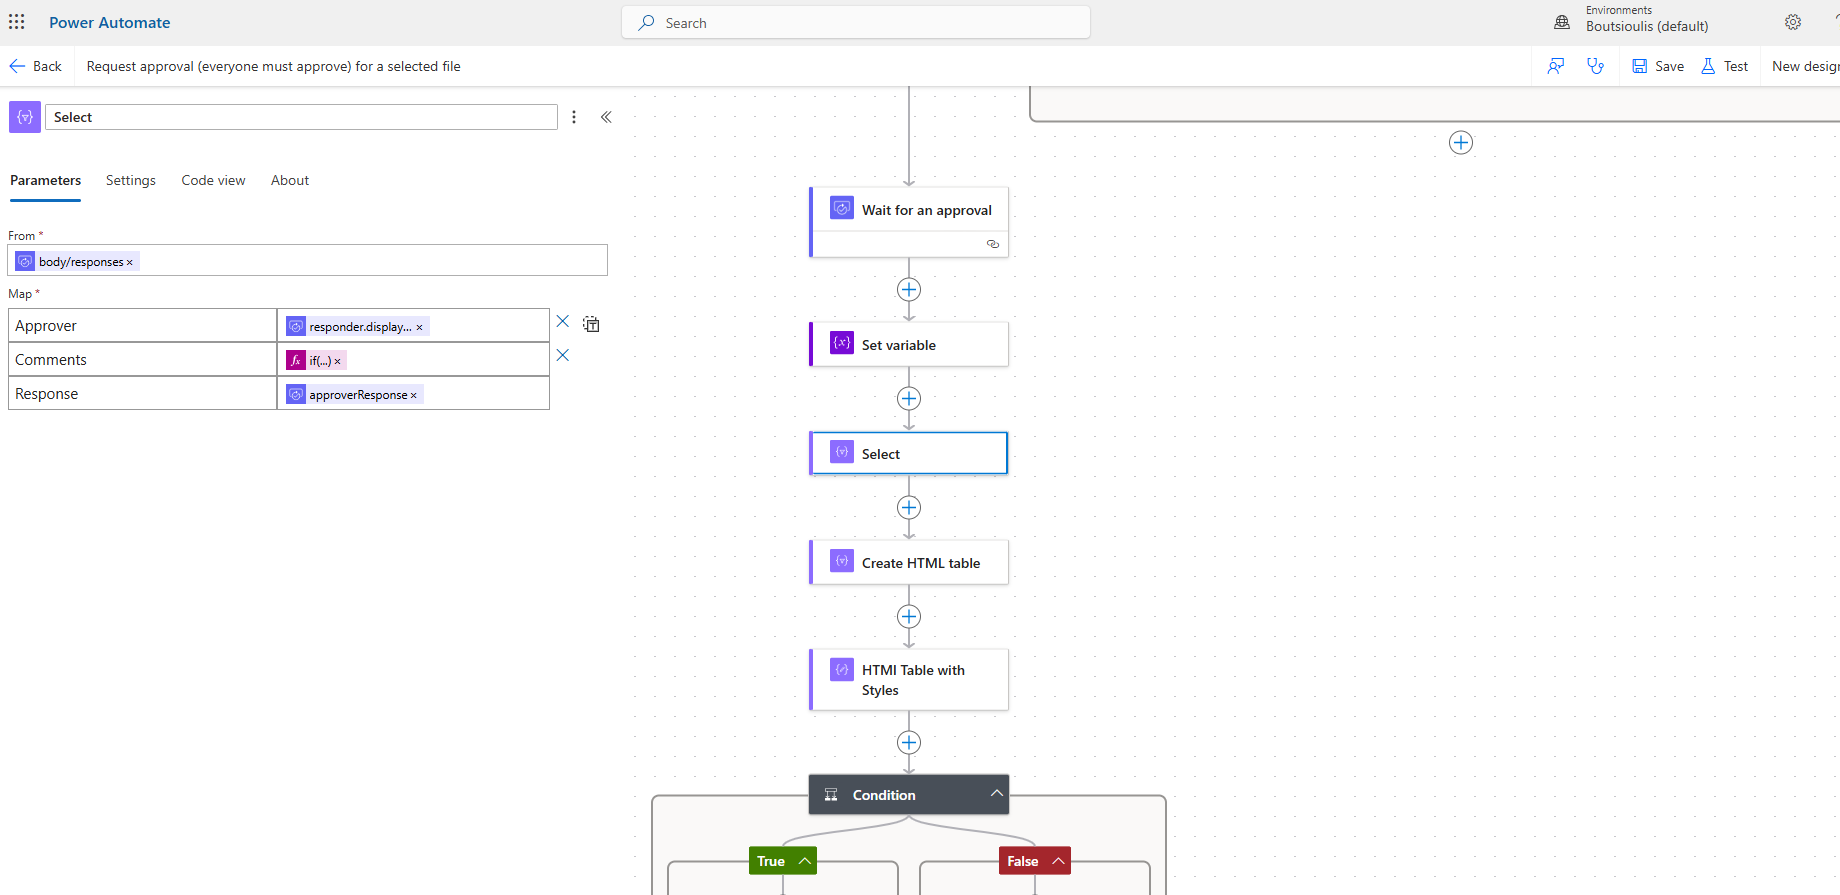
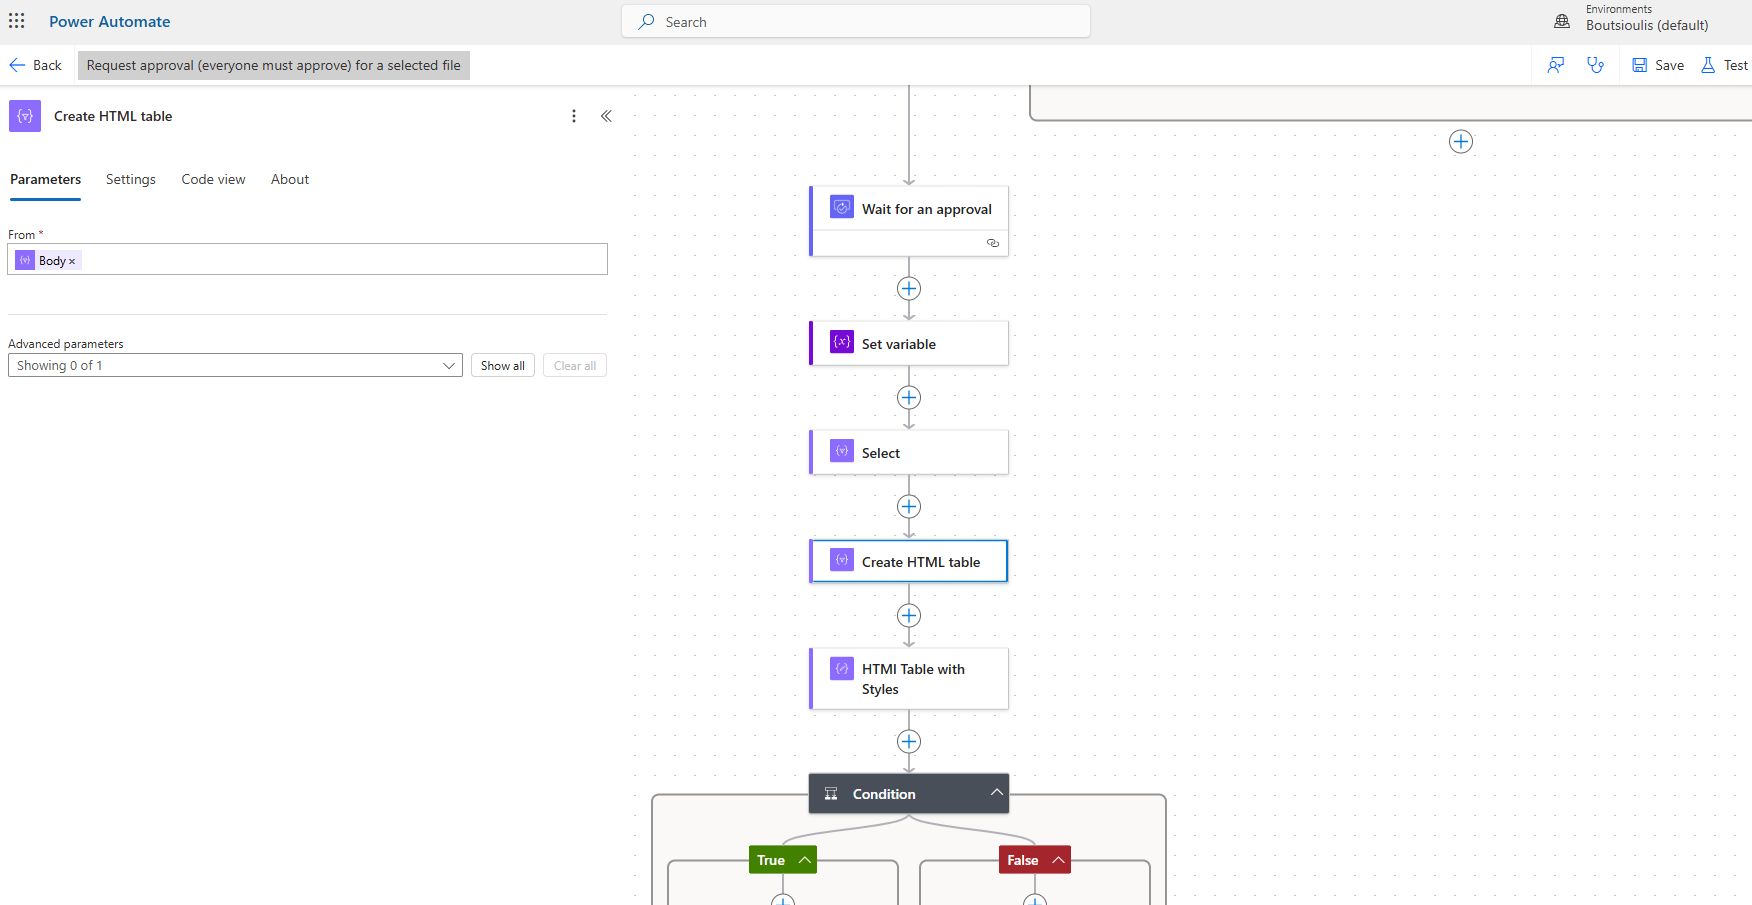
As the next step, we have a new action of the type Create HTML Table where we set the from field to the output of the select action.
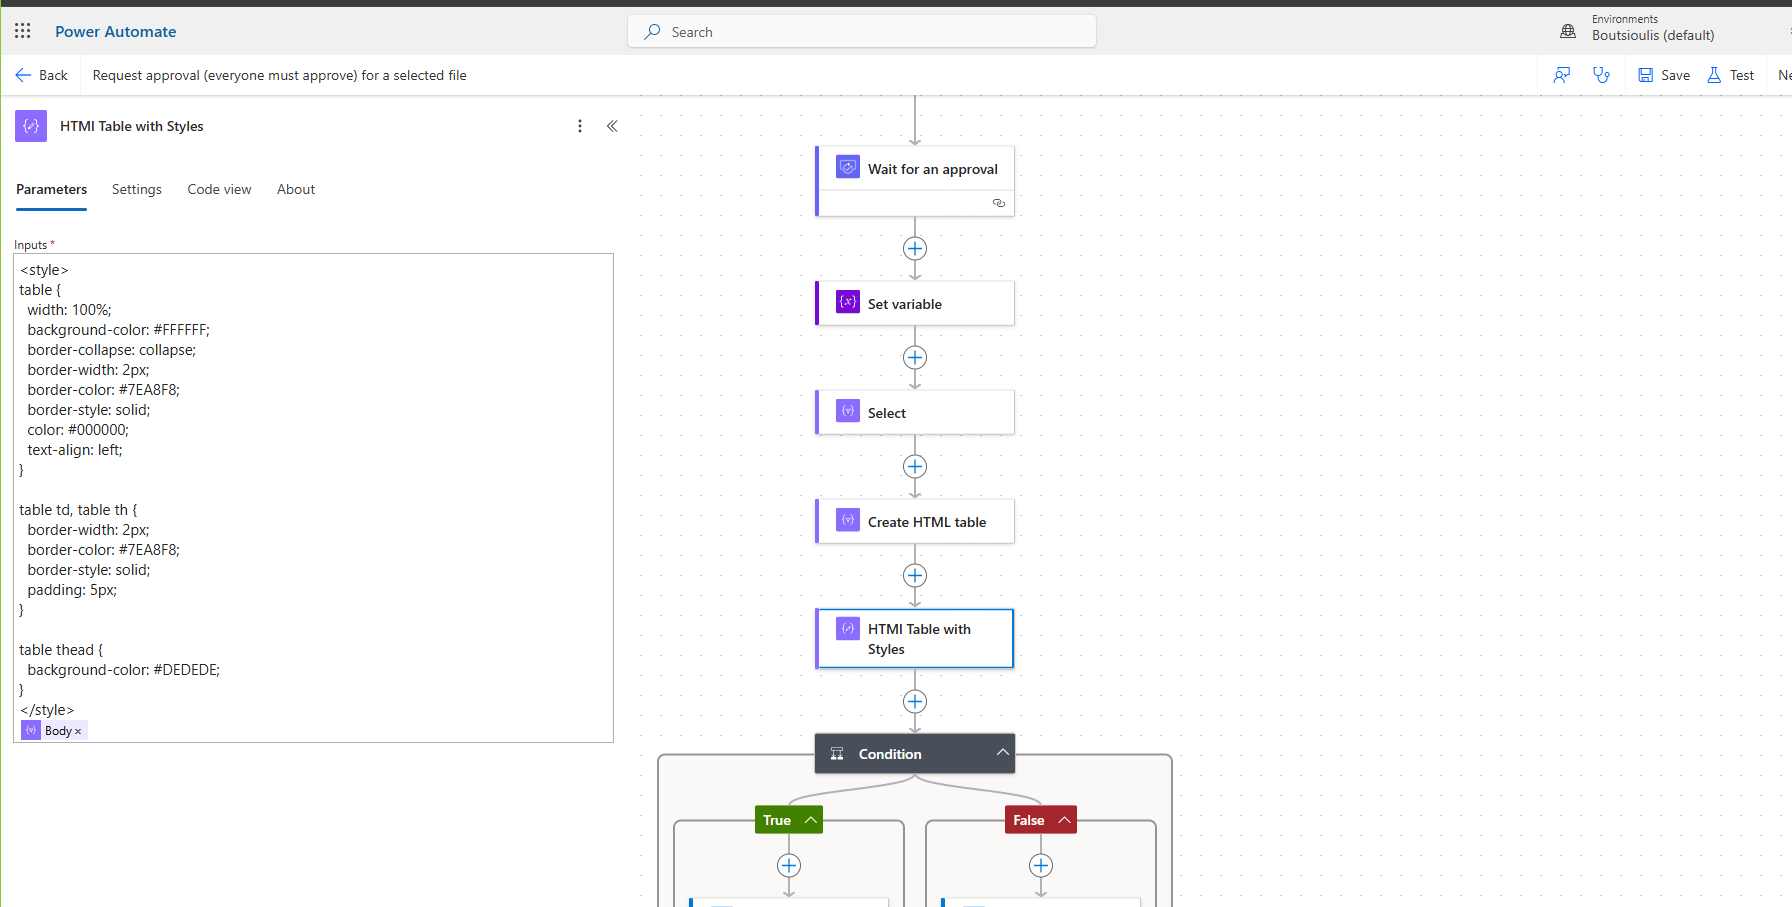
The next step is to create another action HTML Table with Styles to insert the CSS we want to display the table and, of course, apply it to the output body of the create table action.
In the next step, we have a condition check where, depending on the value contained in the output of the wait for approval action, it routes the sending of an email.
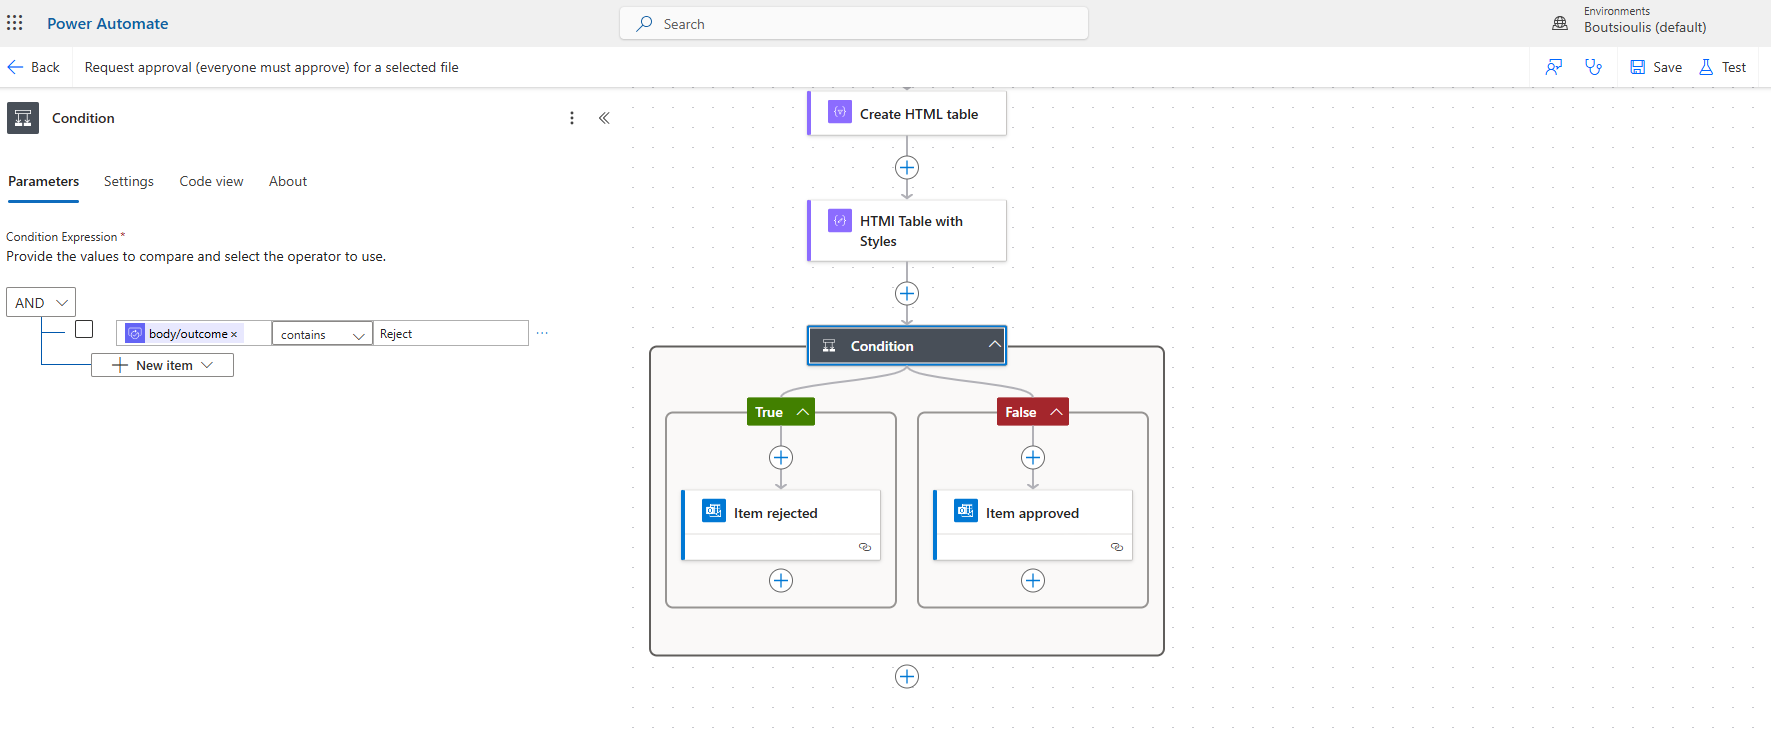
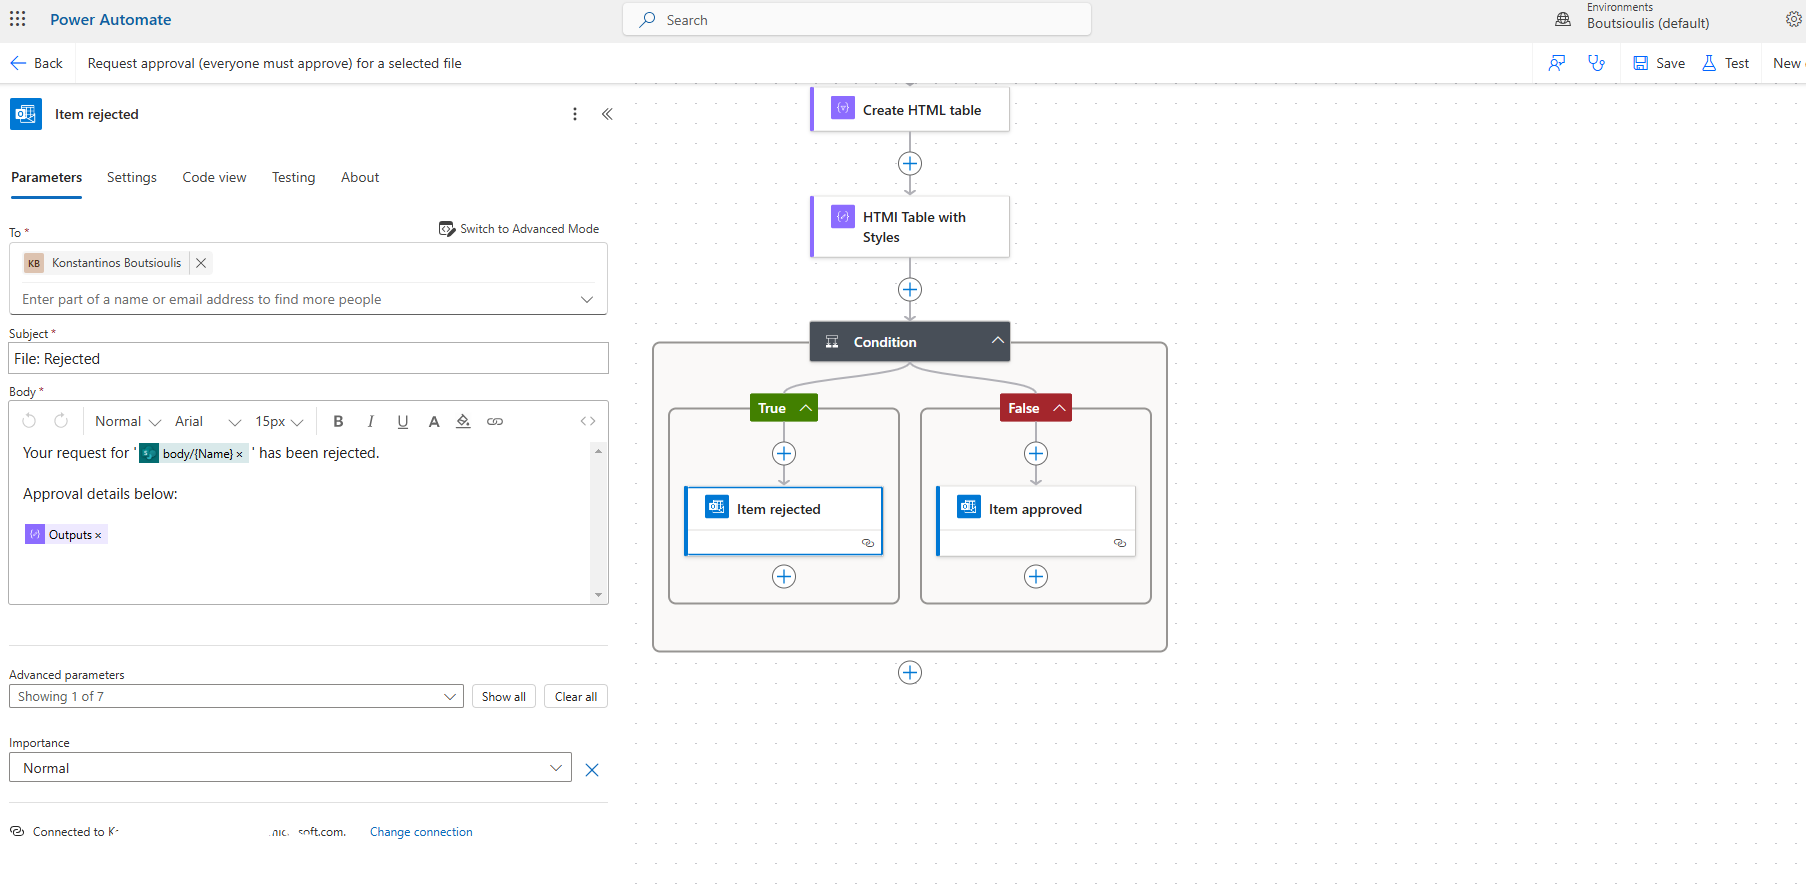
If it contains the value true, meaning it has been rejected by someone, it sends an email to a recipient we set with the title File: Rejected and in the body, it contains the name of the item from the library and the output of the HTML Table with Style.
If it contains the value false, meaning it has been approved by everyone, it sends an email to a recipient we set with the title File: Approved and in the body, it contains the name of the item from the library and the output of the HTML Table with Style.

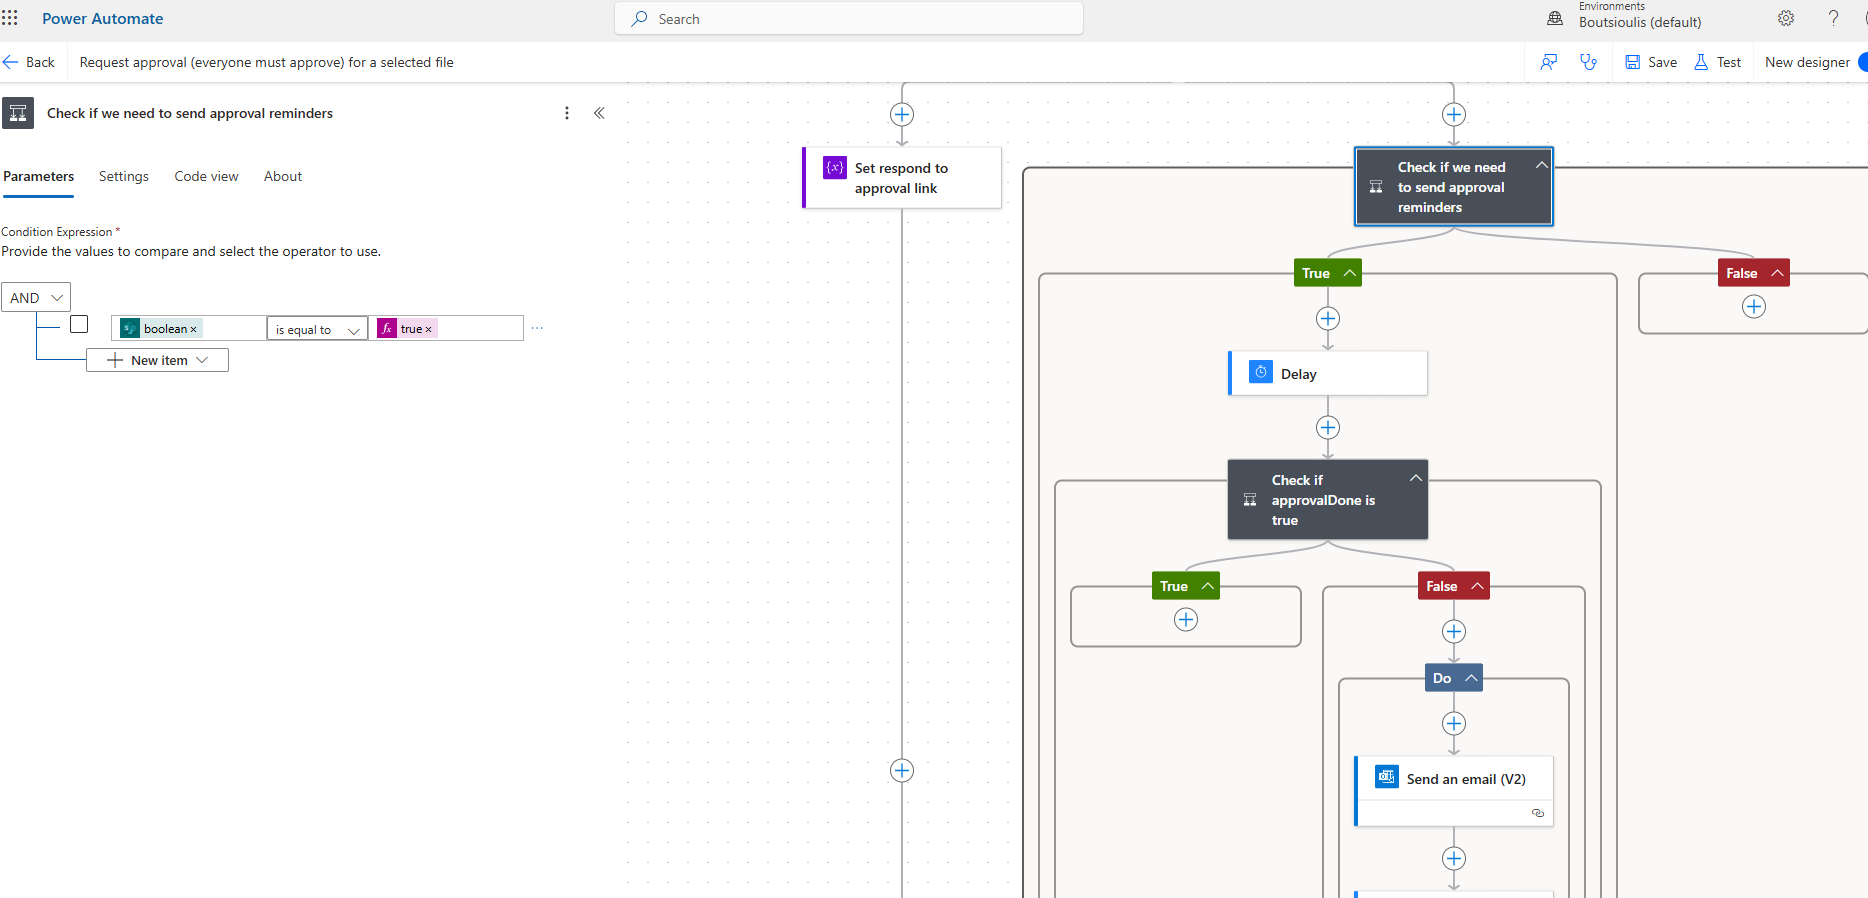
As we said, the automate requires the unanimous approval of all approvers, so simultaneously with the set respond to approval link, it runs a condition Check if we need to send approval reminders. There, it checks if the ApprovalDone variable is false and if it is, we have a branch.
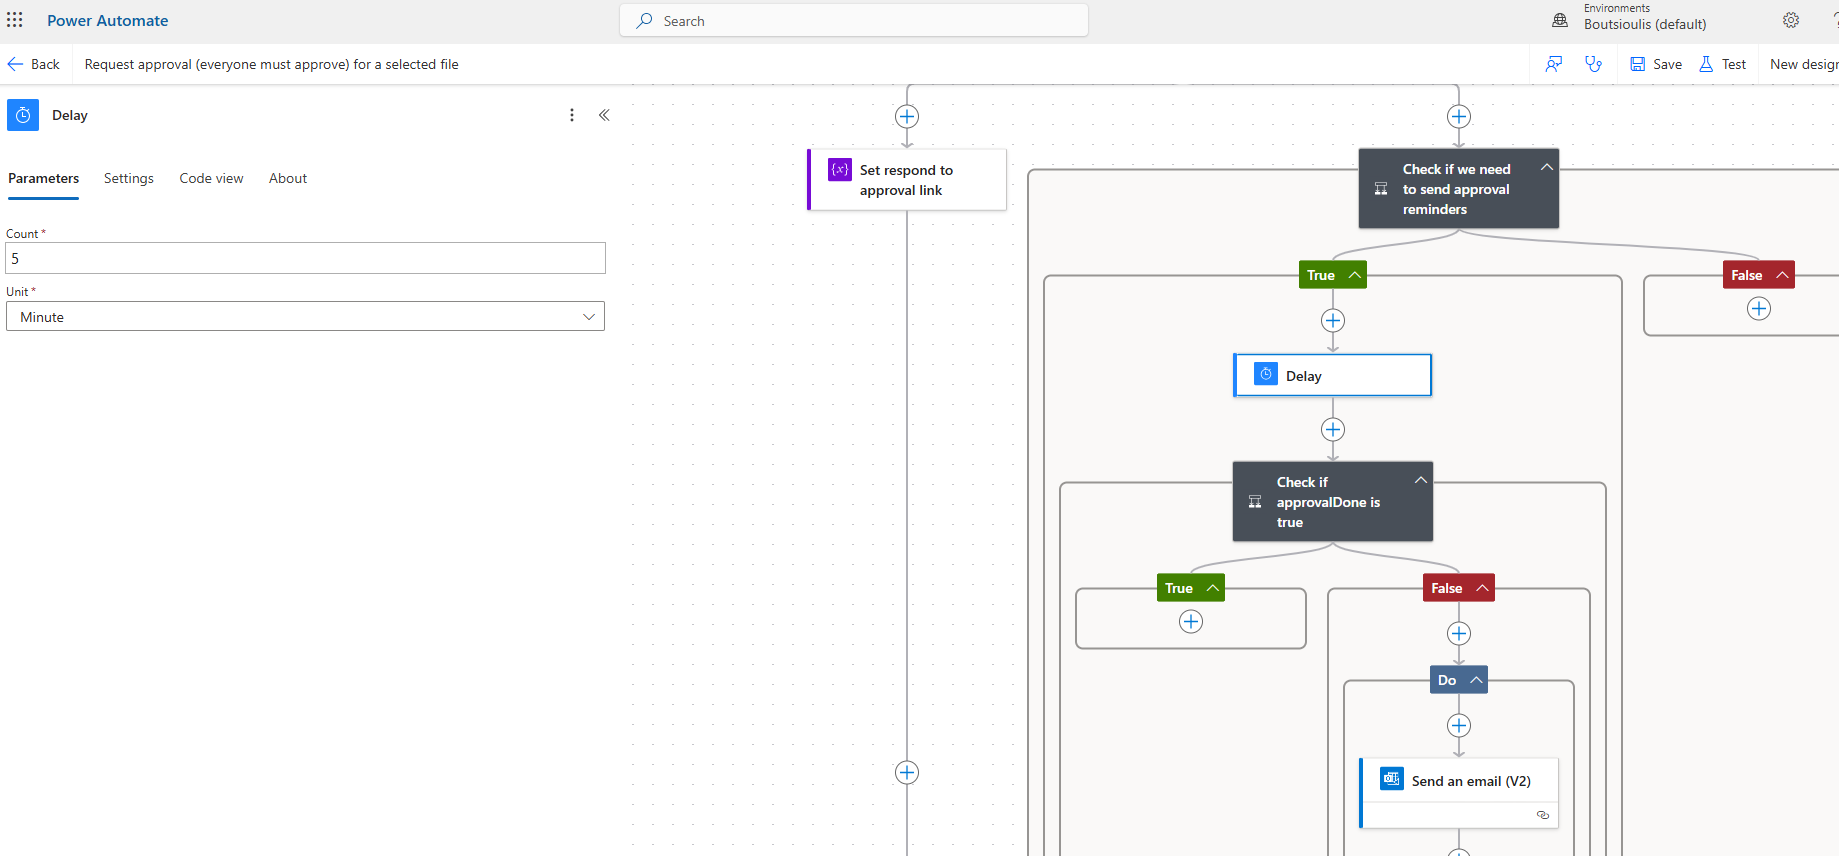
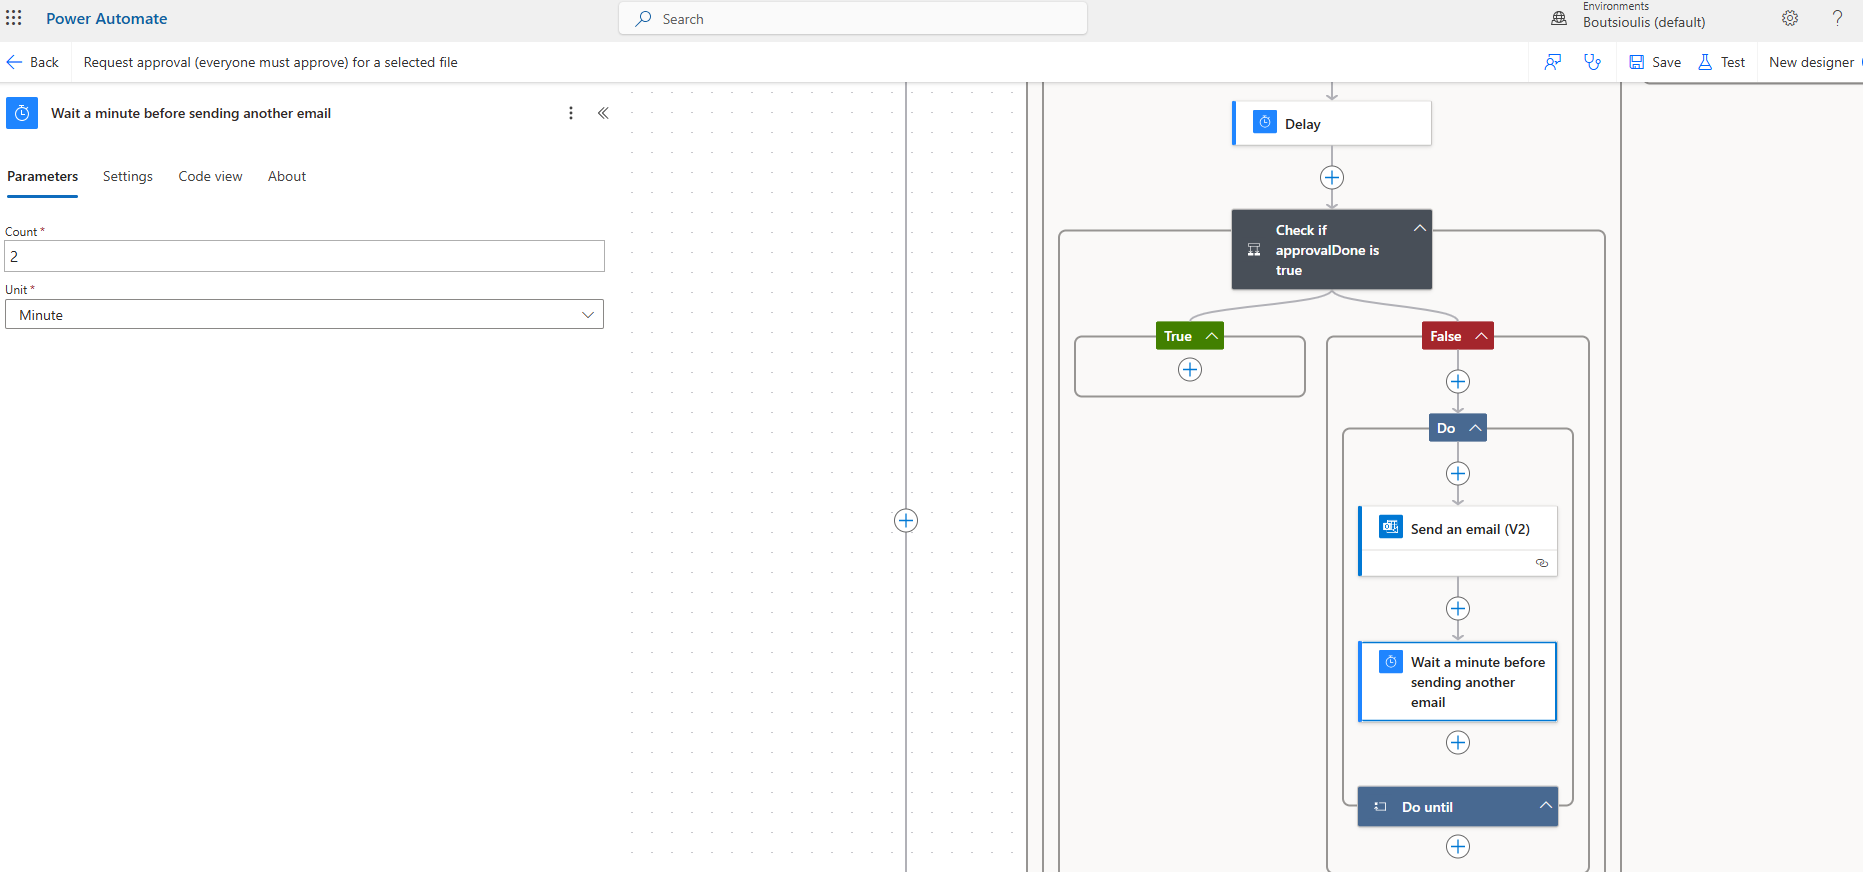
If it is true, we have a 5-minute delay with a new action of the type delay.
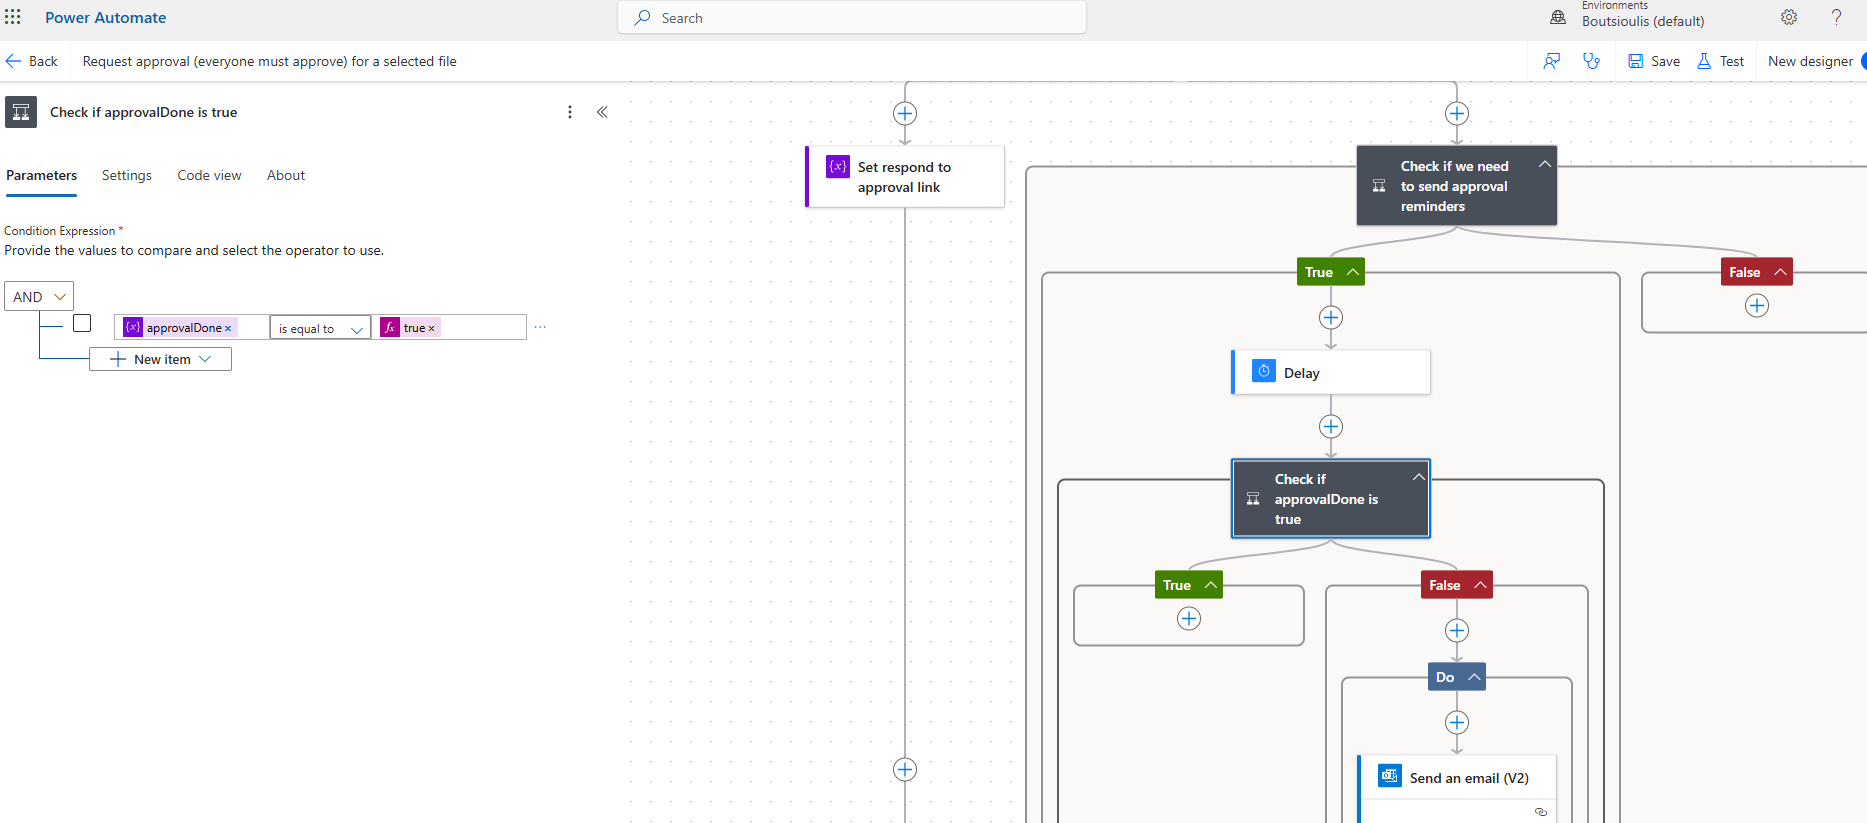
Then, another check follows, which again checks if the approvalDone variable is true. If it is true, it closes there.
However, if it is not true after the 5-minute delay, it enters the right branch and there it enters a do Until condition that sends reminder emails to the approvers as shown in the image below.
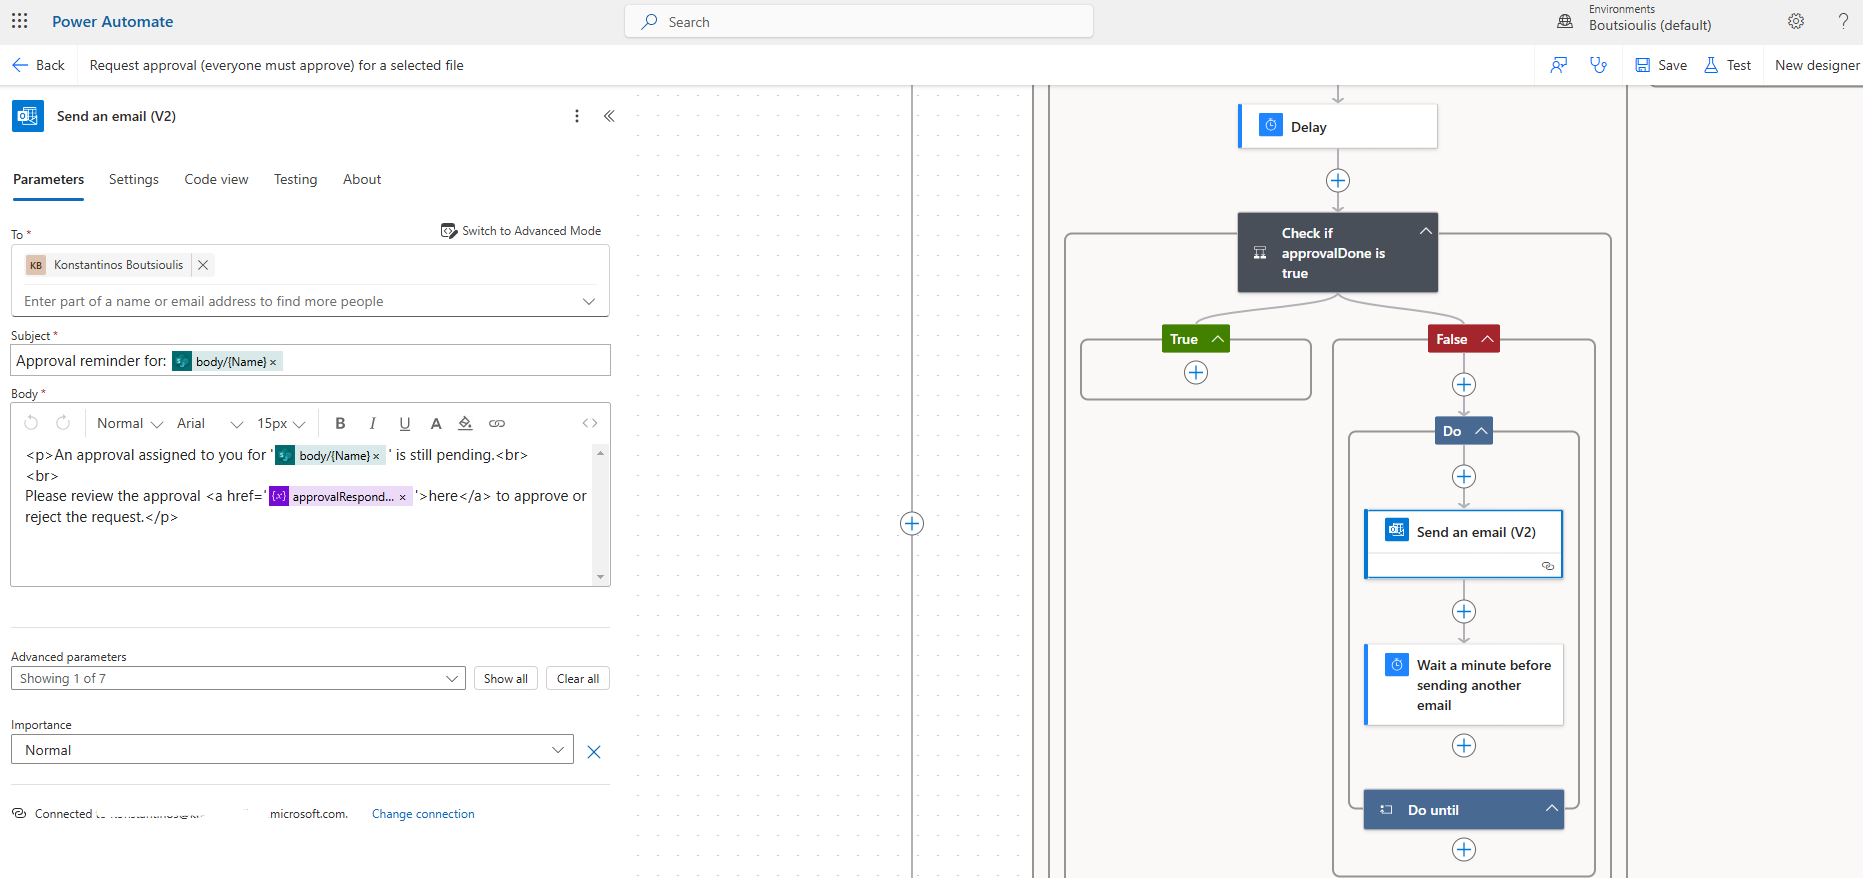
This check is done every 2 minutes with another action and is repeated until the approver finally responds to the request. The time interval between the reminder emails is set by us, the 2-minute time is indicative.
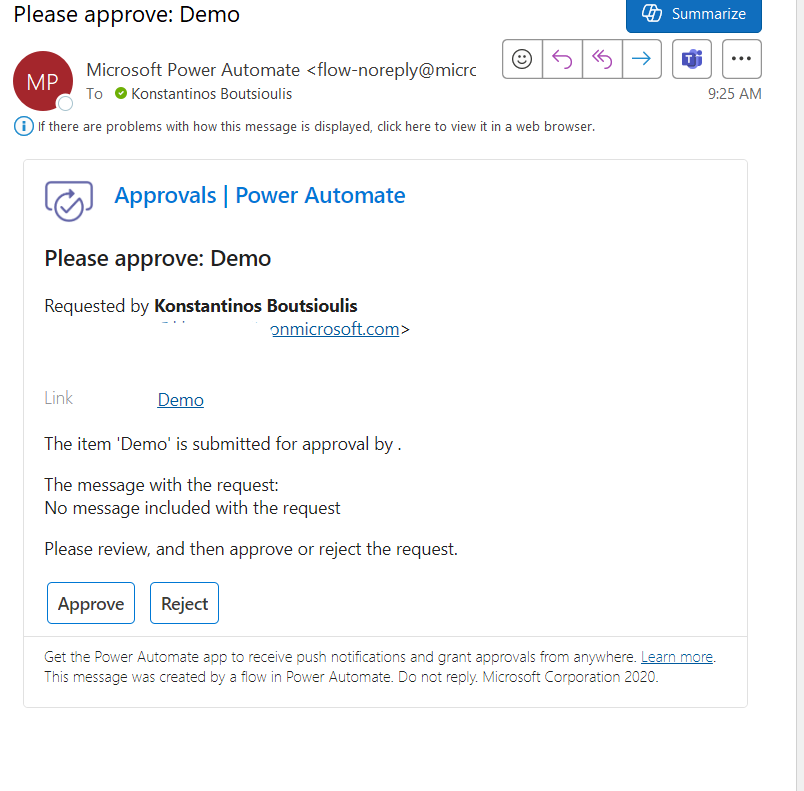
We save our automate and manually execute a test to verify the correct operation of the automate. The resulting outcome is initially an email of the following form to the approvers.
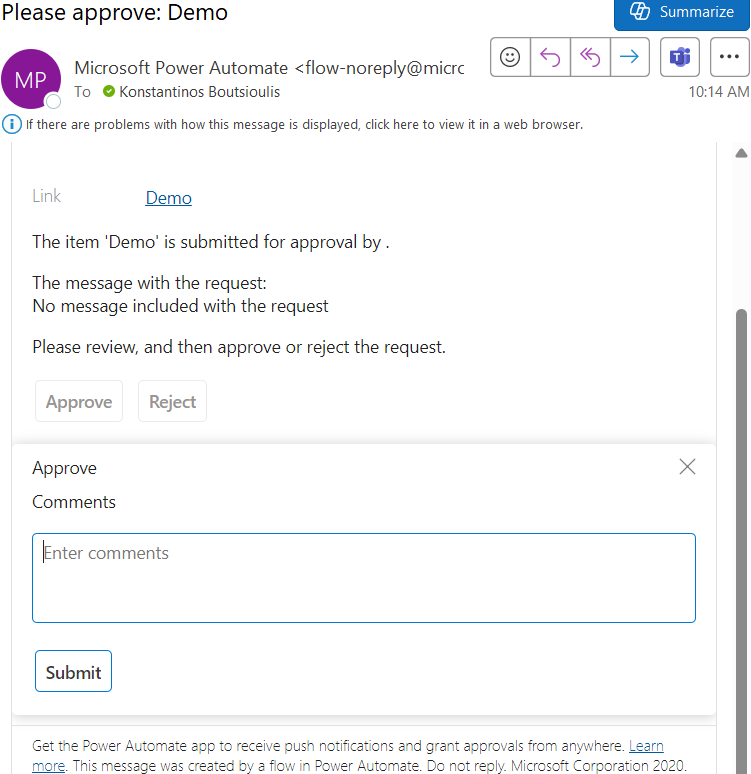
Regarding the reminder emails, they are of the form where one can see that we also add comments to the approve in this particular case.
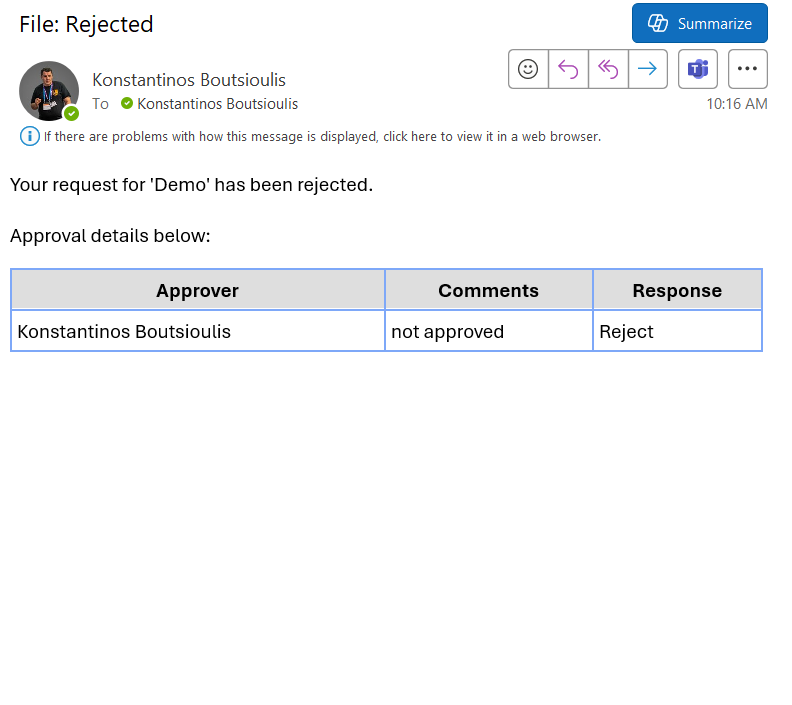
The final email received by someone after the final approval or rejection is of the following form within the HTML table with stylesheet containing the name of the approver, their comment, and their response. This type of email usually returns to the user who created the file and requested the approval.
 #ModerWork
#M365_Apps_Services
#BusinessApps
#SharePoint
#PowerAutomate
#technology
#microsoft
#digitaltransformation
#cloud
#mvpbuzz
#m365
#ModerWork
#M365_Apps_Services
#BusinessApps
#SharePoint
#PowerAutomate
#technology
#microsoft
#digitaltransformation
#cloud
#mvpbuzz
#m365
Visit Archives below to find more articles about Microsoft technologies on Modern Workplace